
Sweet & Tangy Homemade Pineapple Pizza
Homemade Pineapple Pizza Recipe: From Dough to Baking, A Complete Guide

Inspired by my child’s wish for ‘mom-made pizza,’ I created this special homemade pineapple pizza! It was so delicious that we baked two pizzas for their birthday and then two more just a few days later – a testament to its popularity! The key to homemade pizza is dough proofing. In winter, it can take up to two hours and still not rise properly, depending on humidity and temperature. Worried about proofing times? I’ll share a secret tip using your oven! Preheat your oven to its lowest setting, then let it cool slightly to around 40°C (104°F). Place the dough and a bowl of warm water inside. This consistent warmth and humidity will help the dough double in size for the first proof in about an hour, regardless of the season or weather. This method significantly cuts down proofing time! Our Hawaiian pizza, loaded with sweet pineapple, is a huge hit with kids. Who says pizza can only be bought from a shop? Try making this fresh, delicious pizza at home for a truly special treat.
Pizza Dough- 400g bread flour
- 35g sugar
- 6g salt
- 8g instant dry yeast
- 250ml warm water (around 40°C/104°F)
- 30ml olive oil
Pizza Toppings- Onion (to taste)
- Bell pepper (to taste)
- Mushrooms (to taste)
- 14 Vienna sausages
- Corn kernels (to taste)
- Olives (to taste)
- 2 slices canned pineapple (drained)
For Assembly- 4 Tbsp tomato sauce
- Generous amount of mozzarella cheese
- Onion (to taste)
- Bell pepper (to taste)
- Mushrooms (to taste)
- 14 Vienna sausages
- Corn kernels (to taste)
- Olives (to taste)
- 2 slices canned pineapple (drained)
For Assembly- 4 Tbsp tomato sauce
- Generous amount of mozzarella cheese
Cooking Instructions
Step 1
In a large bowl, combine bread flour (400g), sugar (35g), salt (6g), and instant dry yeast (8g). Gently mix with a spoon to distribute the ingredients evenly.

Step 2
Pour in the warm water (250ml, around 40°C/104°F). Make sure the water isn’t too hot, as it can kill the yeast. Stir until a shaggy dough begins to form.

Step 3
Once the dough starts to come together, switch from using the spoon to your hands. Begin kneading the dough.

Step 4
Knead the dough by pressing down and folding it with the palm of your hand. Continue kneading until the dough becomes smooth and elastic. It might seem sticky at first, but keep kneading.

Step 5
When the dough starts to form a cohesive ball, add the olive oil (30ml) and continue kneading.

Step 6
Knead the dough vigorously, stretching and folding it like washing laundry, until the surface is smooth and glossy. This develops the gluten, resulting in a pliable dough.

Step 7
Once the dough has a smooth and elastic surface, it’s time to let it rise. We’ll begin the first proof.

Step 8
Preheat your oven to its lowest setting (around 40°C/104°F). Place the dough and a bowl of warm water inside the oven to create a warm, humid environment. Let it proof until the dough has roughly doubled in size. Using the oven, this first proof took about 1 hour. This method ensures consistent proofing regardless of the weather.

Step 9
After 1 hour, take the dough out of the oven. You’ll see it has puffed up beautifully, looking soft and full, much like a plump cushion!

Step 10
Gently transfer the dough to a clean surface. Fold the edges of the dough towards the center to gently release the trapped gases. This process helps create a finer crumb structure.

Step 11
Shape the deflated dough into a smooth ball. Cover it with plastic wrap and let it rest for a second proof at room temperature for about 15 minutes. This is a good time to prepare your toppings.

Step 12
While the dough is undergoing its second proof, chop your topping ingredients: onions, bell peppers, and mushrooms. Slice the Vienna sausages as well. Prepare the canned corn, olives, and drained pineapple chunks. Feel free to use up any leftover vegetables you have in the fridge!

Step 13
After the 15-minute second proof, place the dough into your pizza pan or a round baking dish. Gently press and spread the dough with your fingers to fit the pan. Make sure not to spread it too thick, as it will puff up during baking. If you don’t have a round pan, you can roll it out into a circle with a rolling pin. Using a tart pan or a cast-iron skillet can give your pizza a beautiful shape and crust.

Step 14
Use a fork to prick the surface of the dough all over. This prevents the crust from puffing up too much while baking.

Step 15
Spread about 2 tablespoons of tomato sauce evenly over the docked dough. Be careful not to use too much sauce, as it can make the crust soggy. Sprinkle a generous layer of mozzarella cheese over the sauce.

Step 16
Arrange your prepared topping ingredients artfully over the first layer of cheese. Once the toppings are in place, cover them generously with more mozzarella cheese. Don’t be shy with the cheese – more is better!

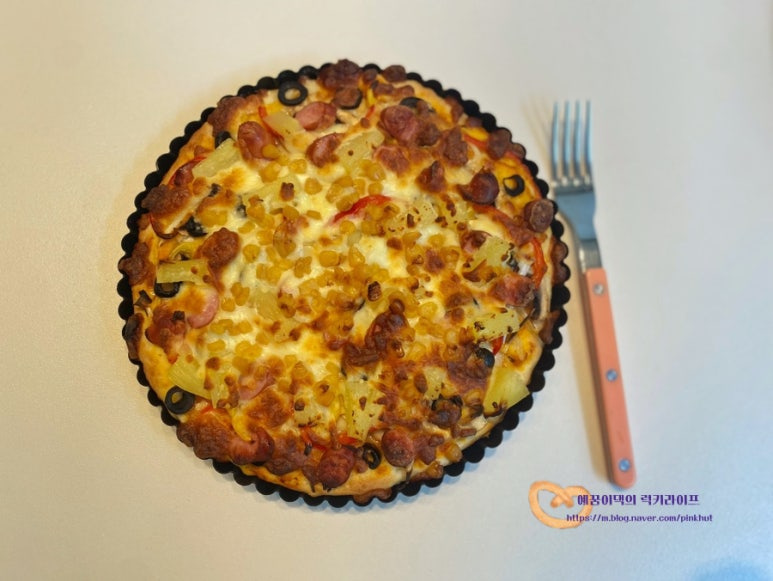
Step 17
Bake in a preheated oven at 200°C (400°F) for about 20-23 minutes, or until the crust is golden brown and the cheese is bubbly and melted. Your homemade pineapple pizza, loved by kids and adults alike, is now ready to be enjoyed!
