
Sweet & Savory Mitarashi Dango
Super Easy Homemade Mitarashi Dango Recipe Using the Microwave!

This is one of my daughter’s favorite snacks, so I make it often. I create the dough by mixing glutinous rice flour and regular rice flour (non-glutinous rice flour) in a 5:5 ratio, inspired by the ingredient list on commercial dango flour mixes. Making Mitarashi Dango is incredibly simple using the microwave! It’s especially wonderful enjoyed warm with a cup of tea. The recipe is listed for 4 servings, which corresponds to 4 skewers.
Dango Dough Ingredients (Makes 4 skewers)- 70g Shiratamako (glutinous rice flour)
- 70g Joshinko (regular rice flour)
- 1 Tbsp granulated sugar or brown sugar
- 150ml boiled water
- A little cooking oil (for greasing the pan)
Mitarashi Sauce Ingredients- 70ml Water
- 1.5 tsp Cornstarch
- 1 Tbsp Soy Sauce
- 50g Granulated sugar or brown sugar
- 70ml Water
- 1.5 tsp Cornstarch
- 1 Tbsp Soy Sauce
- 50g Granulated sugar or brown sugar
Cooking Instructions
Step 1
First, let’s prepare the sweet and savory Mitarashi sauce. In a saucepan, combine all the sauce ingredients: water, cornstarch, soy sauce, and sugar. Whisk them together thoroughly **before heating** to ensure there are no lumps. Mixing well beforehand prevents the cornstarch from clumping when heated.

Step 2
Place the saucepan with the sauce ingredients over medium-low heat. Stir constantly to prevent sticking and bring it to a simmer. Once the sauce starts to bubble and thicken, immediately turn off the heat. Be careful not to overcook, as it can burn.

Step 3
Now, it’s time to make the dango dough. In a microwave-safe bowl, combine the shiratamako (glutinous rice flour), joshinko (regular rice flour), and sugar. Mix them well with a spatula or spoon.

Step 4
Prepare the boiling water needed to cook the dough. Pour the measured 150ml of water into a pot and bring it to a rolling boil.

Step 5
Gradually add the boiling water to the dry ingredients in the bowl, **in three stages**, while mixing to form the dough. Adding too much water at once can make the dough too sticky, so it’s best to add it incrementally and adjust the consistency.

Step 6
Use a spatula or spoon to mix the ingredients until no dry flour remains, forming a dough. At this stage, you don’t need to knead it with your hands; just mix until the ingredients come together into a cohesive mass.

Step 7
Cover the bowl containing the dough with plastic wrap. Microwave it for **3 minutes**. Covering with plastic wrap helps retain moisture, ensuring the dough cooks up tender.

Step 8
Be very careful when removing the dough from the microwave, as it will be extremely hot. Dampen a clean kitchen cloth, wring out the excess water, and carefully place the hot dough onto the damp cloth.

Step 9
Cover the hot dough with another part of the damp cloth. Wearing gloves for safety is recommended. Press down firmly on the dough with your hands, continuing to knead until it becomes smooth and pliable. Kneading while it’s hot is key to achieving the right chewy texture.

Step 10
Once the dough is smoothly kneaded, it’s time to shape it.

Step 11
Divide the kneaded dough into 12 equal portions. Then, roll each portion into a round ball to form the dango shape.

Step 12
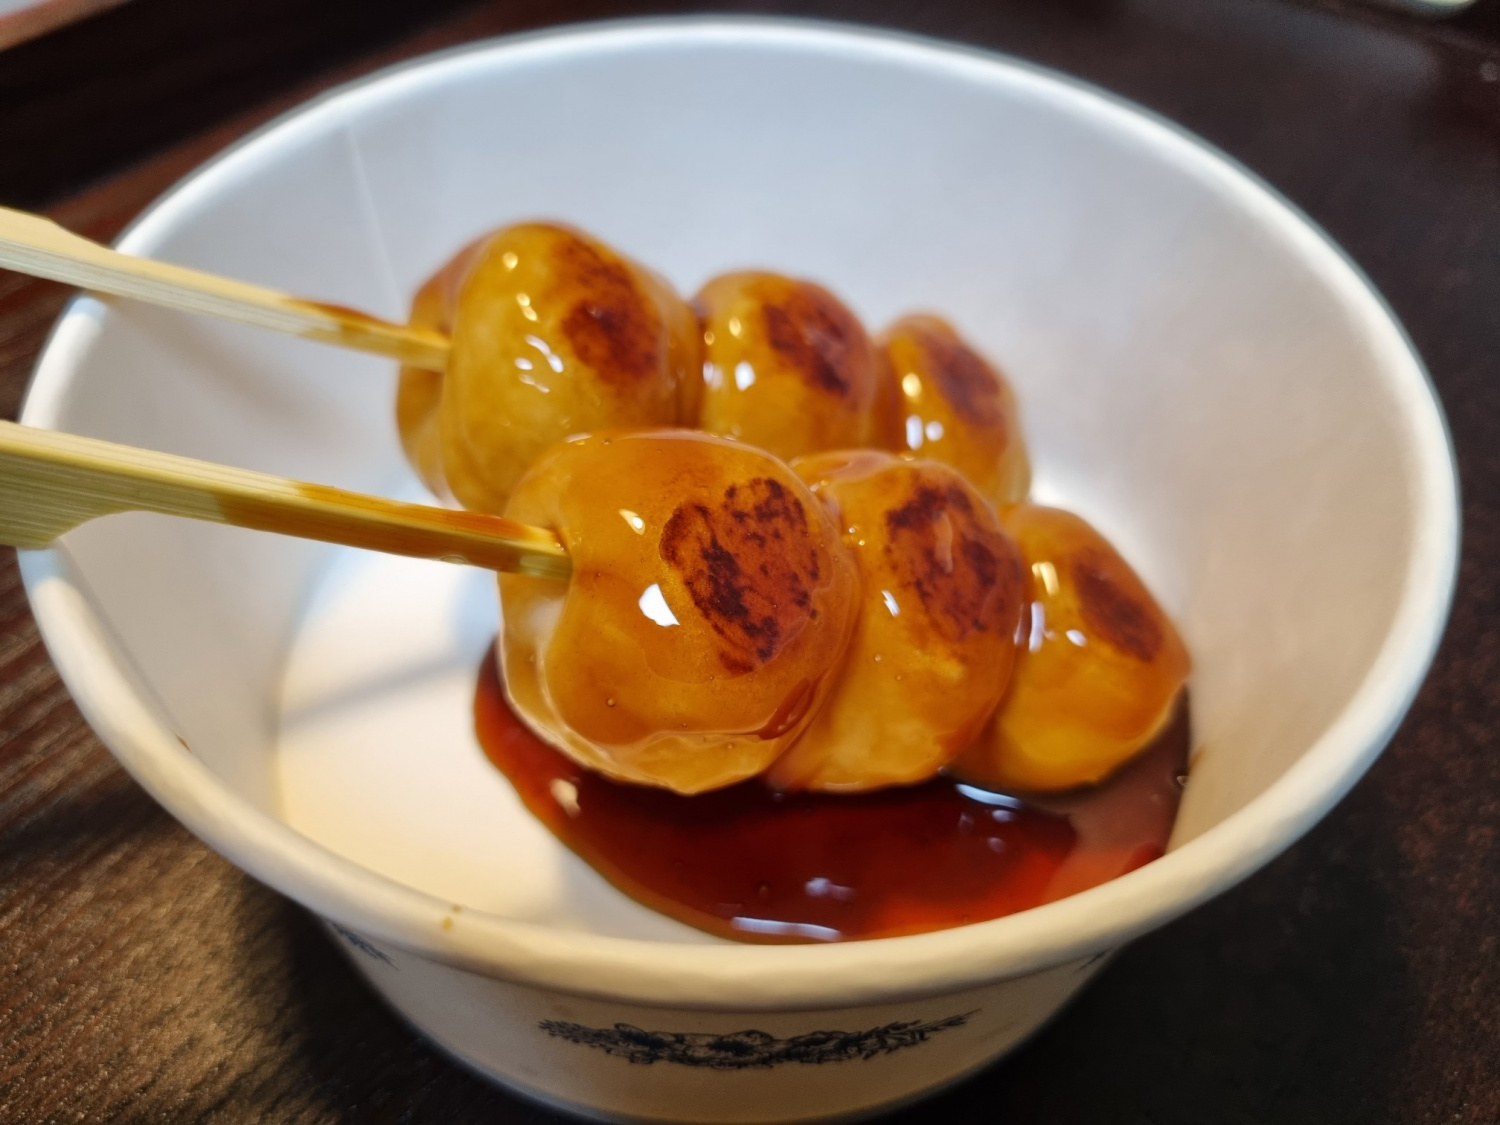
Thread 3 dango balls onto each skewer. You’ll end up with 4 skewers, each holding 3 dango balls.

Step 13
Now, let’s grill the dango. Lightly grease a preheated pan with a small amount of cooking oil over medium-low heat. Place the dango skewers on the pan and grill the first side until golden brown.

Step 14
Once one side is nicely browned, flip the skewers and grill the other side until it’s also golden brown. Ensure even browning on all sides for the best flavor and appearance.

Step 15
Brush the Mitarashi sauce generously over the grilled dango. The warm dango will absorb the delicious glaze.

Step 16
Finally, spoon any remaining sauce over the skewers to finish. Your sweet and savory Mitarashi Dango is ready! It’s best enjoyed immediately while warm.
