
Sweet Red Bean Porridge with Brown Rice
How to Make Healthy Brown Rice Patjuk (Red Bean Porridge) with No Blood Sugar Worries, Including Pressure Cooker Tips for Cooking Red Beans

The winter solstice, the longest night and shortest day of the year, falls on the 22nd day of the 11th lunar month. On this day, it’s traditional to eat red bean porridge to wish for good health and fortune. Even those who don’t typically love red bean porridge make an exception to enjoy a bowl for well-being. Red beans are packed with nutrients and are particularly beneficial for regulating blood sugar and blood pressure, making them an excellent food for seniors. While traditional patjuk is made with glutinous or regular rice, this recipe uses brown rice, which is more beneficial for blood sugar management, creating a nutritious and healthy porridge. We’ll guide you through the process of cooking red beans until tender using a pressure cooker, along with tips for making chewy ‘saealsim’ (rice cake balls).
Porridge Ingredients- 300g red beans (about 2 cups)
- 1.5 cups brown rice
- 8 cups water
Saealsim (Rice Cake Ball) Ingredients- 1 cup glutinous rice flour
- 10 tablespoons hot water
- 2 pinches salt
- 1 cup glutinous rice flour
- 10 tablespoons hot water
- 2 pinches salt
Cooking Instructions
Step 1
Rinse the 300g of red beans thoroughly. Then, soak them in about 4 cups of water for at least 3 hours. Soaking helps the beans cook faster and become softer.

Step 2
Wash the 1.5 cups of brown rice until the water runs clear. Soak it in water for about 30 minutes. Soaking the brown rice will make the porridge smoother and easier to digest.

Step 3
Place the soaked red beans in a pot with 4 cups of water and bring to a boil. Once the water boils, skim off any foam and discard the first batch of bean water. This step helps reduce any astringent or bitter taste from the red beans.

Step 4
Transfer the pre-soaked, rinsed red beans to a pressure cooker and add 8 cups of fresh water. Close the lid of the pressure cooker. Once the weight valve starts to hiss and release steam vigorously, let it cook for about 5 minutes, then turn off the heat. Allow the steam to release naturally from the pressure cooker. This method ensures the red beans are cooked to a very tender consistency.

Step 5
To make the ‘saealsim’, put 1 cup of glutinous rice flour and 2 pinches of salt into a bowl. Gradually add hot water, heated in a kettle, a tablespoon at a time, while stirring the flour with a spoon or spatula. The amount of water needed can vary depending on the glutinous rice flour, so don’t add all the water at once. Adjust as you mix to achieve a dough consistency. I used about 10 tablespoons of hot water to form a pliable dough. Using hot water for kneading (yeomi) makes the ‘saealsim’ chewier.

Step 6
Once the dough reaches a suitable consistency, stretch it out into long, rope-like shapes, similar to making ‘tteokbokki’ dough.

Step 7
Cut these long dough ropes into pieces about 1cm thick, ensuring they are of uniform size. These will be the base for your ‘saealsim’.

Step 8
Take each piece of dough, place it in the palm of your hand, and gently roll it to form small, round balls. Make them a reasonable size, as they can shrink when cooked.

Step 9
Boil the ‘saealsim’ in simmering water until they float to the surface. This pre-cooking step helps them maintain their shape when added to the porridge.

Step 10
Once the ‘saealsim’ float in the boiling water, they are cooked. Remove them from the water, briefly rinse with cold water to prevent sticking, and set aside in a bowl.

Step 11
Remove the tender red beans from the pressure cooker. Set aside half of the cooked beans, and place the other half into a blender or use an immersion blender (like a ‘dökebi bangmangi’) to process.

Step 12
Blend about half of the cooked red beans until smooth. For a pleasant texture, it’s nice to leave some of the bean skins intact rather than pureeing them completely smooth.

Step 13
Place the soaked 1.5 cups of brown rice in a blender with about 1 cup of water and blend. Pureeing the brown rice helps to thicken the porridge and add a smoother texture.

Step 14
Pour the pureed brown rice into the red bean cooking water (strained to remove any solids) and mix well.

Step 15
Now, combine the red bean water with the brown rice mixture in a pot. Add the reserved whole cooked red beans and the unsoaked brown rice kernels. Bring this mixture to a boil.

Step 16
Stir the porridge continuously with a spatula to prevent it from sticking to the bottom of the pot, especially as the brown rice cooks. It’s crucial to keep stirring to avoid burning.

Step 17
While the porridge is cooking, check if the brown rice is cooked by pressing a grain with your spatula. It’s ready when the rice grains are soft and easily mashable.

Step 18
Once the brown rice porridge has reached your desired consistency and the brown rice is fully cooked, add all the pureed red beans and whole red beans back into the pot. Stir well to combine.

Step 19
Finally, add the pre-cooked ‘saealsim’ to the red bean porridge. Since they are already cooked, they only need to simmer for a short time to warm through and meld with the porridge flavors.

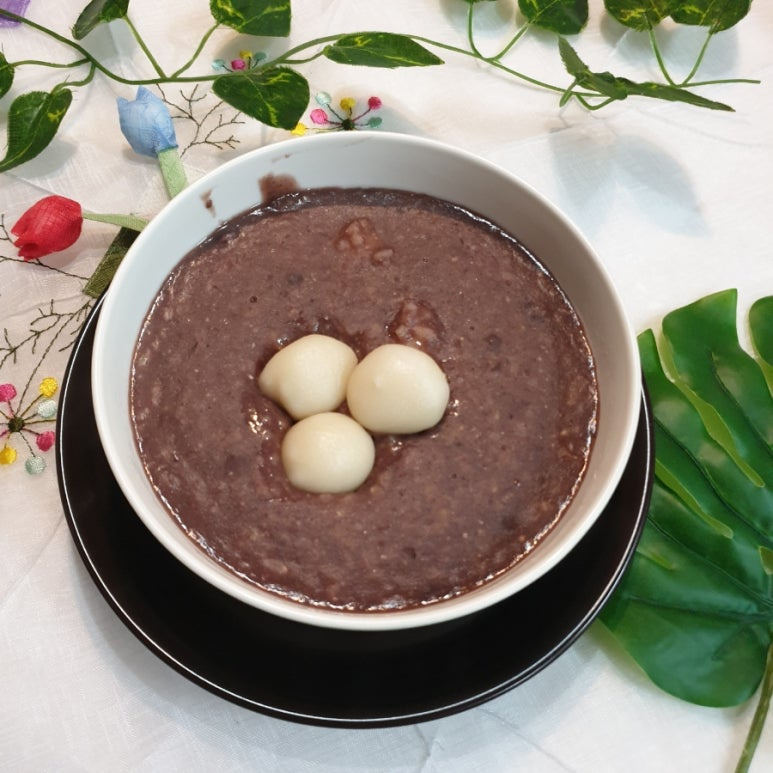
Step 20
Serve the finished brown rice red bean porridge. Season with salt or sugar to your taste. For those managing blood sugar, it’s recommended to use salt for seasoning instead of sugar, or adjust the saltiness based on accompanying kimchi. Enjoy this warm and comforting dish.
