
Sweet Caramelized Onions: A Time-Intensive but Rewarding Base
Chef Paik’s All-Purpose Caramelized Onions: Mastering the Art of Onion Caramelization (A Recipe for Those with Patience!)

Inspired by Chef Paik’s ‘Paik’s Cuisine’ YouTube channel, I decided to embark on the journey of caramelizing onions. While I initially thought it was just about frying onions, seeing the versatile dishes made with this caramelized base made me exclaim, ‘I absolutely have to make this!’ I was so curious about the flavor and it looked incredibly delicious! This recipe requires time and dedication, but the resulting all-purpose caramelized onions will add a special touch to any dish, offering a sweetness that is well worth the effort.
Key Ingredients- Onions (any size, use a generous amount)
- Cooking oil (canola or soybean oil recommended) – a small amount
Cooking Instructions
Step 1
Begin by peeling the onions thoroughly. (While the cooking video suggested drying the peels for use in broth, I opted to discard them for this recipe. Peeling the onions alone can take quite some time!)

Step 2
After peeling and washing the onions clean, slice them into thin strips. If they are sliced too thinly, they might burn or become mushy during cooking. Aim for a moderate thickness.

Step 3
Initially, the sliced onions might not seem like a lot, but once you’ve sliced them all, you’ll realize there’s a substantial amount. They will start to reduce in volume as they cook.

Step 4
Once the onions are all sliced, it’s time to start cooking! Lightly coat your pan with cooking oil. It’s better to start with a moderate amount and add more if needed during the process. (Avoid strongly flavored oils like olive oil, as they might clash with Korean dishes later on. Opt for neutral-flavored oils like canola or soybean oil.) While butter can be used for caramelization, its flavor profile leans more towards Western dishes, so choose your oil based on your intended use for the caramelized onions.

Step 5
I initially planned to use just one pot, but the volume of sliced onions was too much for even my largest pot. Therefore, I began by dividing the onions and cooking them in two pots simultaneously. (The real work is about to begin! 😉)

Step 6
Start with high heat, stirring the onions occasionally to prevent them from burning.

Step 7
As the onions cook, they release moisture and soften, so they won’t burn easily even if you don’t stir constantly. This is the stage where their natural sweetness begins to develop.

Step 8
Continue stirring to evaporate the moisture from the onions. The sweet aroma of caramelizing onions is wonderful, but be prepared for your arm to get a workout! 😅

Step 9
Once the volume has reduced by about half, combine the onions from both pots into a single pot. Now, reduce the heat to medium and continue to cook them gently, allowing them to simmer and reduce. Cooking over medium heat slowly develops a richer, more profound flavor compared to high-heat, quick stir-frying.

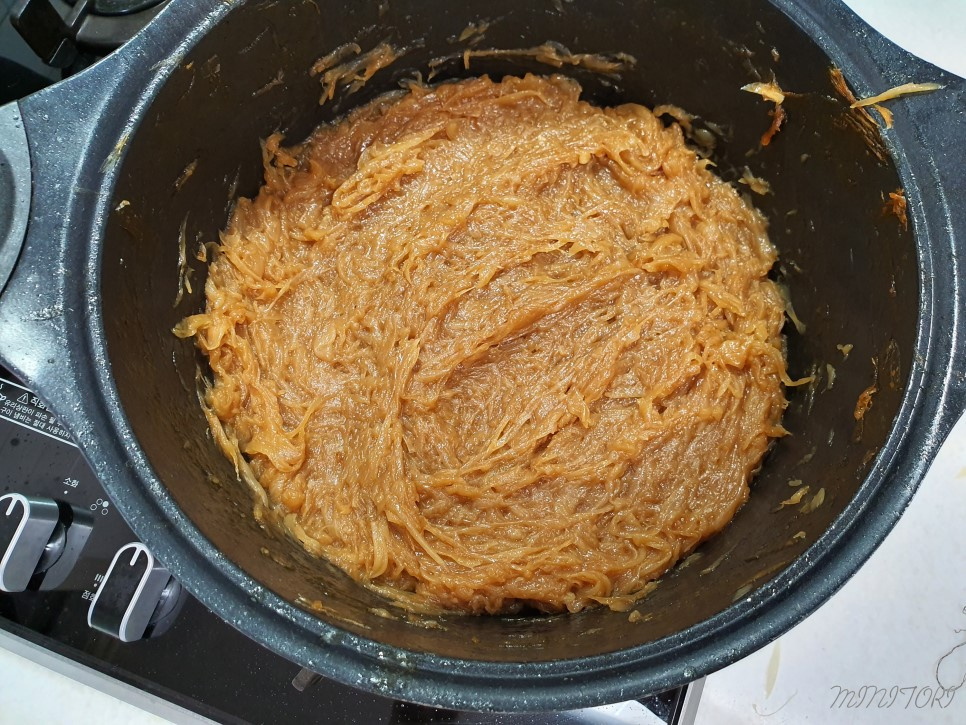
Step 10
Finally, it’s done! I had estimated about 2 hours, but cooking them gently over medium heat ended up taking approximately 3 hours. The onions that once filled two pots now barely cover the bottom of one pot. It’s a sweet reward born from time and effort.

Step 11
Once the all-purpose caramelized onions have cooled down slightly, portion them into an ice cube tray or a zip-top bag for freezing. I placed them flat on a tray in the freezer to ensure an even freeze.

Step 12
If you’re using zip-top bags, before they freeze completely solid, take them out and use a scraper or the back of a knife to score lines, dividing them into portion-sized pieces. This makes it easy to break off just what you need later.

Step 13
Seal the bags again to prevent freezer odors from affecting the onions and return them to the freezer. Now, whenever I need them, I can just break off a piece and use it! The process was demanding, but having this ready-to-use ingredient makes me feel so prepared and accomplished! 😊
