
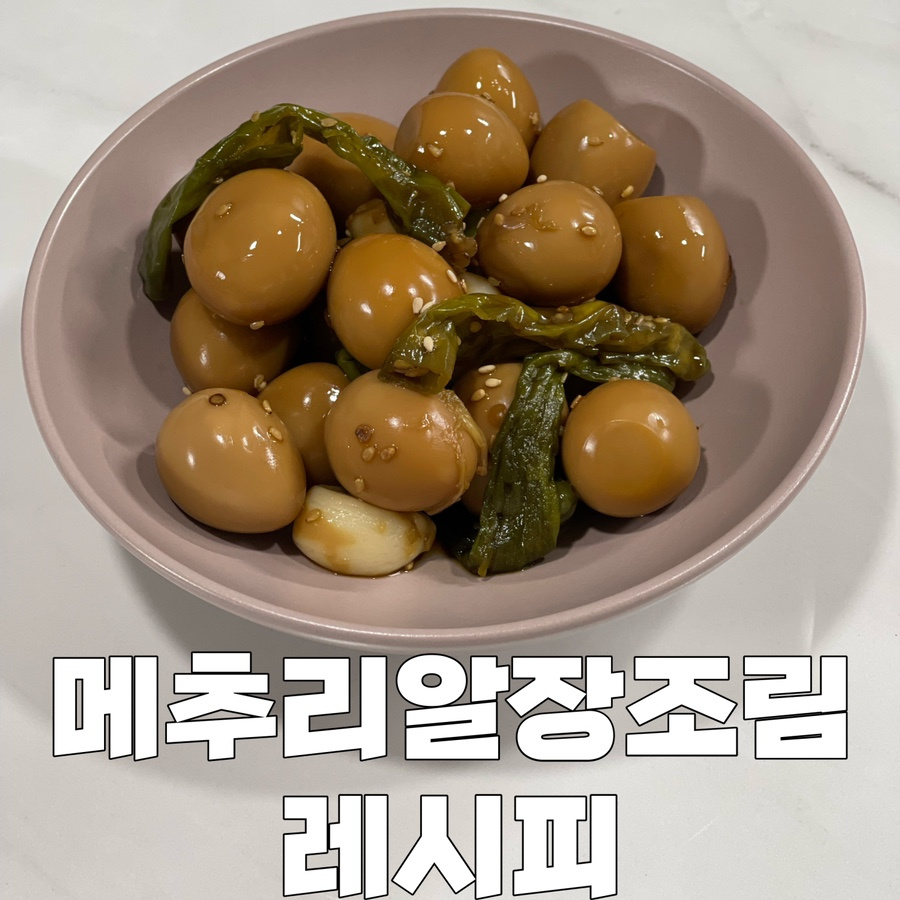
Sweet and Chewy Quail Egg Soy Braise
Quail Egg and Shishito Pepper Soy Braise Recipe

A must-have side dish for any meal, this Quail Egg Soy Braise is incredibly addictive! Just a few bites will have you hooked. It’s a flavorful and comforting banchan that’s perfect for stocking your fridge.
Main Ingredients- 270g Peeled Quail Eggs (pre-boiled and peeled)
- 100g Shishito Peppers
- 400ml Water
Braising Sauce- 5 Tbsp Soy Sauce (approx. 50ml)
- 2 Tbsp Mirin (Rice Wine)
- 4 Tbsp Oligodang (Corn Syrup)
- Pinch of Sesame Seeds (for garnish)
- 5 Tbsp Soy Sauce (approx. 50ml)
- 2 Tbsp Mirin (Rice Wine)
- 4 Tbsp Oligodang (Corn Syrup)
- Pinch of Sesame Seeds (for garnish)
Cooking Instructions
Step 1
Begin by preparing your ingredients. If you’re using pre-peeled quail eggs, simply rinse them. For the shishito peppers, wash them thoroughly under cold running water.

Step 2
Place all 270g of peeled quail eggs into a wide pot or pan. (Tip: If this quantity seems small, consider buying a larger package next time!)

Step 3
Pour in 400ml of water, enough to cover the quail eggs.

Step 4
Add 5 tablespoons of soy sauce. This will form the savory base of your braising liquid.

Step 5
Add 2 tablespoons of mirin (a type of rice wine) and 4 tablespoons of oligodang (a sweet corn syrup). Stir everything together. Mirin helps to reduce any ‘eggy’ smell and adds a nice sheen, while oligodang provides a smooth sweetness. Bring the mixture to a boil over high heat.

Step 6
Now it’s time to add the shishito peppers. To ensure they absorb the maximum flavor, we’ll prepare them slightly before adding.

Step 7
Using a fork or a toothpick, pierce each shishito pepper 2-3 times.

Step 8
These little holes will allow the delicious braising liquid to penetrate the peppers, infusing them with flavor from the inside out. This step makes a significant difference in taste!

Step 9
Once the braising liquid starts to bubble, reduce the heat to medium. We’re now ready to add the shishito peppers and begin the braising process.

Step 10
(Optional) For an extra layer of flavor, add about 1/2 tablespoon of minced garlic at this stage. Spontaneous additions can make cooking fun! Don’t worry if you skip this, the dish will still be delicious.

Step 11
Continue simmering over medium heat. Taste the braising liquid and adjust the seasoning if needed by adding more soy sauce or oligodang to suit your preference. If you prefer a sweeter taste, add more oligodang.

Step 12
When the braising liquid has reduced by about half, add all of the prepared shishito peppers to the pot.

Step 13
Keep the heat at medium and continue to simmer, allowing the peppers and quail eggs to meld with the sauce.

Step 14
Simmer until the shishito peppers are tender and the quail eggs are deeply colored, indicating they’ve absorbed the soy sauce. Once cooked, allow the dish to cool slightly. This resting period allows the flavors to further penetrate the ingredients, resulting in a richer taste.

Step 15
Continue simmering until the sauce has thickened to your desired consistency, then sprinkle with sesame seeds for a final touch. Enjoy your delicious Quail Egg Soy Braise! The flavors deepen even more as it cools.
