
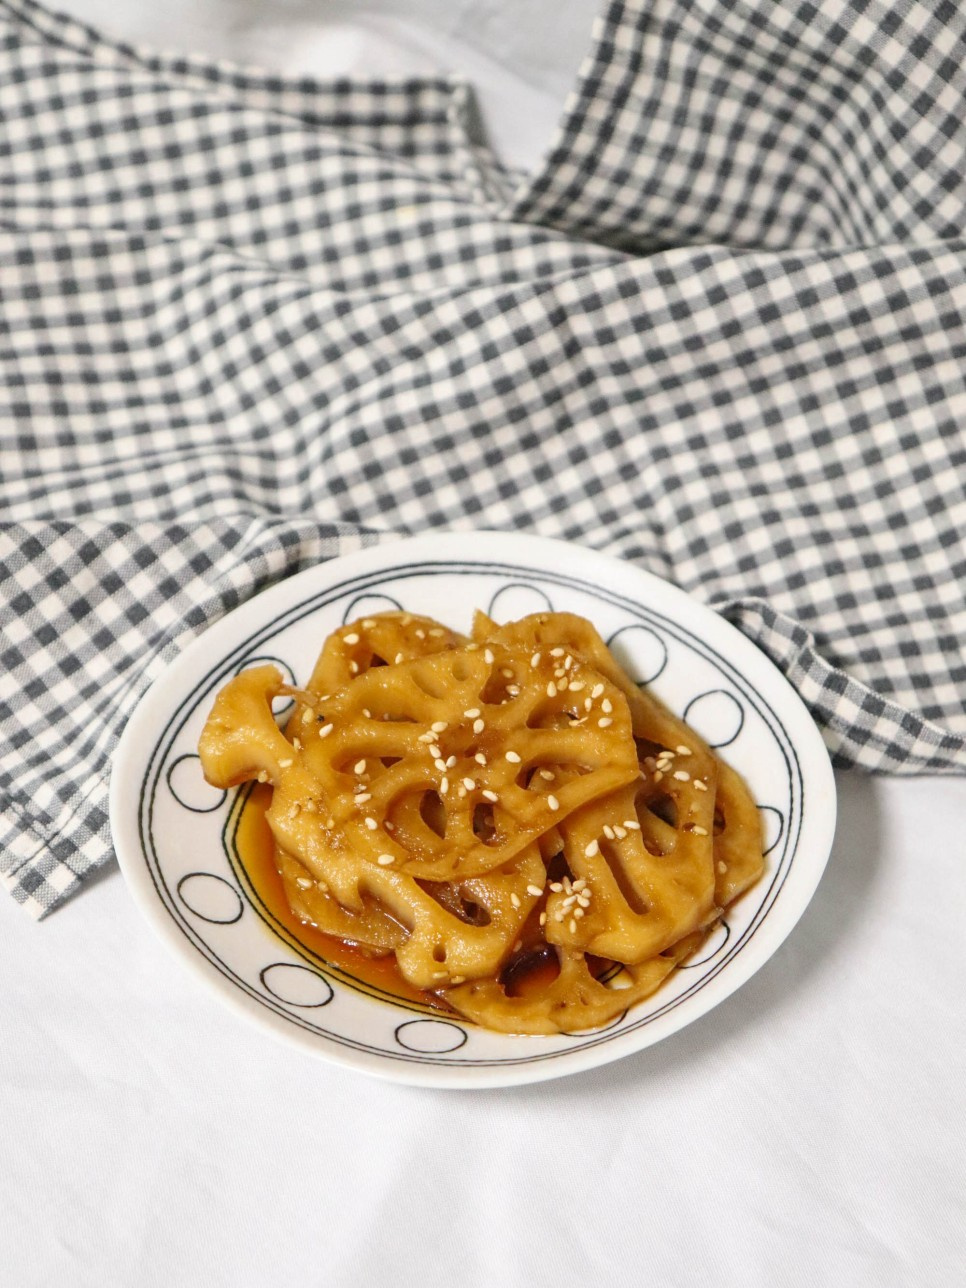
Sweet and Chewy Braised Burdock Root (Renkon Nimono)
Secret Golden Recipe for Perfectly Braised Burdock Root Revealed!

Discover the ultimate recipe for braised burdock root (renkon nimono) that anyone can master! This classic Korean side dish is surprisingly easy to make; the key lies in getting the perfect balance of soy sauce and sweetness. Let’s unlock the secrets to a delicious, tender, and flavorful dish!
Ingredients- 1 burdock root
- Vinegar (for blanching)
- Salt (for blanching)
- 10 Tbsp soy sauce
- 6 Tbsp sugar
- 5 Tbsp corn syrup (or rice syrup)
- 250ml water
- Toasted sesame seeds (for garnish)
Cooking Instructions
Step 1
Start by thoroughly washing the burdock root. Use a peeler or a knife to remove the outer skin, then rinse it again. Slice the burdock root into uniform pieces, about 0.5 cm thick. Slicing it too thin might cause it to break during cooking, while slicing it too thick will make it difficult for the seasoning to penetrate. Aim for a consistent, medium thickness for the best results!

Step 2
In a pot, add enough water to cover the burdock root. Add 1-2 tablespoons of vinegar and a pinch of salt. Boil the burdock root until it’s about halfway tender. This step is crucial not only for softening the burdock but also for removing its slightly bitter or astringent taste. Don’t skip this important process!

Step 3
While the burdock root is blanching, prepare the braising liquid. In a bowl, combine 10 tablespoons of soy sauce, 6 tablespoons of sugar, 5 tablespoons of corn syrup, 250ml of water, and toasted sesame seeds. Mix them well until the sugar is dissolved. The quantity might seem generous, but since it’s measured by tablespoons, it creates the perfect amount of sauce for the burdock.

Step 4
Once the burdock root is partially cooked, drain it thoroughly using a colander. Be careful as it will be hot. Transfer the drained burdock root to a clean pot.

Step 5
Pour the prepared braising liquid over the burdock root in the pot. Bring it to a boil over medium-high heat. Once it starts to simmer and the liquid begins to reduce, lower the heat to medium. Stir occasionally with a spoon or spatula to ensure the burdock root is evenly coated with the sauce and to prevent sticking. Continue to simmer until the sauce has thickened.

Step 6
Continue to simmer until the sauce has reduced to a thick, glaze-like consistency that coats the burdock root. For an extra nutty aroma, you can stir in 1 tablespoon of sesame oil just before turning off the heat (this is optional). While a thicker sauce is delicious, leaving a little bit of the savory soy glaze allows the burdock root to remain moist and flavorful. Taste and adjust the seasoning or sweetness according to your preference. Enjoy this addictive side dish that will make your rice disappear!
