
Super Easy Rice Cooker Cheesecake
Incredibly Delicious Cheesecake Made in a Rice Cooker | Angela’s Baking

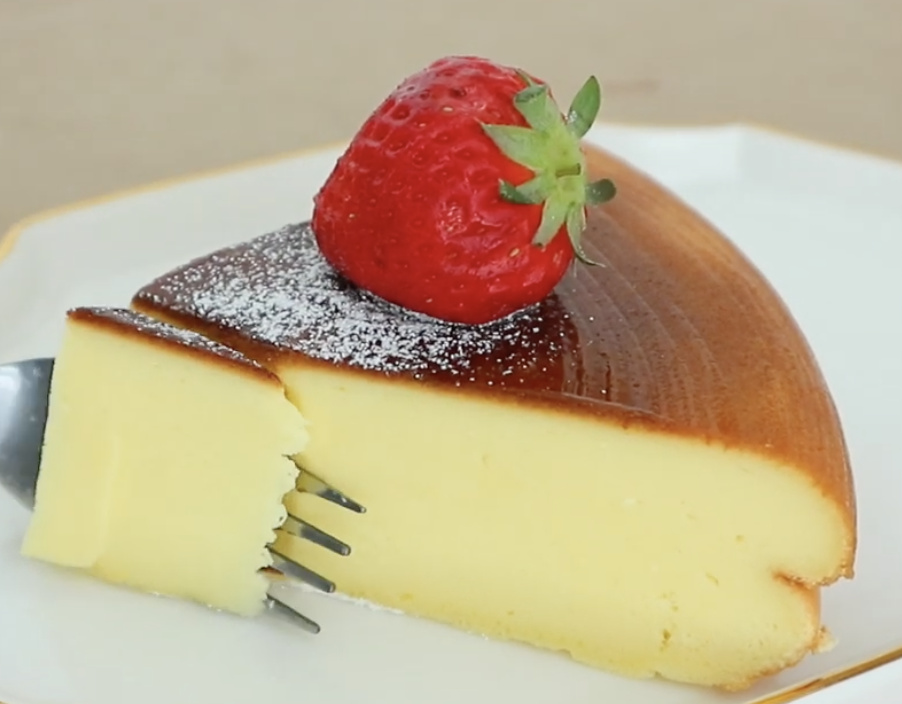
Can you believe this cheesecake was made in a rice cooker? I tried baking a soufflé cheesecake, usually made in an oven, using my rice cooker, and the result was surprisingly delicious! Served chilled, its subtle yet rich cheese flavor is exquisite. It’s not dense but rather soft, substantial, and moist. This recipe offers a wonderful cheesecake experience without the need for an oven.
Cheesecake Batter (for a 22cm diameter, 10-cup rice cooker)- Cream cheese, softened at room temperature (or in a warm place) 440g
- Milk, warmed 120ml
- Butter, softened at room temperature 50g
- Sugar 30g (for batter)
- Cake flour, sifted 70g
- Salt 1/4 tsp
- Egg yolks 120g (approx. 6-7 yolks)
- Egg whites 200g (approx. 6-7 whites)
- Sugar 110g (for meringue)
- Lemon juice 1 Tbsp
For Decoration (Optional)- Powdered sugar, as needed
- Fresh strawberries, as needed
For Greasing the Rice Cooker- Butter 1 tsp
- Powdered sugar, as needed
- Fresh strawberries, as needed
For Greasing the Rice Cooker- Butter 1 tsp
Cooking Instructions
Step 1
Before you begin, ensure your cream cheese and butter are softened. Leave them at room temperature or in a warm spot until they are very pliable and easy to mix. Gently warm the milk in a small saucepan over low heat until it just begins to simmer, then immediately remove from heat.

Step 2
Pour the warm milk into the bowl with the softened cream cheese. Using a whisk, mix until the cream cheese is smooth and lump-free. Add the softened butter and continue whisking until it’s fully incorporated and the mixture is smooth.

Step 3
Add the sifted cake flour (70g), salt (1/4 tsp), and sugar (30g for the batter) to the cream cheese mixture. Mix with a whisk or spatula until just combined and no dry flour streaks remain. Be careful not to overmix at this stage, as it can affect the texture.

Step 4
Incorporate the egg yolks (120g) into the mixture. Whisk until the yolks are fully blended into the batter, creating a smooth, uniform consistency. This forms the rich base of your cheesecake.

Step 5
In a separate, clean bowl, beat the egg whites (200g) using an electric mixer or a whisk. As they begin to foam, gradually add the sugar (110g for meringue) in 2-3 additions while continuing to beat. Beat until you achieve stiff, glossy peaks that hold their shape.

Step 6
Take about one-quarter of the prepared meringue and gently fold it into the cream cheese batter. Mix thoroughly but carefully, aiming to lighten the batter’s consistency without deflating the meringue too much. This helps the meringue incorporate more easily later.

Step 7
Now, add the remaining meringue to the batter. Using a spatula, gently fold it in using an over-and-under motion, as if you were scraping the sides and bottom of the bowl and folding it over. Continue until just combined and the batter is a uniform color. Finally, stir in the lemon juice (1 Tbsp) until just incorporated. Your cheesecake batter is ready!

Step 8
Lightly grease the inner pot of your rice cooker with about 1 tsp of butter. This prevents the cheesecake from sticking and ensures easy removal. Pour all of the prepared cheesecake batter into the greased rice cooker pot.

Step 9
Close the rice cooker lid and select the ‘Mixed Grain’ or ‘Cake’ setting. Run the cycle twice consecutively. If your rice cooker doesn’t have these specific settings, you can use the regular ‘Cook’ setting twice. Ensure the cake is fully cooked.

Step 10
Once the cooking cycle is complete, open the rice cooker and check if the cheesecake is fully baked. Allow the cheesecake to cool completely in the rice cooker with the lid open. Once fully cooled, carefully invert the pot to release the cheesecake onto a wire rack or plate. Trying to remove it while hot might cause it to break.

Step 11
Place the cooled cheesecake on a serving plate. For a beautiful finish, you can sift powdered sugar over the top and decorate with fresh strawberries. Enjoy your wonderfully moist and rich cheesecake!
