
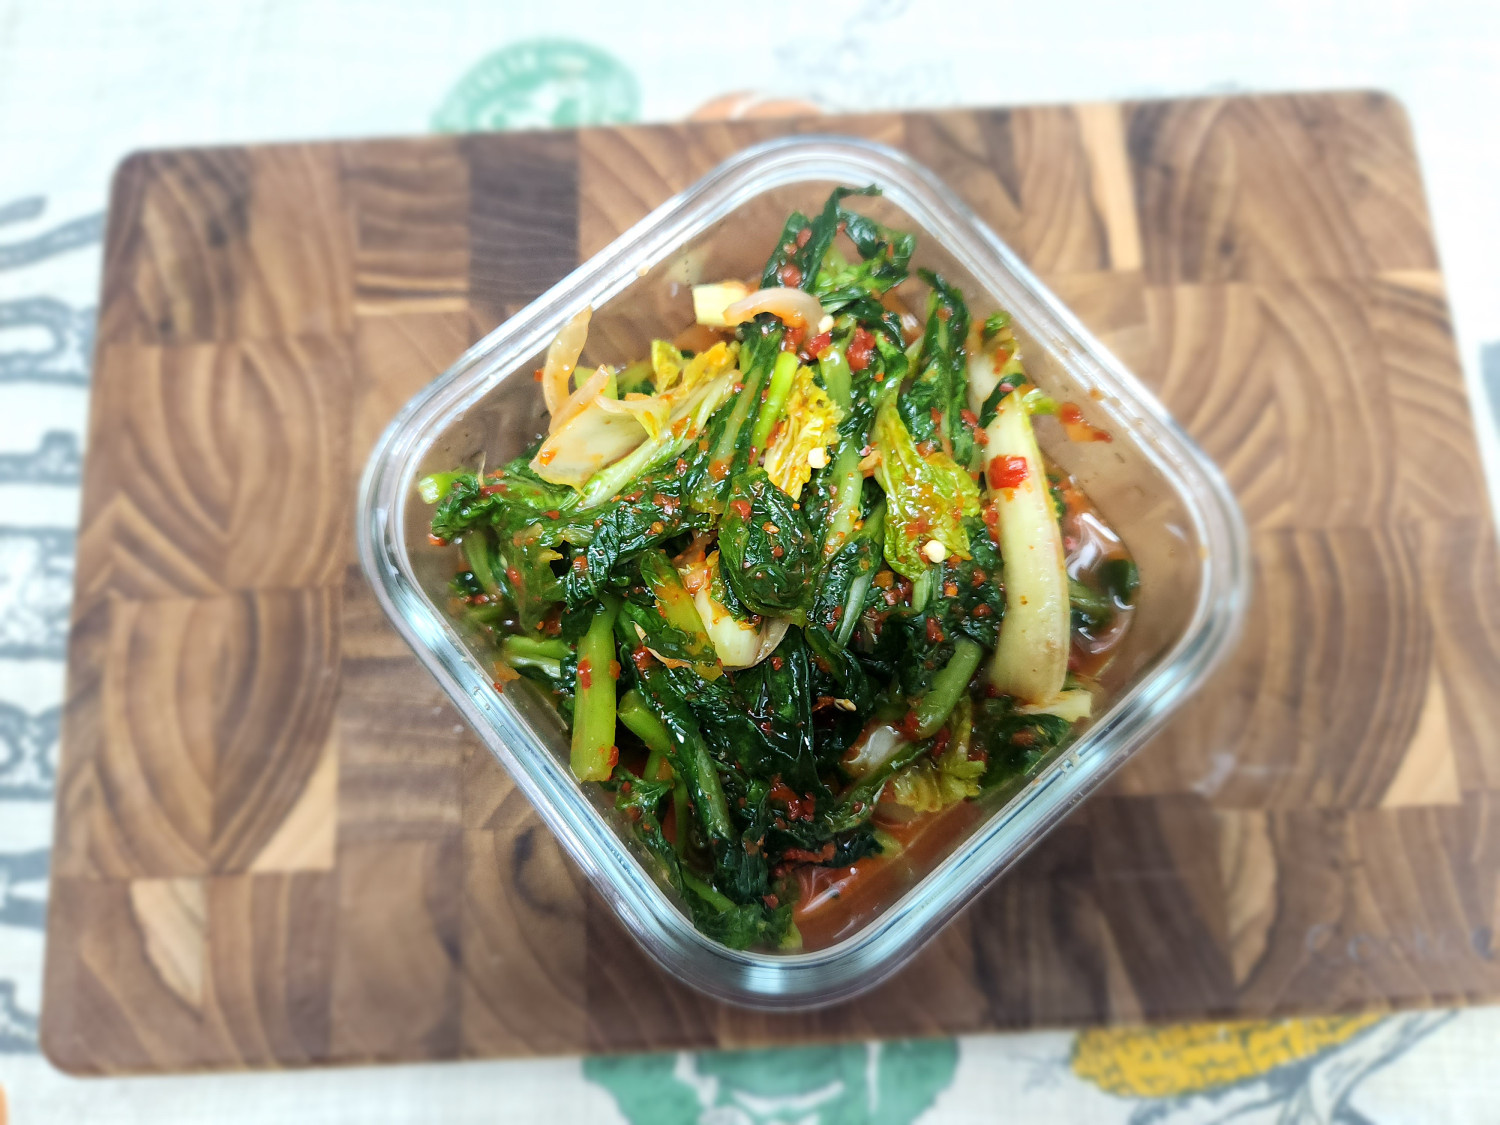
Summer Delight: Yeolmu Kimchi (Young Radish Kimchi)
Crispy and Refreshing Yeolmu Kimchi

Yeolmu, or young radish greens, are prized for their tender leaves and delicious flavor, making them a favorite over the root itself. These greens are low in calories and rich in dietary fiber, classifying them as an alkaline food. Packed with vitamins A and C, along with essential minerals, yeolmu kimchi helps prevent blood acidification, stimulates appetite, and provides a satisfying sense of fullness. Make your summer meals even more delightful with this homemade, refreshing kimchi!
Essential Ingredients- 1 bunch Yeolmu (young radish greens – choose ones with tender leaves)
- 1 bunch Eolgari Baechu (baby napa cabbage – adds a nice touch when combined with yeolmu)
- Coarse sea salt, to taste (for brining)
Flavor-Boosting Seasoning Ingredients- 400g Green chilies (or Cheongyang chilies for extra spice – ensure they are drained if wet)
- 1 Onion (adds sweetness and umami)
- 1/2 Tbsp minced garlic (generous amounts enhance the flavor)
- 3 Tbsp Gochugaru (Korean chili powder – for color and spice)
- 1 Tbsp Oligodang (corn syrup or other liquid sweetener – for subtle sweetness and gloss)
- 2 Tbsp Sugar (adjust sweetness to your preference)
- 3 Tbsp Fish sauce (anchovy or tuna based – key for depth and savory flavor)
Flour Paste for Richness- 3 Tbsp Flour (thickens the kimchi brine and adds flavor)
- Water, as needed (to dissolve the flour)
- 400g Green chilies (or Cheongyang chilies for extra spice – ensure they are drained if wet)
- 1 Onion (adds sweetness and umami)
- 1/2 Tbsp minced garlic (generous amounts enhance the flavor)
- 3 Tbsp Gochugaru (Korean chili powder – for color and spice)
- 1 Tbsp Oligodang (corn syrup or other liquid sweetener – for subtle sweetness and gloss)
- 2 Tbsp Sugar (adjust sweetness to your preference)
- 3 Tbsp Fish sauce (anchovy or tuna based – key for depth and savory flavor)
Flour Paste for Richness- 3 Tbsp Flour (thickens the kimchi brine and adds flavor)
- Water, as needed (to dissolve the flour)
Cooking Instructions
Step 1
First, let’s make the flour paste, which will form the base of your kimchi seasoning. In a pot, add 3 tablespoons of flour. Gradually add water while whisking to create a smooth mixture without lumps. Start with about 1 cup of water and adjust the consistency as needed.

Step 2
Place the flour mixture over medium-low heat. Stir continuously with a whisk or spoon to prevent sticking or lumps, ensuring a smooth paste forms. Once it thickens, remove from heat and let it cool completely. Using a hot paste can affect the kimchi’s flavor.

Step 3
Prepare the onion, which adds flavor depth to the kimchi. Peel the onion and slice it thinly into shreds. Slicing it this way allows the seasoning to penetrate evenly for a tastier result.

Step 4
To the completely cooled flour paste, add the shredded onion, minced garlic, gochugaru, oligodang, sugar, and fish sauce. Mix everything thoroughly with a whisk or spatula until well combined. This step creates a delicious seasoning base for your yeolmu kimchi. Making it ahead allows the flavors to meld beautifully.

Step 5
Now it’s time to prepare the main ingredient, the yeolmu. Trim the roots slightly and remove any yellow or wilted leaves. Cut the yeolmu into bite-sized pieces, about 5-7 cm long. Cutting them too short might make them mushy, so aim for a moderate length.

Step 6
Cut the baby napa cabbage (eolgari baechu) into similar bite-sized pieces as the yeolmu, about 5-7 cm long. The leaves are delicate, so cutting them too long can cause them to break down. Ensure they are a manageable size for eating.

Step 7
Rinse the prepared yeolmu and eolgari baechu thoroughly under running water multiple times to remove any dirt or debris. Pay close attention to the root areas, as they often hold the most soil.

Step 8
Sprinkle coarse sea salt over the thoroughly rinsed yeolmu and eolgari baechu to begin the brining process. Distribute the salt evenly, focusing on the stems, and gently toss them. Let them brine for about 30 to 40 minutes, flipping them once or twice in between to ensure even salting. They are ready when they become wilted and tender.

Step 9
After brining, rinse the yeolmu and eolgari baechu gently under clean water, about twice, to remove excess salt. Avoid squeezing them too hard, as this preserves their crisp texture. Drain them well in a colander. Excess water can make the kimchi bland.

Step 10
Finally, add all the pre-made delicious seasoning to the drained yeolmu and eolgari baechu. Now, mix everything together thoroughly by hand until all the ingredients are evenly coated with the seasoning. Your delicious yeolmu kimchi is ready to be enjoyed!
