
Spooky Yet Sweet Halloween Red Velvet Muffins with Oreo Cream Cheese Topping
Recipe: ‘Devilish Red Velvet Muffins’ for Halloween with Oreo Cream Cheese Topping!

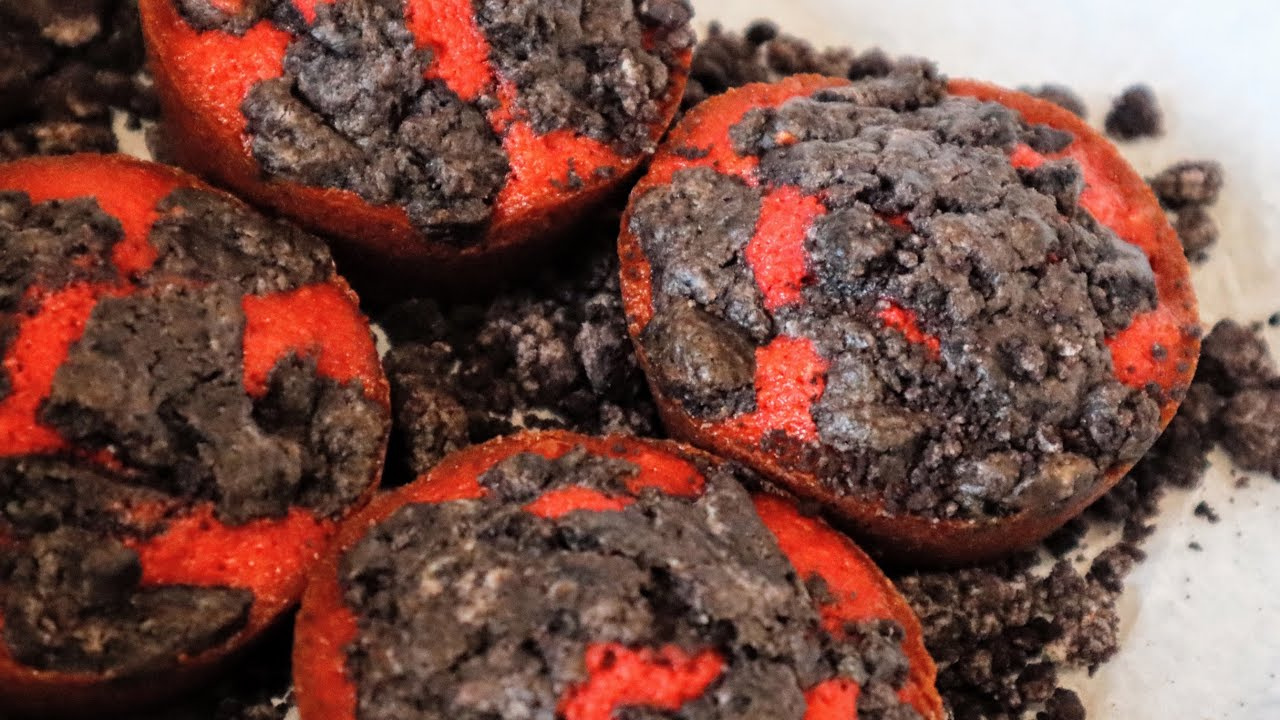
Hello everyone! Today, I’m sharing a recipe for ‘Devilish Red Velvet Muffins’ perfect for the Halloween season! While they look a bit eerie, these muffins boast a moist red velvet cake base topped with cream cheese and crunchy Oreo cookie pieces. They offer a delightful sweet surprise that contrasts with their spooky appearance. Let’s bake these deliciously deceptive muffins together!
Muffins (Makes 12)- 145g All-purpose flour (or cake flour)
- 3g Unsweetened cocoa powder
- 3g Baking powder
- 3g Salt
- 113g Unsalted butter, softened to room temperature
- 140g Granulated sugar
- 2 Large eggs, at room temperature
- 5g Vanilla extract
- 80g Milk, slightly warmed
- 2g White vinegar
- Red food coloring, as needed for desired color
Oreo Cream Cheese Topping- 125g Oreo cookies (with cream filling)
- 50g Cream cheese, softened to room temperature
- 125g Oreo cookies (with cream filling)
- 50g Cream cheese, softened to room temperature
Cooking Instructions
Step 1
First, place the Oreo cookies, including their cream filling, into a zip-top bag. Crush them thoroughly using a rolling pin or a heavy object until finely crumbled. (Apologies for the slightly out-of-focus photo!)

Step 2
In a bowl, combine the softened cream cheese for the topping with the crushed Oreo cookies.

Step 3
Using your hands, gently mix and knead the cream cheese and crushed Oreos until they form a cohesive mixture. Ensure it’s well combined and slightly sticky.

Step 4
Shape the Oreo cream cheese mixture into a long rectangular log. Wrap it tightly with plastic wrap and refrigerate for a short while. It only needs to chill while you prepare the muffin batter.

Step 5
Prepare your muffin tin by lightly greasing the insides with oil or by lining it with paper muffin liners. Preheat your oven to 180°C (350°F).

Step 6
In a small bowl, combine the slightly warmed milk with the white vinegar. Stir and let it sit for a few minutes; it will slightly curdle.

Step 7
In a large mixing bowl, whisk together the all-purpose flour (or cake flour), unsweetened cocoa powder, baking powder, and salt. If your cocoa powder is lumpy, it’s best to sift it through a fine-mesh sieve for a smoother batter.

Step 8
Use a whisk to gently blend the dry ingredients together until they are evenly distributed.

Step 9
In a separate bowl, cream the softened unsalted butter using a hand mixer or a whisk until it becomes smooth and fluffy.

Step 10
Continue whipping the butter for about 2 minutes until it lightens in color and increases in volume. This aeration is key for a tender muffin.

Step 11
Gradually add the granulated sugar while continuing to beat. Whip until the sugar granules are no longer gritty and are fully incorporated into the butter, creating a light and fluffy mixture. Proper creaming will result in moist muffins.

Step 12
Add the room-temperature eggs one at a time, beating well after each addition. Ensure the first egg is fully incorporated before adding the second. Avoid adding cold eggs, as this can cause the butter to curdle.

Step 13
Stir in the vanilla extract and give it a final quick whisk. Use the mixer on low speed for a moment to ensure everything is evenly combined.

Step 14
Your batter should now have a smooth and creamy consistency like this.

Step 15
Add the red food coloring, a drop or two at a time, mixing on low speed. Continue adding color and mixing until you achieve your desired vibrant red velvet shade. Be patient to get the perfect hue.

Step 16
This time, I aimed for a particularly intense and striking red to enhance the ‘devilish’ aesthetic of the muffins.

Step 17
Add the sifted dry ingredients to the wet batter.

Step 18
Using a spatula, gently fold the dry ingredients into the wet batter until just combined. Avoid overmixing; use a motion of cutting through the batter and then lifting it from the bottom of the bowl. This minimizes gluten development for a tender crumb.

Step 19
Once most of the flour streaks have disappeared, pour in the prepared milk and vinegar mixture. Gently mix again until just incorporated. Stop mixing as soon as you no longer see dry flour.

Step 20
Your smooth red velvet muffin batter is now ready. Be careful not to overmix during this final stage.

Step 21
Fill your prepared muffin cups (greased or lined) about halfway full with the red velvet batter. Overfilling will cause the muffins to overflow during baking.

Step 22
Remove the chilled Oreo cream cheese log from the refrigerator and divide it into 12 equal portions. A knife or bench scraper can help you cut it cleanly.

Step 23
Gently flatten each portion of the Oreo topping with your hands and place it on top of the muffin batter. It’s okay if it doesn’t cover the entire surface.

Step 24
Bake in the preheated 180°C (350°F) oven for 16 to 18 minutes. A toothpick inserted into the center should come out clean when the muffins are done.

Step 25
And there you have it – the spookily captivating yet deliciously sweet Halloween Red Velvet Muffins! Once completely cooled, store them in an airtight container in the refrigerator to maintain freshness.
