
Spicy & Chewy Dakgalbi: Homemade Korean Stir-Fried Chicken
The Ultimate Guide to Making Delicious Dakgalbi at Home

Tender chicken thigh meat marinated in a spicy and sweet sauce, stir-fried with a generous mix of fresh vegetables, chewy rice cakes, and other delicious additions. You can recreate the irresistible flavor of restaurant-style Dakgalbi right in your own kitchen! Our secret tip of marinating the chicken in milk for 15 minutes tenderizes the meat and removes any unwanted odors. This detailed recipe includes a customizable sauce, tips for adding toppings like rice cakes, and instructions for making a delicious fried rice at the end.
Main Dakgalbi Ingredients- 500g Boneless Chicken Thighs (leaner cuts preferred)
- 1/2 cup Milk (for tenderizing and odor removal)
- 1/6 head Napa Cabbage
- 1 medium Sweet Potato
- 1/2 Onion
- 1/4 Carrot
- 1/2 stalk Green Onion (Scallion)
- 7 leaves Perilla Leaves (Kkaennip)
- Small amount of Korean Green Chili Peppers (for heat)
- 1 Red Chili Pepper (for color)
- 1 handful Tteokbokki Rice Cakes
- 150g Mozzarella Cheese
Special Dakgalbi Sauce- 3 Tbsp Gochujang (Korean chili paste)
- 3 Tbsp Gochugaru (Korean chili flakes)
- 2 Tbsp Soy Sauce
- 2 Tbsp Mirin (or rice wine)
- 2 Tbsp Cheongju (or ginger wine)
- 1 Tbsp Minced Garlic
- Small amount of Minced Ginger (optional)
- Pinch of Black Pepper
- 1 Tbsp Sesame Oil
- 3 Tbsp Gochujang (Korean chili paste)
- 3 Tbsp Gochugaru (Korean chili flakes)
- 2 Tbsp Soy Sauce
- 2 Tbsp Mirin (or rice wine)
- 2 Tbsp Cheongju (or ginger wine)
- 1 Tbsp Minced Garlic
- Small amount of Minced Ginger (optional)
- Pinch of Black Pepper
- 1 Tbsp Sesame Oil
Cooking Instructions
Step 1
Prepare the Chicken: Cut the boneless chicken thighs into bite-sized pieces (about 1.5-2 inches). Place them in a bowl, pour in 1/2 cup of milk, and let it marinate for 15 minutes. This step is crucial for tenderizing the meat and removing any gamey odor. After 15 minutes, drain the milk and rinse the chicken lightly. Pat it completely dry with paper towels.

Step 2
Chop the Vegetables: Cut the napa cabbage into thick shreds. Slice the onion into thick strips. Cut the carrot into about 0.5cm thick slices or thick strips. Aim for similar sizes so they cook evenly.

Step 3
Prepare Aromatic Vegetables and Chilies: Cut the green onions into 1.5-2 inch lengths or at a bias. Wash the perilla leaves, remove the stems, and cut them into thick strips. Slice the red and green chilies diagonally for a visually appealing presentation.

Step 4
Prepare Rice Cakes and Sweet Potato: Rinse the tteokbokki rice cakes under cold water. If they are hard, briefly blanch them in boiling water to soften them. Peel the sweet potato and cut it into thick matchsticks (about 0.5cm thick). Cutting them too thin might cause them to break apart during cooking.

Step 5
Make the Special Dakgalbi Sauce: In a bowl, combine 3 Tbsp gochujang, 3 Tbsp gochugaru, 2 Tbsp soy sauce, 2 Tbsp mirin, 2 Tbsp cheongju, 1 Tbsp minced garlic, a pinch of minced ginger (if using), a pinch of black pepper, and 1 Tbsp sesame oil. Mix well to create a flavorful sauce.

Step 6
Marinate the Chicken: Add the prepared Dakgalbi sauce to the dried chicken pieces. Use your hands to thoroughly coat the chicken. Cover the bowl with plastic wrap and refrigerate for at least 1 hour, or ideally 2-3 hours, to allow the flavors to meld deeply into the chicken.

Step 7
Start Stir-Frying (Phase 1): Heat a tablespoon of cooking oil in a large skillet or wok over medium heat. Add the marinated chicken and the sliced sweet potatoes. Stir-fry until the chicken is about 60-70% cooked. At this point, use kitchen shears to cut the chicken into more manageable, bite-sized pieces directly in the pan. Add the napa cabbage, carrot, and onion, and continue to stir-fry until the vegetables begin to soften slightly. Add the tteokbokki rice cakes and cook along with the other ingredients.

Step 8
Continue Stir-Frying (Phase 2): Once the vegetables are tender-crisp, add the perilla leaves, green onions, and chilies. Stir-fry for just another minute or two to preserve their fresh flavor and aroma. Avoid overcooking, as the vegetables can become mushy.

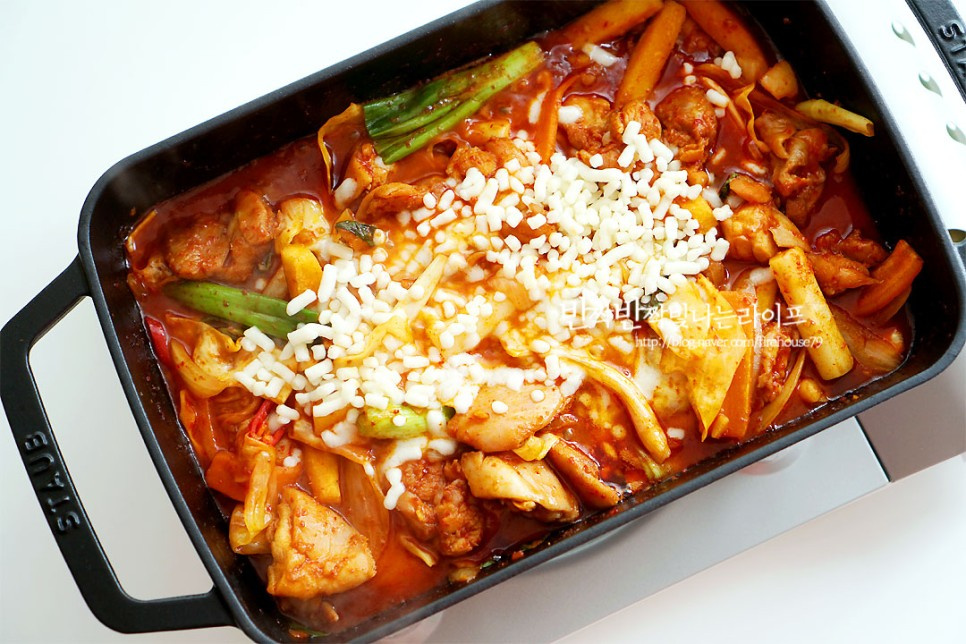
Step 9
Add Cheese and Finish: Transfer the Dakgalbi to a portable burner at your dining table for a fun, interactive meal. Sprinkle a generous amount of mozzarella cheese over the top. Cover with a lid or reduce the heat to low and let the cheese melt until it’s gooey and stretchy.

Step 10
Serving Tips & Fried Rice: Once the cheese is melted, enjoy the delicious Dakgalbi! For an extra treat, use any remaining sauce in the pan to make a delicious fried rice. Add cooked rice, chopped kimchi, roasted seaweed flakes (gim), and sesame oil, then stir-fry until heated through. You can even add more cheese to the fried rice if you like!
