
Spicy and Delicious Spring Scallion Kimchi: A Rice Thief!
A Delicious Scallion Kimchi Recipe Using Fresh Spring Scallions and a Method to Keep Them Fresh

Hearing from my brother that my nephew loves scallion kimchi, I decided to make some with fragrant spring scallions. It’s delicious right after making, and even more so when aged and fermented, making it a perfect companion for rice. Its refreshing, slightly pungent flavor is a true appetite stimulant! Aged scallion kimchi is also a ‘masterstroke’ when added to kimchi stew or pork backbone soup, enriching the broth’s depth.
Kimchi Ingredients- 1 bunch fresh scallions (approx. 400-500g)
- 1 paper cup (approx. 180ml) fish sauce (anchovy or sand lance)
- 2 tablespoons fine yellow sugar or white sugar (approx. 30g)
- 1 teaspoon coarse sea salt (approx. 5g)
- 1 packet sweet pear juice (store-bought or homemade; add 1 tbsp sugar if unavailable)
- Plenty of roasted sesame seeds (for garnish)
- 1 paper cup (approx. 100g) cooked rice (used as a binder instead of flour paste)
Cooking Instructions
Step 1
It’s crucial to prepare the scallions while they are fresh. First, gently remove any wilted or damaged outer leaves and trim the roots. Pay close attention to cleaning the root area, as it can hold a lot of soil.

Step 2
If you want to keep your scallions fresh for longer, try the ‘scallion investment’ method! Trim the fine roots with scissors and cut the white bulbous parts into about 5-7 cm lengths. Place these cut white parts in a clean container with a small amount of water. You can leave it as is, or transplant it into a pot and harvest only the green tops as needed, enjoying fresh scallions for a long time!

Step 3
If you have a garden, you can plant the trimmed scallion roots. They will regrow, and in spring, new shoots will emerge quickly just from the roots. (This step is optional and does not directly affect the kimchi-making process.)

Step 4
Wash the scallions thoroughly under running water multiple times to remove any dirt or debris. Drain them well in a colander. Once well-drained, place the scallions in a large bowl for mixing. Now, let’s make the essential kimchi paste. In a blender, combine the cooked rice, sweet pear juice, sugar, coarse salt, and fish sauce. Blend until smooth. Note: Garlic and ginger are omitted in this recipe because they can cause a bitter taste when the kimchi ferments. Remember this!

Step 5
Add the Korean chili powder to the blended paste and gently mix it with the scallions, ensuring the seasoning coats them evenly without breaking. Now it’s time to taste. If it’s too bland, add a little more coarse salt. If it’s not sweet enough, add more sugar. If the color isn’t vibrant enough, add a bit more chili powder to achieve the desired hue. Gently mix again after adjusting the seasoning and color.

Step 6
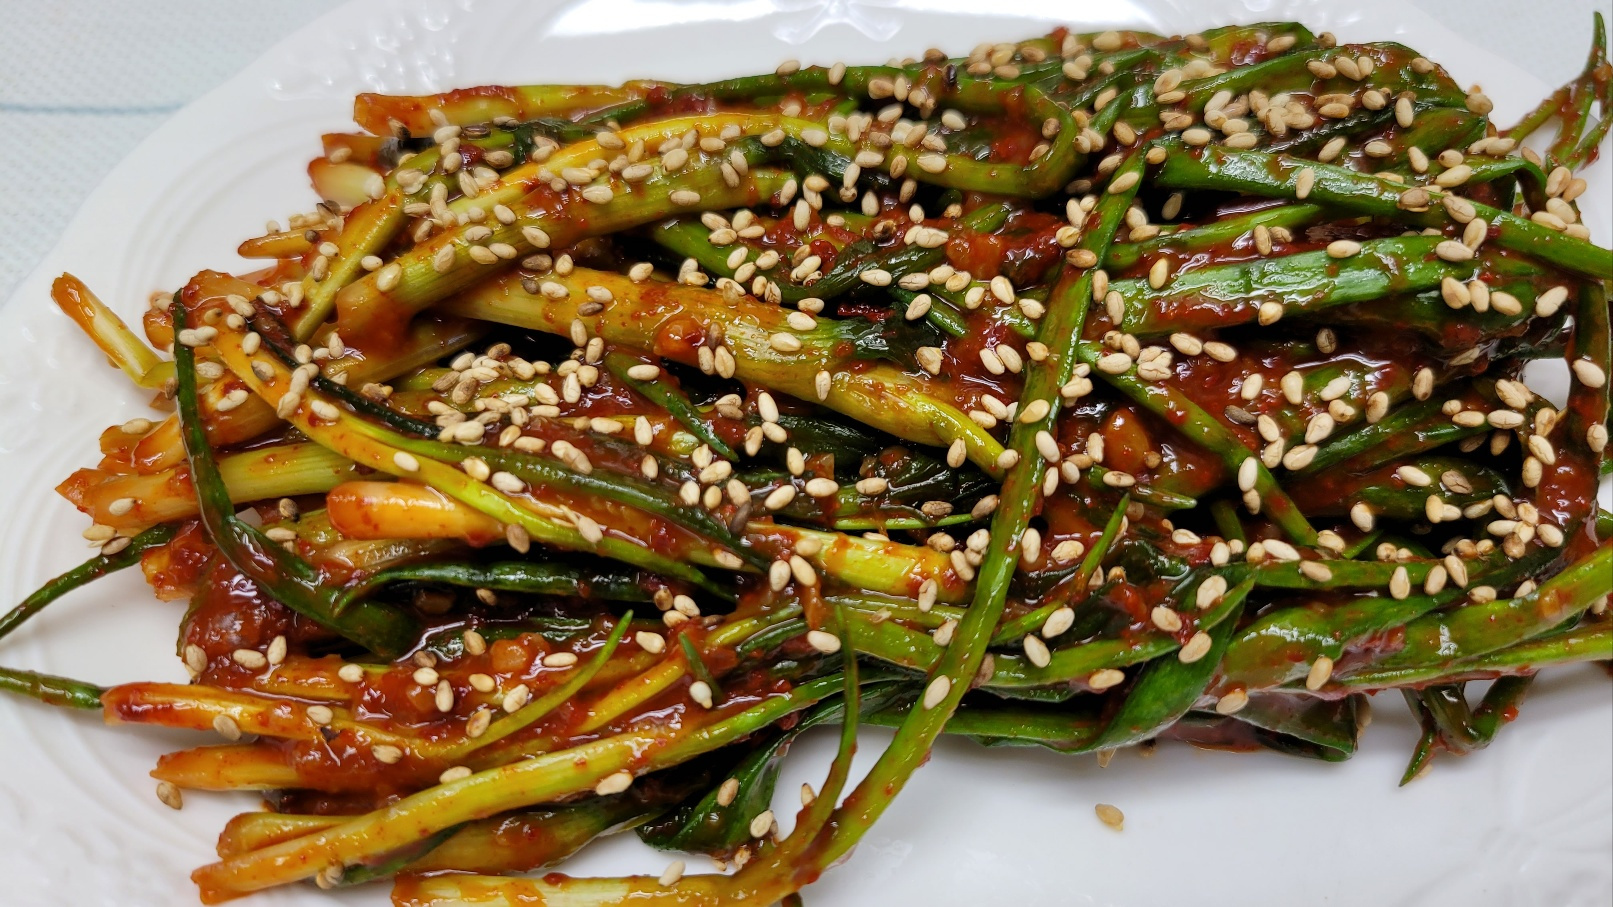
Once the scallion kimchi is perfectly seasoned to your liking, pack it neatly into your kimchi container. Finish by generously sprinkling roasted sesame seeds on top for added nutty flavor and texture. The popping sensation of the sesame seeds will make it even more delicious.

Step 7
If you wish to enjoy the kimchi immediately, plate a portion prettily. You can savor the fresh and crisp taste of newly made scallion kimchi right away.

Step 8
Here’s a special method for delicious aged scallion kimchi! Don’t seal the container lid completely; place it slightly askew to allow some air circulation. Leave it in a cool place overnight to let the kimchi lightly ferment. Then, transfer it to a kimchi refrigerator for proper storage. This process will deepen and enrich the flavor of your scallion kimchi.
