
Simple Tuna Mayo Gimbap
Kids’ Favorite ‘Tuna Mayo Gimbap’ Recipe with Just 2 Main Fillings

Introducing a Tuna Mayo Gimbap recipe that the whole family, especially kids, will absolutely love! By using sushi rice seasoned with a sweet and sour vinegar mixture, these gimbap won’t spoil easily, making them perfect for children’s picnic lunches. My daughter adores them!
Basic Ingredients- 3 sheets of Gim (seaweed for gimbap)
- 1 can (270g) Tuna
- 9 strips of Pickled Radish (Danmuji)
- 500g Warm Cooked Rice (approx. 2.5 bowls)
Sushi Rice Seasoning (Vinegar Mixture)- 3 Tbsp Rice Vinegar
- 1.5 Tbsp Sugar
- 1 tsp Salt
Tuna Filling Seasoning- 1 Tbsp Sugar
- 1 Tbsp Soy Sauce
- 3 Tbsp Rice Vinegar
- 1.5 Tbsp Sugar
- 1 tsp Salt
Tuna Filling Seasoning- 1 Tbsp Sugar
- 1 Tbsp Soy Sauce
Cooking Instructions
Step 1
Here are all the ingredients prepared to make delicious Tuna Gimbap.

Step 2
Let’s make the sushi vinegar mixture. In a small bowl, combine 3 Tbsp rice vinegar, 1.5 Tbsp sugar, and 1 tsp salt. Stir well. It’s okay if the sugar isn’t completely dissolved, as it will melt into the warm rice. Adjust the sugar and vinegar amounts to your preference for sweetness and sourness.

Step 3
Add 500g (about 2.5 bowls) of warm cooked rice to the prepared sushi seasoning. Mix evenly with a spatula or spoon to create seasoned sushi rice.

Step 4
It’s crucial to let this sushi rice cool completely. If you roll the gimbap while the rice is hot, the seaweed will become soggy, and the rice will clump, resulting in an unappealing shape. If you’re in a hurry, using a fan to cool it down quickly is a great option.

Step 5
Drain the oil from the canned tuna. Tilt the can slightly with the lid ajar, and the oil will drain out cleanly. Removing as much oil as possible prevents the rice from becoming too moist.

Step 6
In a bowl, combine the drained tuna with 1 Tbsp sugar and 1 Tbsp soy sauce. Mix well with a fork or spoon until evenly seasoned. The mixture should be tasty enough to eat as is.

Step 7
Before adding the pickled radish (danmuji) to the gimbap, give it a quick rinse. Then, press it firmly with kitchen paper towels to thoroughly remove any excess water. Excess moisture can cause the gimbap to break easily.

Step 8
Place a sheet of gimbap seaweed on a bamboo rolling mat, with the rough side facing up. Also, prepare a spoon and a small bowl of water for spreading the rice.

Step 9
When spreading the rice on the seaweed, dipping your spoon in water occasionally will prevent the rice from sticking, making the process much smoother. Don’t use too much rice, or the gimbap might burst when rolled.

Step 10
Spread the rice evenly over about two-thirds of the seaweed sheet. Leave the top third of the seaweed bare so that the end of the roll seals neatly.

Step 11
Place a generous amount of the seasoned tuna and the drained pickled radish strips over the rice. Be careful not to overfill, as this can also cause the gimbap to break.

Step 12
Using the bamboo mat, lift the edge closest to you and start rolling the gimbap tightly, ensuring the fillings stay in place. Bring the mat all the way to the end of the rice and press firmly with your fingers to shape the roll.

Step 13
Once rolled, remove the gimbap from the mat. Slice it into bite-sized pieces, and it’s ready!

Step 14
Brush a little sesame oil on the cut surface of the gimbap for a nice sheen and an added nutty aroma.

Step 15
To slice the gimbap cleanly without squishing it, lightly dampen your knife with water or sesame oil. Then, gently saw through the gimbap with the tip of the knife, pulling slightly towards you.

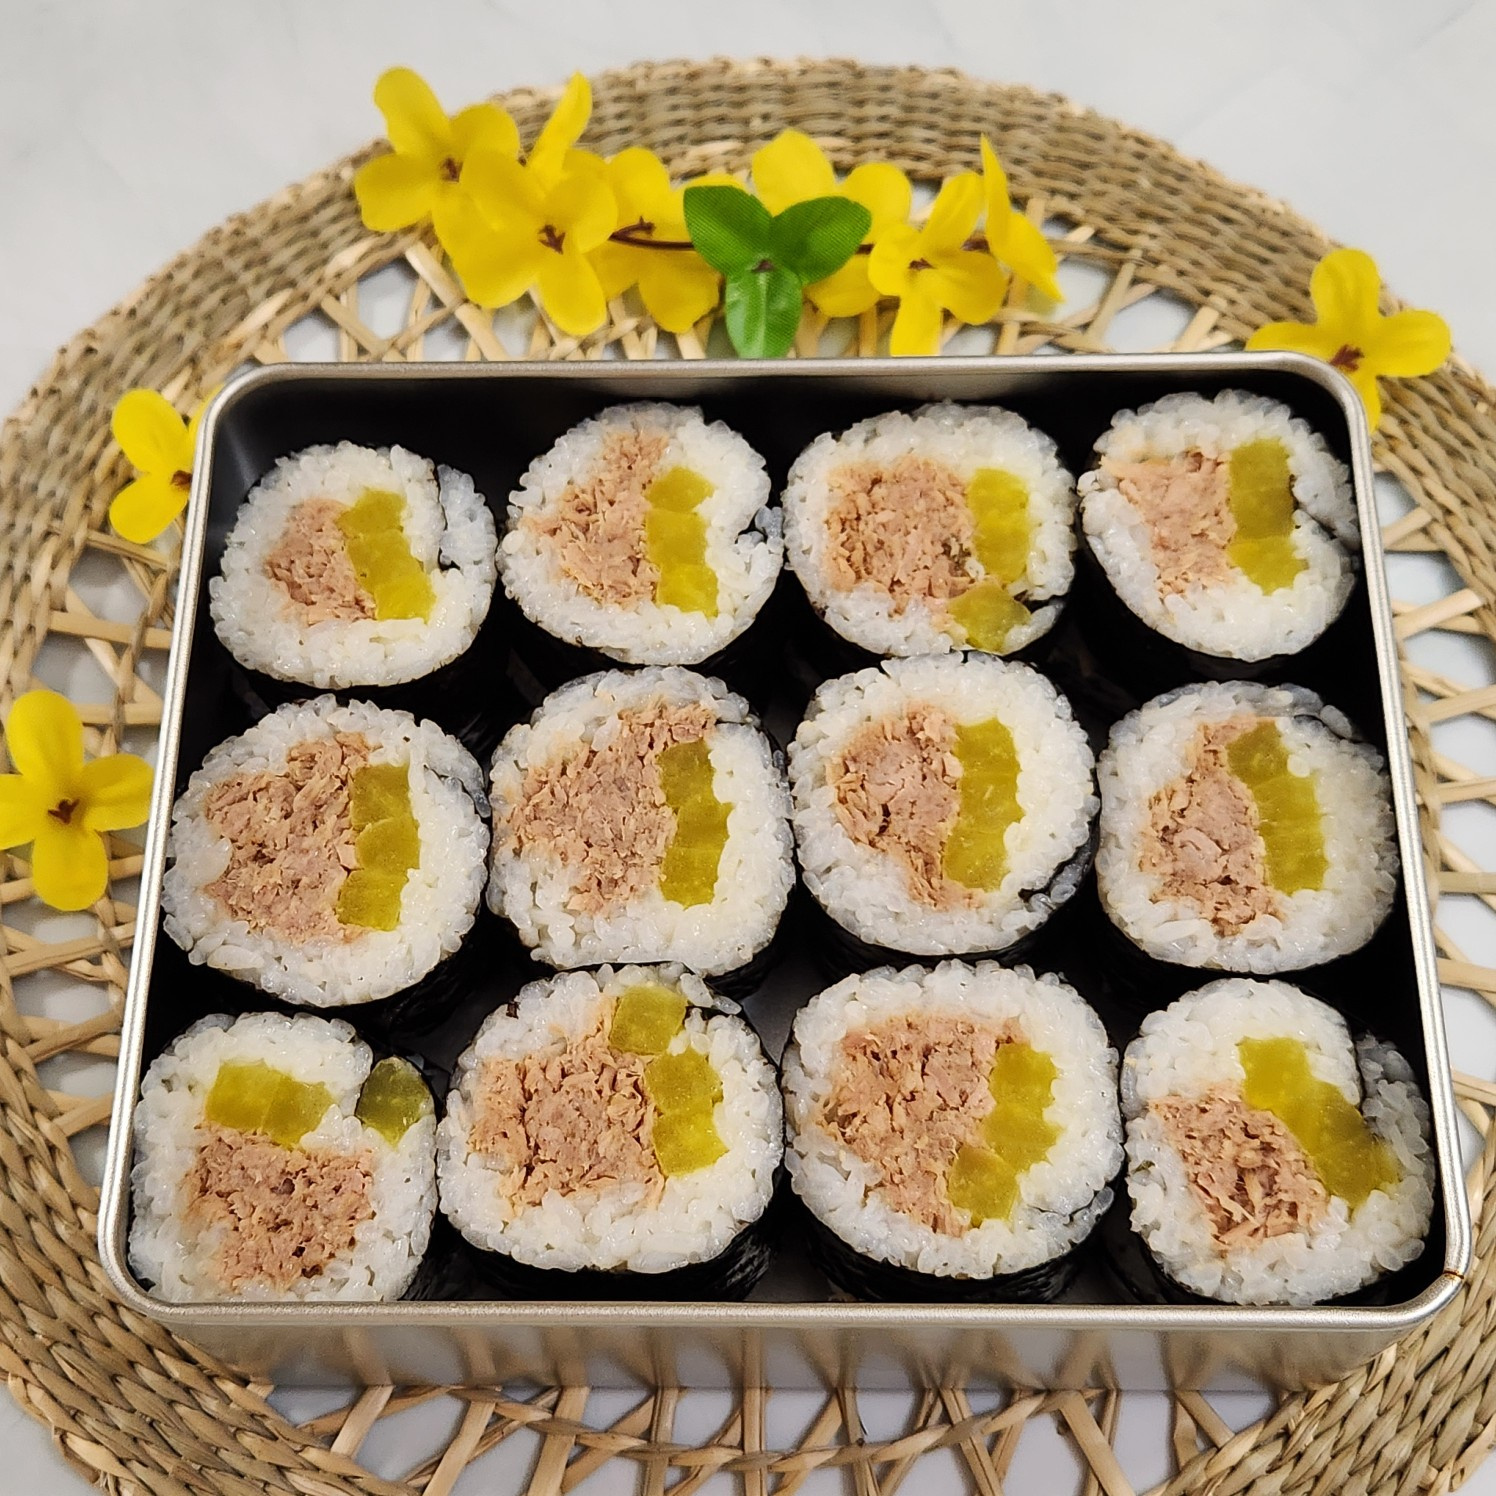
Step 16
This Tuna Gimbap is truly delightful with the perfect balance of tangy sushi rice and savory tuna. Thanks to the vinegar, it stays fresh longer, making it an excellent choice for picnics or lunches on the go. Everyone will love it! Enjoy your delicious creation!
