
Rich & Flavorful Udon: Homemade Dashi Broth Recipe
Mastering Udon Broth: The Secret to Deep Flavor with Bonito Flakes

Dreaming of authentic Japanese Udon at home? Skip the store-bought broth and discover the unparalleled umami of homemade! This recipe guides you through a simple yet profound method for creating a clear, deeply flavorful Udon soup base, focusing on precise heat control and steeping times. Even beginners can achieve a restaurant-quality broth that perfectly complements chewy udon noodles. Enjoy a comforting and delicious bowl that warms you from the inside out.
Main Ingredients- 2 servings of chewy Udon noodles
- A small bunch of crown daisy (Shungiku)
- A bit of scallion
- A piece of dried seaweed (Nori)
Bonito Dashi Broth Base- 20g dried kelp (Kombu) for steeping in cold water
- 40g bonito flakes (Katsuobushi) for deep flavor
Udon Soy Sauce Seasoning- 100ml Japanese soy sauce (Usukuchi or Koikuchi)
- 100ml Mirin (sweet rice wine)
- 30g Sugar (approx. 4 tablespoons)
- 20g dried kelp (Kombu) for steeping in cold water
- 40g bonito flakes (Katsuobushi) for deep flavor
Udon Soy Sauce Seasoning- 100ml Japanese soy sauce (Usukuchi or Koikuchi)
- 100ml Mirin (sweet rice wine)
- 30g Sugar (approx. 4 tablespoons)
Cooking Instructions
Step 1
In a large, deep pot, pour 2 liters of cold water. Add 2 sheets of cleaned dried kelp (Kombu, about 20g), starting from cold water to extract maximum flavor, and bring to a boil over high heat.

Step 2
As soon as small bubbles begin to form and the water is about to boil, immediately reduce the heat to low. Skim off any foam that rises to the surface with a spoon. This step is crucial for a clear and clean broth. Let the kelp steep gently for 10 minutes.

Step 3
After 10 minutes, remove the kelp. Turn off the heat briefly and add the bonito flakes (Katsuobushi, 40g). Let them steep gently over low heat for about 5 minutes to infuse their rich aroma. Once steeped, carefully strain the broth through a fine-mesh sieve to remove all solids, leaving only a clear, amber liquid. This ensures a pure broth flavor.

Step 4
In a separate pot, measure and pour in 100ml of Japanese soy sauce and 100ml of Mirin. Mirin helps to remove any potential fishy smell from the bonito and adds a subtle sweetness and depth.

Step 5
Add 30g of sugar (approximately 4 tablespoons) to the soy sauce and Mirin mixture. Stir gently over low heat until the sugar is completely dissolved. Once dissolved, turn off the heat immediately to prevent any bitterness.

Step 6
Pour the seasoned soy sauce mixture into the clear bonito dashi broth you prepared earlier and stir well to combine. A standard ratio for Udon broth is about 1 part seasoned soy sauce to 5 parts bonito dashi. Taste and adjust the amount of soy sauce or sugar according to your preference.

Step 7
Now, it’s time to cook the udon noodles. Bring a generous amount of water to a rolling boil. Add the 2 servings of udon noodles and cook according to the package instructions, usually around 3-4 minutes, until they reach a chewy al dente texture. Once cooked, immediately drain them and rinse under cold running water to remove excess starch, then drain thoroughly. This process makes the noodles delightfully springy.

Step 8
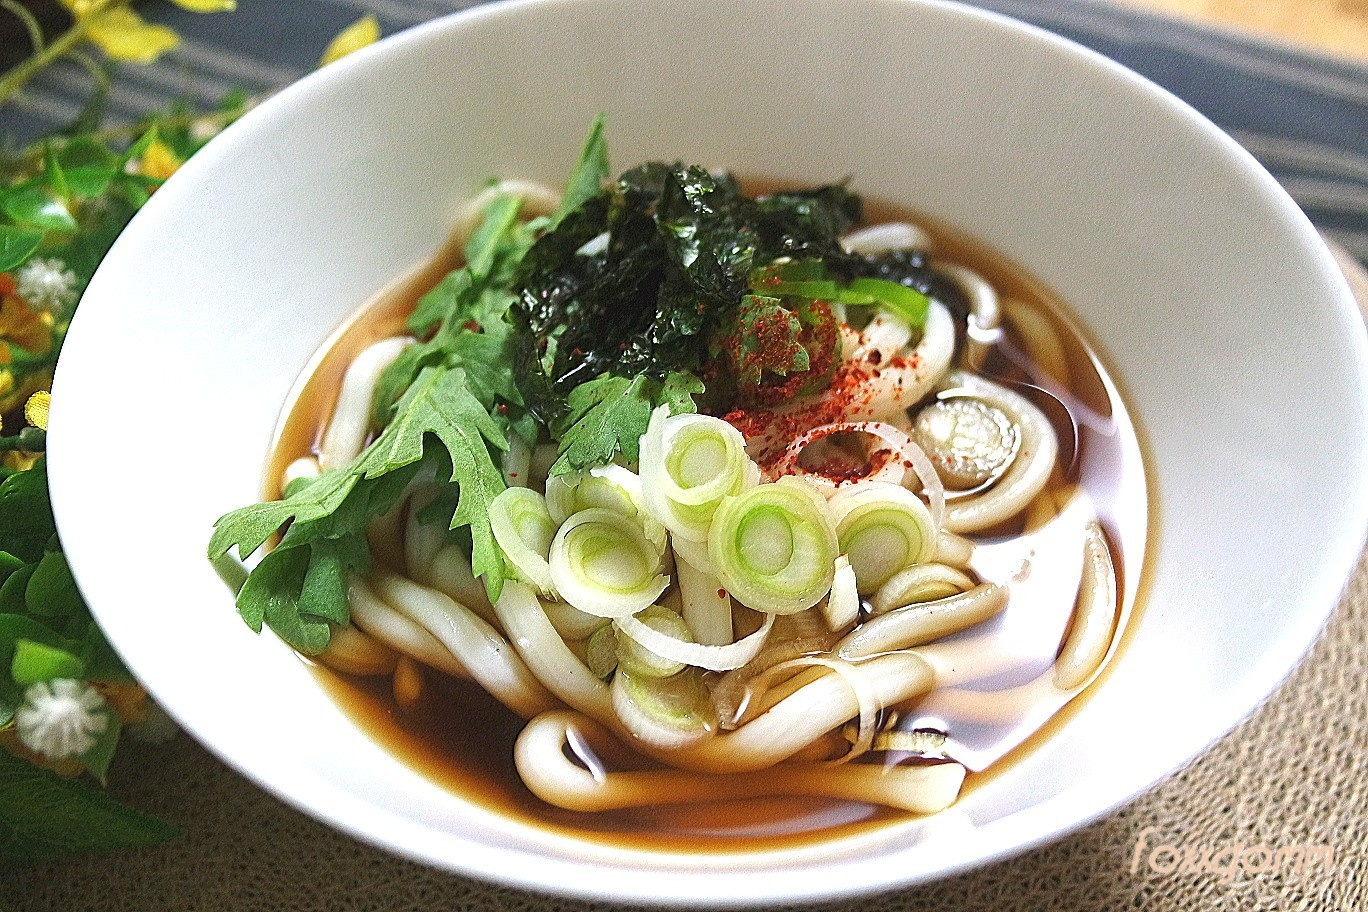
Prepare your desired toppings for the Udon. Wash the crown daisy and slice the scallions thinly. Cut the dried seaweed into desired pieces or crumble it. Feel free to add other toppings like a poached egg, fish cakes, or fried tofu pouches for an even more satisfying meal.

Step 9
Place the cooked, drained udon noodles into a deep serving bowl. Ladle the warm, prepared Udon broth generously over the noodles. Finally, arrange your prepared toppings like crown daisy, scallions, and seaweed attractively on top. This completes your simple and elegant homemade basic Udon! Take a moment to savor the rich, comforting flavor of the broth, carefully crafted with bonito and kelp, and enjoy a warm, hearty meal.
