
Quick Yeolmu Kimchi Bibimbap from Mom’s Recipe
[Solo Meal Delight] 5-Minute Yeolmu Bibimbap: Simple Recipe with Delicious Sauce

Craving a hearty home-cooked meal but don’t want to go out or order delivery? Today, I dug into my fridge and found some delicious yeolmu kimchi made by my mom. So, I decided to whip up a simple yet incredibly satisfying Yeolmu Bibimbap using it! This is the perfect dish for those days when you need a quick, flavorful meal.
Essential Ingredients- 1 bowl of warm rice
- 1/2 bowl of yeolmu kimchi (fermented radish greens), chopped
- 1 egg
Optional Ingredient- 1 small can of tuna (100g), drained
- 1 small can of tuna (100g), drained
Cooking Instructions
Step 1
Hello everyone! Today, I’m sharing a super easy recipe for ‘Yeolmu Bibimbap’ that you can make right at home. All you need is some delicious yeolmu kimchi, preferably homemade like my mom’s, and you’ll have a fantastic meal in no time. I’ll also guide you through making the perfect bibimbap sauce!

Step 2
Just a note on measurements: I’ve used a standard rice bowl and spoon for all quantities. You’ll need 1 bowl of warm rice, about 1/2 bowl of chopped yeolmu kimchi, and 1 egg. If you’d like to add a little extra protein, a small 100g can of drained tuna is a great optional addition. For the sauce, gather 1 Tbsp gochujang, 1 Tbsp sesame oil, 1 Tbsp oligodang (or corn syrup), 1 Tbsp toasted sesame seeds, 1/3 Tbsp minced garlic, and 1 Tbsp soy sauce.

Step 3
First, let’s prepare the yeolmu kimchi. Chop it into bite-sized pieces. You’ll need about half the amount of rice in terms of volume. Crucially, do NOT add any of the kimchi brine to your bibimbap! Adding the brine will make the dish too watery and dilute the flavors. Set the kimchi aside, leaving the brine behind.

Step 4
The tuna is completely optional! I just happened to have it on hand, so I decided to include it. (chuckles) If you’re using canned tuna, make sure to drain all the oil thoroughly, or place it in a sieve to let the oil drip away completely. Keeping the flavor clean and not oily is key.

Step 5
Now, let’s make the star of the dish – the bibimbap sauce! In a small bowl, combine 1 Tbsp gochujang, 1 Tbsp sesame oil, 1 Tbsp oligodang, 1 Tbsp toasted sesame seeds, 1/3 Tbsp minced garlic, and 1 Tbsp soy sauce.

Step 6
Mix all the sauce ingredients together well with a spoon until they are thoroughly combined. This creates a beautifully balanced sauce. You can taste it and adjust the gochujang or soy sauce to your preference if needed.

Step 7
No bibimbap is complete without a lovely fried egg! Heat a little oil in a pan and crack the egg in. You could make it sunny-side up and let the yolk run into the rice, but today, due to the ‘AI’ (a playful nod to potential overcooking!), I cooked it through on both sides. Feel free to cook it to your preferred doneness, from runny yolk to fully set.

Step 8
Alright, it’s time to bring everything together! In a large mixing bowl, place the warm 1 bowl of rice. Add the drained tuna (if using), the chopped yeolmu kimchi, and the delicious bibimbap sauce you just made.

Step 9
Now for the best part: mixing! Grab your spoon and mix everything together vigorously until all the ingredients are well combined and coated with the sauce. It’s already incredibly tasty like this, but let’s make it look as good as it tastes!

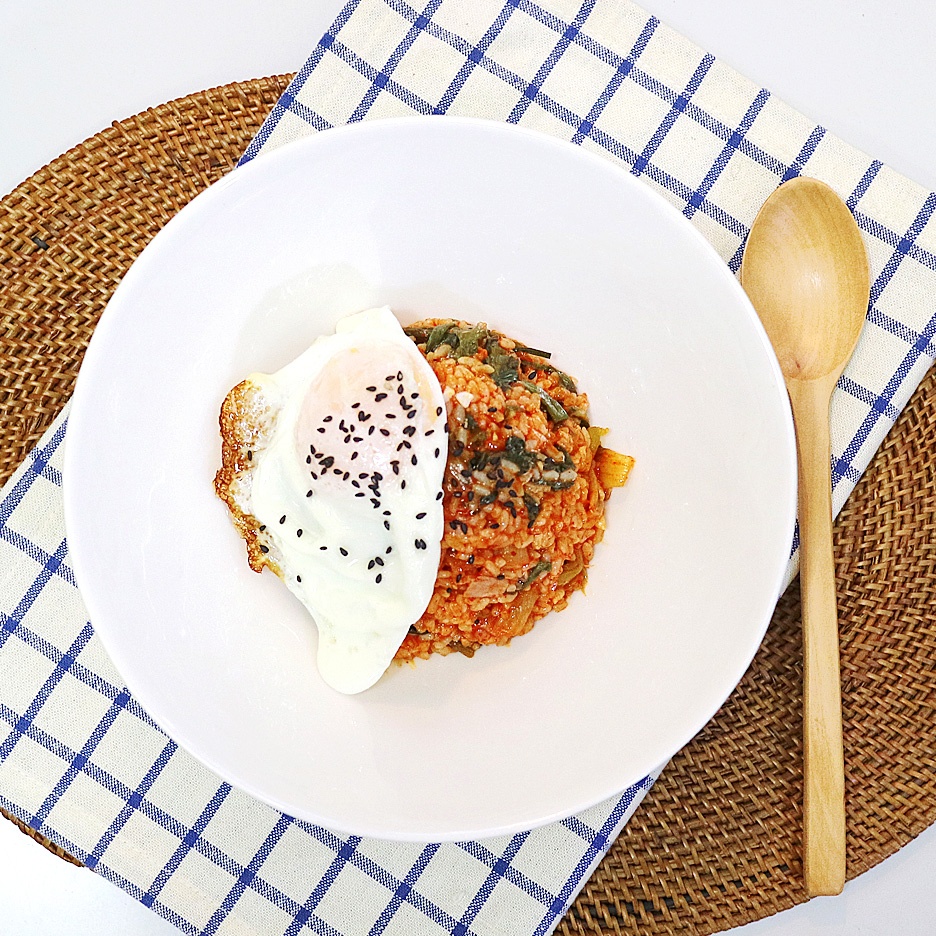
Step 10
Transfer the well-mixed bibimbap to a nice serving bowl. Gently place the fried egg on top, and then sprinkle some black sesame seeds for a final touch of flavor and visual appeal. Your delicious Yeolmu Bibimbap is ready to be enjoyed! Enjoy your meal!
