
Quick Radish Salad Bibimbap with Tuna
5-Minute No-Gochujang Radish Salad Bibimbap with Tuna: Simple & Delicious Recipe

Whip up this incredibly simple Radish Salad Bibimbap in under 5 minutes for a busy morning meal! No need for gochujang or even a fried egg, this recipe is quick, nutritious, and satisfying.
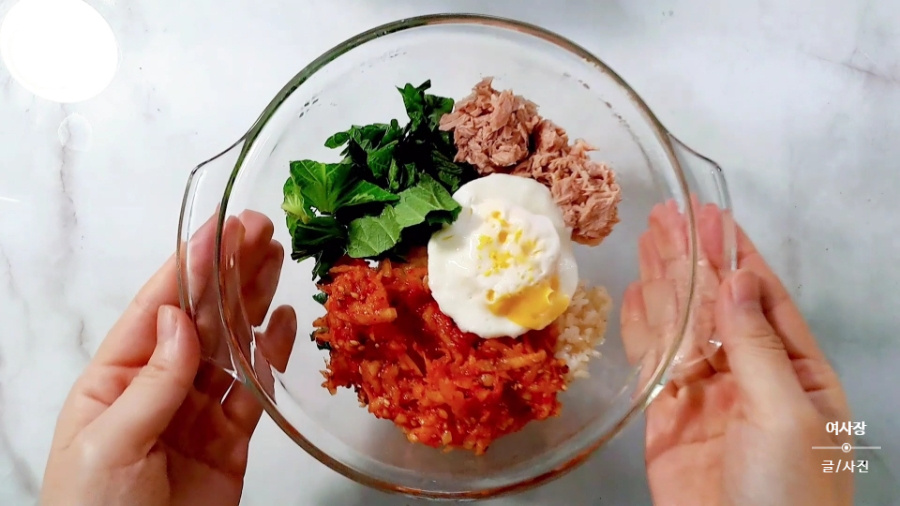
Ingredients- Prepared radish salad (musaengchae)
- Brown rice (or your preferred rice)
- 3-4 fresh perilla leaves
- 2 tbsp canned tuna
- 1 egg (optional)
- A pinch of seasoned seaweed (gim)
Cooking Instructions
Step 1
First, prepare your hearty brown rice. If you usually cook rice in batches and freeze it, simply transfer a portion from the freezer to the refrigerator the night before. In the morning, gently reheat it in the microwave until warm. While the rice is heating, wash the 3-4 fresh perilla leaves and finely chop them with scissors.

Step 2
To ensure a good source of protein, add the tuna. Drain about 2 tablespoons of canned tuna and add it to your bibimbap bowl. Draining the excess oil will make it even lighter.

Step 3
Next, add a generous portion of your delicious homemade radish salad (musaengchae). The crisp texture and tangy, slightly sweet flavor will elevate your bibimbap.

Step 4
To keep the meal light and suitable for breakfast, I’ve omitted the gochujang and added more radish salad. My recent batch of radish salad was made with chili powder, so it’s not overly spicy. (Feel free to add gochujang or more chili powder if you prefer a spicier kick.)

Step 5
Even on a busy morning, we can add a simple poached egg for extra richness. (Optional) Using a microwave egg poacher, readily available at stores like Daiso, makes this easy. Follow the instructions: prick the yolk, add 2 tablespoons of water, and microwave for about 50 seconds until cooked. (Microwave times may vary.)

Step 6
Carefully drain the water from the egg poacher and gently place the poached egg on top of your bibimbap. Be delicate to avoid breaking the yolk.

Step 7
Finally, crumble or snip some seasoned seaweed (gim) over the bibimbap for a burst of savory flavor. Enjoy this incredibly simple yet delicious and satisfying bibimbap at home, much cheaper than eating out! It provides a wonderfully filling meal that helps you focus and power through your day.
