
Old Pumpkin Pancakes: A Healthy Snack for Diabetics
Diabetic-Friendly Food #OldPumpkinPancakes #HealthyLiving

Deliciously sweet and tender pancakes made from old pumpkin. We’ve used stevia to reduce the impact on blood sugar, allowing you to fully enjoy the rich nutrients and natural sweetness of the pumpkin. These are a perfect snack not only for diabetics but for anyone mindful of their health. Experience the chewy texture and the authentic pumpkin flavor that fills your mouth.
Old Pumpkin Pancake Ingredients & Seasoning- 1/4 old pumpkin
- 1 Tbsp salt
- Stevia to taste (adjust as needed)
- 1 cup starch (paper cup measurement)
Cooking Instructions
Step 1
Old pumpkin is a versatile ingredient that can be enjoyed in many ways. You can make warm and delicious pumpkin porridge, sweet pumpkin mash, or chewy pumpkin candy. Alternatively, steeping or simmering the pumpkin flesh can yield a tea that warms the body and aids circulation, making it perfect for chilly weather.

Step 2
Let’s prepare the main ingredients and seasonings for today’s old pumpkin pancakes. You’ll need 1/4 old pumpkin, 1 Tbsp salt, a little stevia, and 1 cup of starch. Stevia is included to ensure this dish is suitable for a diabetic-friendly diet.

Step 3
First, scoop out the seeds from the 1/4 old pumpkin and carefully peel off the tough skin. Then, use a mandoline or grater to thinly julienne the pumpkin. Sprinkle 1 Tbsp of salt evenly over the julienned pumpkin and let it sit for about 10 minutes. This process helps to draw out excess moisture, season the pumpkin, and make it more tender.

Step 4
To make these pancakes suitable for diabetics, we’re using stevia instead of sugar. Stevia is quite sweet even in small amounts, so taste as you go and adjust the quantity to your preference. For this recipe, we added an appropriate amount after tasting.

Step 5
After letting the pumpkin sit with the salt, gently knead it. This will help the salt to fully incorporate and create a slight amount of liquid from the pumpkin’s natural moisture, aiding in seasoning.

Step 6
Instead of flour, we’ll use starch to achieve a wonderfully chewy texture. Add about 80% of the 1 cup of starch (approximately 80g) to the pumpkin mixture. Be careful not to add too much starch, as it can make the pancakes dense.

Step 7
Mix the ingredients by kneading them together with your hands. You’ll notice the pumpkin and starch starting to bind, creating a cohesive dough with a sticky, viscous texture.

Step 8
To ensure the pumpkin pancakes hold their shape and don’t fall apart during cooking, the right amount of starch is crucial. Gradually add the remaining 20% of the starch while mixing, adjusting the dough’s consistency until it’s perfectly sticky. It’s best to use the minimum amount of starch necessary to highlight the pumpkin’s natural flavor.

Step 9
Now it’s time to cook! Heat a generous amount of olive oil in a frying pan. Spoon portions of the pumpkin mixture onto the pan, shaping them into small, round, pancake-like discs, about the size of a small saucer. Making them small makes them easier to flip and handle.

Step 10
Use the back of a spoon to gently shape each portion into a neat, round pancake. Cook over medium-low heat to prevent the bottoms from burning. Let the underside cook until it’s golden brown and set.

Step 11
Once the bottom is nicely browned, carefully flip the pancakes using chopsticks or a spatula. Gently press down with the spatula to ensure even cooking. Cook the other side until it’s also golden brown.

Step 12
After both sides are golden brown, flip them once more so the first side cooked is facing up. This brief second cook on the first side helps to enhance the pumpkin’s natural sweetness and ensures the pancakes are cooked through and moist.

Step 13
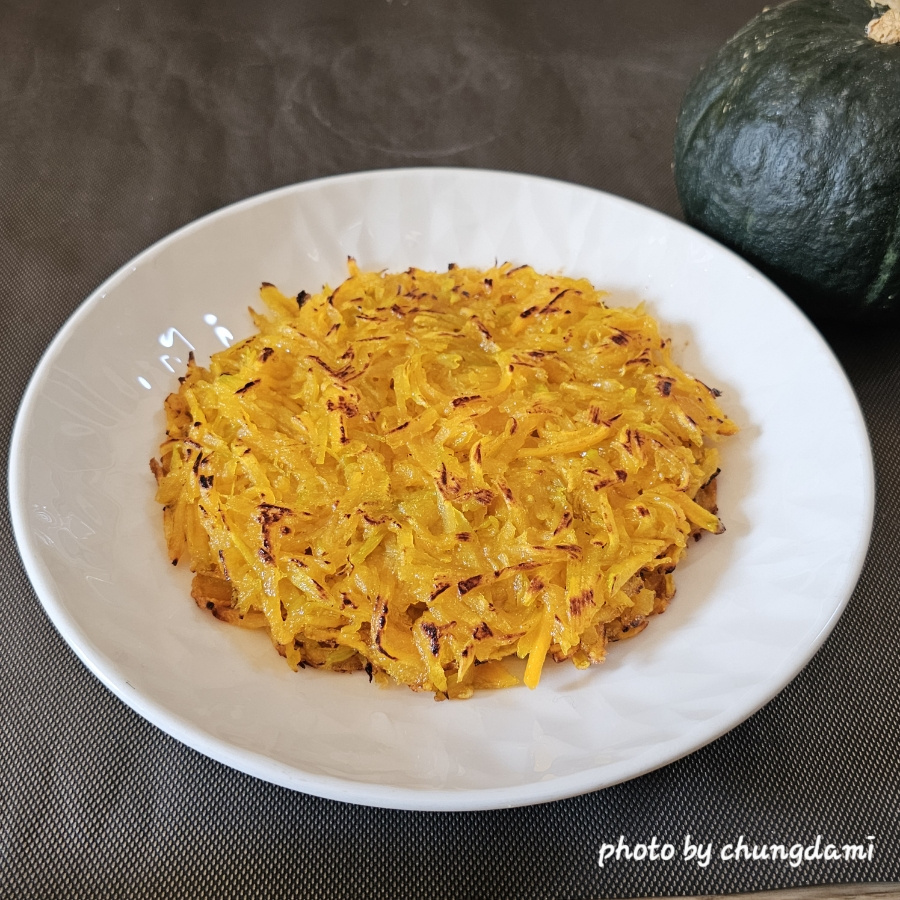
Gently slide the perfectly cooked pumpkin pancakes from the pan onto a serving plate. Making 2-3 pancakes is ideal for a snack. These are wonderful for individuals managing diabetes or anyone focusing on a healthy diet, but even for those without dietary restrictions, the natural sweetness and tender texture are incredibly satisfying.

Step 14
They are seasoned just right, so there’s no need for a dipping sauce. The subtle, natural sweetness of the pumpkin, combined with its savory notes, creates a delightful flavor sensation that feels like pure health entering your body.
