
Old-Fashioned Pork Cutlet (Donkatsu)
Homemade Crispy & Savory Old-Fashioned Pork Cutlet and Special Sauce Recipe

While store-bought options are convenient, nothing beats the satisfying crunch and tender, juicy texture of homemade pork cutlet. It’s surprisingly easy to make at home; all you need is to prepare the coating and fry it until golden brown. If you make a generous batch, you can even portion and freeze it for future delicious meals. Enjoy this nostalgic taste of classic Western-style Japanese cutlet right in your own kitchen!
Pork Cutlet Ingredients- 1kg Pork Loin for Cutlets (ask butcher to pound to desired thickness)
- 2 cups All-purpose Flour
- 3 cups Panko Breadcrumbs
- 3-4 Eggs
- Pinch of Salt (for seasoning)
- Pinch of Black Pepper (for seasoning)
Pork Cutlet Sauce Ingredients- 15g Butter
- 15g All-purpose Flour
- 3 Tbsp Ketchup
- 3 Tbsp Worcestershire Sauce
- 1 Tbsp Sugar
- 1/3 Tbsp Chicken Stock (or dashi broth)
- 100ml Milk
- 3 Tbsp Apple Juice
- 3 Tbsp Onion Juice
- 15g Butter
- 15g All-purpose Flour
- 3 Tbsp Ketchup
- 3 Tbsp Worcestershire Sauce
- 1 Tbsp Sugar
- 1/3 Tbsp Chicken Stock (or dashi broth)
- 100ml Milk
- 3 Tbsp Apple Juice
- 3 Tbsp Onion Juice
Cooking Instructions
Step 1
When purchasing pork loin for cutlets from the butcher, request that it be pounded to a suitable thickness. This saves you the step of tenderizing it at home. First, thoroughly pat the surface of the pork with paper towels to remove any excess blood. Removing blood ensures a cleaner flavor and prevents any gamey taste when fried.

Step 2
Arrange the blotted pork loin slices individually on a wide plate. Season both sides generously with salt and pepper. This step enhances the meat’s natural flavor and contributes to a tender texture.

Step 3
Now, let’s prepare the crispy coating for the cutlets. Crack the eggs into a large bowl and whisk them thoroughly with a fork until smooth. A well-beaten egg mixture ensures an even coating.

Step 4
If there are any clumps in the whisked egg, use kitchen scissors to snip them away. This will prevent the egg wash from clumping when you coat the cutlet, allowing for a smoother application.

Step 5
Prepare your dredging stations by placing all-purpose flour and panko breadcrumbs in separate wide trays or shallow dishes. Having these ready in advance makes the coating process much more efficient.

Step 6
First, lightly coat the seasoned pork slices with all-purpose flour. Gently shake off any excess flour. The flour layer helps the egg wash adhere better to the meat.

Step 7
Next, dip the floured pork into the prepared egg wash, ensuring the entire surface is evenly coated. Let any excess egg wash drip off briefly. This ensures the panko will stick well in the next step.

Step 8
Finally, generously coat the cutlet with panko breadcrumbs. Press the panko gently onto the egg-coated surface to ensure it adheres well. A thick layer of panko will result in an extra crispy finish.

Step 9
You should now have your cutlets coated in the sequence: flour – egg wash – panko. Gently press down to secure the coating. This careful coating process is key to achieving that perfect crunch.

Step 10
Let’s make the sauce! Melt the butter in a saucepan over low heat. Once melted, add the flour and whisk constantly to form a smooth paste (roux). Cook this for a minute or two until lightly golden, stirring to prevent burning. This step develops a nutty flavor and thickens the sauce.

Step 11
Continue cooking the roux over low heat, stirring constantly. You’ll notice it gradually turning a light brown color. Cook until it reaches your desired shade of brown, which adds a lovely toasted aroma and depth of flavor to the sauce.

Step 12
Once the roux is golden brown, add the ketchup, Worcestershire sauce, sugar, chicken stock, milk, apple juice, and onion juice. Whisk everything together until smooth, then bring to a simmer over low heat. Cook, stirring frequently, until the sauce has thickened to your desired consistency. Be careful not to let it burn at the bottom.

Step 13
Heat a generous amount of cooking oil in a deep pan or pot to about 170-180°C (340-350°F). Carefully lower the breaded pork cutlets into the hot oil. Fry them, turning occasionally, until they are golden brown and crisp on both sides. Gently move the cutlets around to ensure even cooking and prevent sticking.

Step 14
Once the cutlets are a beautiful golden brown, carefully remove them from the oil. To check if they are cooked through, insert a skewer or chopstick into the thickest part. If the juices run clear and there’s no pinkness, they are perfectly cooked. This is a great tip for first-time fryers!

Step 15
Immediately place the freshly fried cutlets on a wire rack. This allows excess oil to drain off and, importantly, helps maintain their crispiness by preventing steam from accumulating underneath.

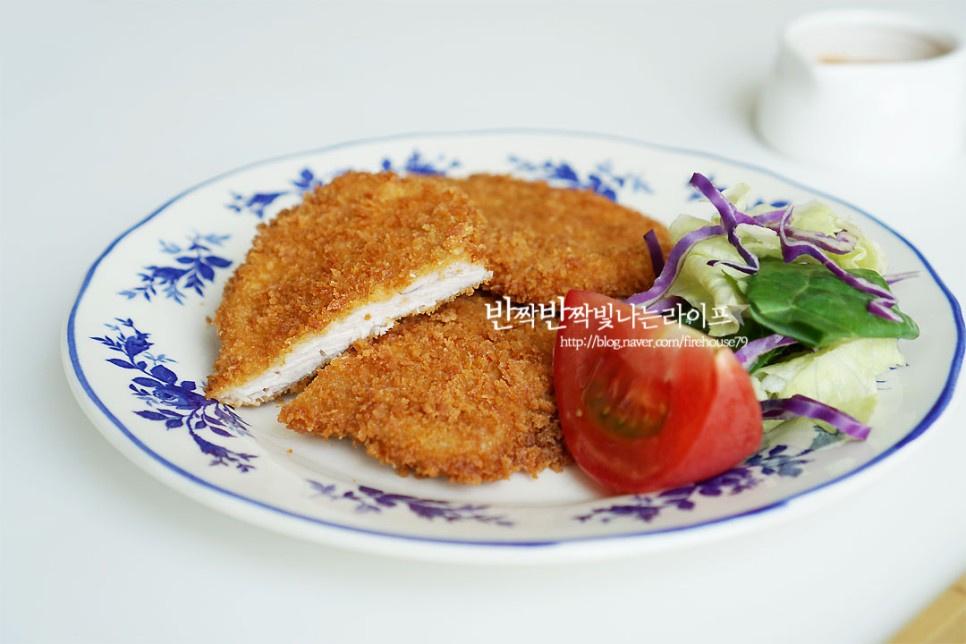
Step 16
Arrange the perfectly fried pork cutlets on a plate. Serve with your favorite sides like a fresh salad, rice, or pickles, and enjoy this delightful homemade meal!
