
Nostalgic Taste! Special Home-style Hayashi Rice
Easy Hayashi Rice Recipe with Rich Flavor from Homemade Vegetable Broth

Remember the comforting taste of Hayashi Rice your mom used to make? Today, we’re bringing back that cherished memory with a special recipe. This Hayashi Rice is elevated with tender Tteokgalbi (Korean short rib patties), perfectly boiled eggs, and a medley of fresh vegetables, making it a nutritious and flavorful meal. Impress your family with this restaurant-quality dish that’s surprisingly easy to make at home!
Main Ingredients- 4 Tteokgalbi patties (Korean short rib patties)
- 2 Eggs
- 1 Large onion
- 1 tbsp Butter (approx. 10g)
- 8 Cubes of solid Hayashi Rice roux (check package for exact amount)
Aromatic Vegetable Broth- 700ml Water
- 1 piece Dried kelp (Kombu, 5x5cm)
- 1/4 Leek
- 1/4 Onion
- 1/4 Carrot
Optional Toppings- Chopped scallions
- Parsley flakes
- Grated cheese
- 700ml Water
- 1 piece Dried kelp (Kombu, 5x5cm)
- 1/4 Leek
- 1/4 Onion
- 1/4 Carrot
Optional Toppings- Chopped scallions
- Parsley flakes
- Grated cheese
Cooking Instructions
Step 1
First, let’s prepare the flavorful vegetable broth. Pour 700ml of water into a pot,

Step 2
add the cleaned dried kelp (5x5cm),

Step 3
roughly chopped leek (1/4 stalk),

Step 4
coarsely chopped onion (1/4),

Step 5
and chopped carrot (1/4). Add them all in.

Step 6
Bring to a boil over high heat, then reduce to medium heat. Remove the kelp immediately as soon as the water boils (boiling kelp for too long can make the broth bitter). Continue simmering the vegetable broth for another 15 minutes to extract deep flavors.

Step 7
While the broth is simmering, let’s caramelize the onion for extra sweetness. Heat a pan over medium heat, add the thinly sliced large onion (1),

Step 8
and the butter (1 tbsp). Butter adds a wonderful richness.

Step 9
Gently stir-fry the onion over low heat until it turns golden brown and caramelized. This slow cooking process unlocks its natural sweetness. Be patient!

Step 10
Now, let’s prepare the boiled eggs. Carefully place 2 eggs in a bowl (making sure they don’t crack), and pour in 750ml of water. Once the water comes to a boil,

Step 11
add 1 tsp of salt,

Step 12
and 1 tbsp of vinegar (approx. 15ml). Boil for exactly 6 minutes. Adding vinegar helps make the eggshells easier to peel later.

Step 13
After 15 minutes of simmering the vegetable broth, strain out all the cooked vegetables from the pot. Your flavorful broth is now ready!

Step 14
In a separate frying pan, heat 1 tbsp of grapeseed oil

Step 15
and pan-fry the 4 Tteokgalbi patties until golden brown on both sides. Ensuring the patties are nicely browned will enhance the overall dish.

Step 16
Once the eggs have boiled for 6 minutes, immediately transfer them to a bowl of cold running water. Keep them under the cold water until they are completely cooled. This chilling process is key to making the eggshells peel off cleanly and beautifully. A pro tip: gently poke a tiny hole in the wider end of the egg before boiling for even easier peeling!

Step 17
Meanwhile, let’s make the Hayashi sauce. Combine the caramelized onions you prepared earlier,

Step 18
and the 8 cubes of Hayashi Rice roux into the prepared vegetable broth. Stir well to dissolve the roux completely, ensuring there are no lumps.

Step 19
Simmer gently over low heat, stirring constantly, until the sauce thickens to your desired consistency. It’s ready when it coats the back of a spoon nicely. That’s your delicious Hayashi sauce!

Step 20
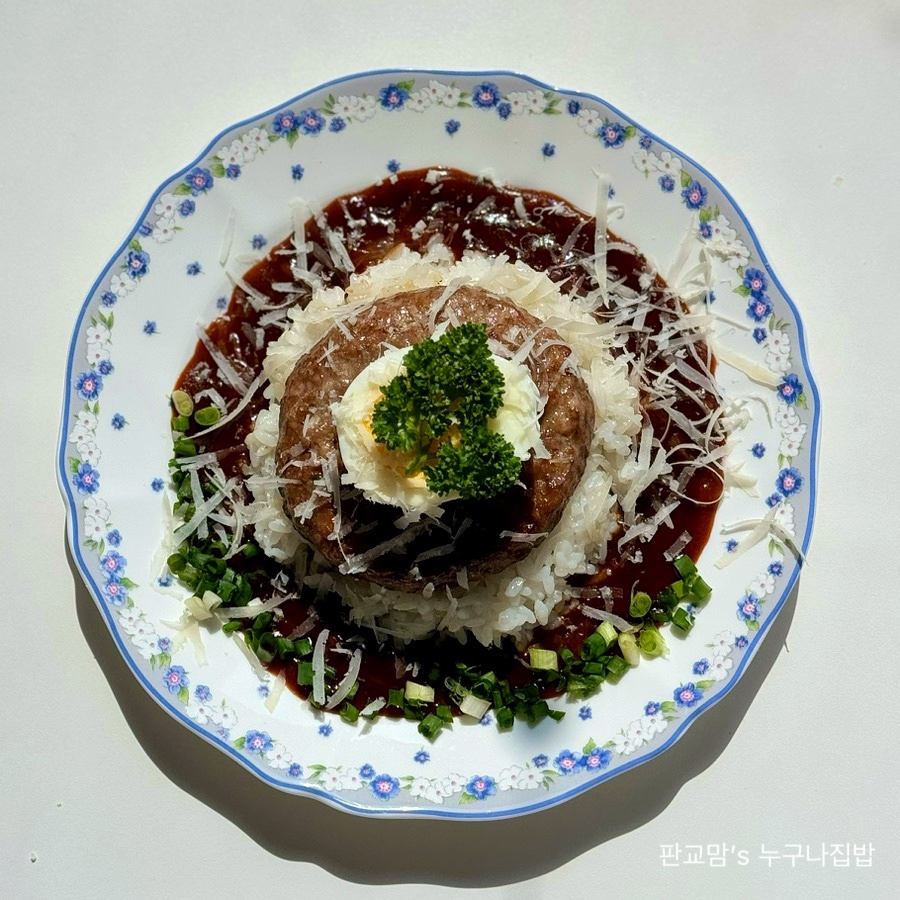
Serve a generous portion of warm rice on a plate, and ladle the rich Hayashi sauce over it.

Step 21
Top with the golden-brown Tteokgalbi,

Step 22
the peeled boiled eggs, a sprinkle of chopped scallions, parsley flakes, and grated cheese for a beautiful and complete presentation!

Step 23
As a family who loves meat, adding the Tteokgalbi and boiled eggs made this dish even more satisfying and delicious. Feel free to customize with your favorite toppings!

Step 24
Enjoy your delicious meal today!
