
Nostalgic Glutinous Sorghum Buchimgae
A Taste of Childhood: Making Deliciously Chewy and Savory Glutinous Sorghum Buchimgae

I’m reminded of those long, cold winter nights when snow piled up to the waist in our humble thatched-roof house in a mountain village. We’d huddle around the hearth, eating sorghum buchimgae. Memories flood back of me playing with my two-year-old brother, prodding his bellybutton with a hot metal chopstick, which made him cry. I got scolded by Mom, feeling it was unfair since I was only six and didn’t know the chopstick was hot. Thankfully, he wasn’t badly hurt and was a good kid, so he didn’t cry too much. He had a small scar like a dot, but it’s probably gone now after so many years. My 90-year-old mother still vividly remembers that incident.
This recipe brings back those warm memories, combining the chewy texture of glutinous sorghum with sweet red bean paste. Let’s recreate the flavors of childhood!
Buchimgae Dough Ingredients- 250g glutinous sorghum flour
- 120g red bean paste filling
- 100ml hot water
- A little cooking oil
Homemade Red Bean Paste Filling- 500g dried red beans
- 180g sugar (adjust to taste)
- 3g salt (to remove beaniness and enhance sweetness)
Homemade Glutinous Sorghum Flour (Optional)- 500g glutinous sorghum grains
- 3g salt (to remove sorghum’s earthy smell)
- 500g dried red beans
- 180g sugar (adjust to taste)
- 3g salt (to remove beaniness and enhance sweetness)
Homemade Glutinous Sorghum Flour (Optional)- 500g glutinous sorghum grains
- 3g salt (to remove sorghum’s earthy smell)
Cooking Instructions
Step 1
First, let’s make the delicious red bean paste filling. Rinse the dried red beans thoroughly and soak them overnight. During soaking, change the soaking water 1-2 times to reduce any bitterness from the beans.
In a pot, combine the soaked red beans with enough water to cover them generously (about 3 times the volume of beans). Add sugar and salt, then boil until the beans are very soft and mashable. If the water level drops significantly during cooking, add more water a ladleful at a time. Cook until the beans are tender enough to be easily mashed with your hand.
Once the beans are cooked and tender, drain most of the water, leaving a thick paste. Use a spatula to mash the beans slightly, creating a rustic yet delicious red bean paste filling.

Step 2
Now, let’s prepare the glutinous sorghum dough. Rinse the glutinous sorghum grains and soak them in water for about 2-3 hours. It’s important for the sorghum to absorb sufficient moisture.
Drain the soaked sorghum completely using a sieve. Once drained, grind the sorghum grains finely in a blender. Sift the ground sorghum through a fine-mesh sieve. If there are any coarse particles left, regrind them and sift again to achieve a very fine flour.
Pour hot water into the sorghum flour gradually, kneading to form a thick dough. The key is to make a dough that is firm but pliable, similar to a cooked dough.

Step 3
Divide the red bean paste filling into portions of about 17g each. Roll each portion into a ball and flatten it slightly to prepare for stuffing.

Step 4
It’s time to cook the buchimgae! Lightly oil a frying pan over medium heat. Take a portion of the sorghum dough (about 36g), flatten it into a circle, and place it in the pan. Gently press down on the dough to spread it into a thin, even circle. Using a wide, flat pan, like one for making omelets, can make it easier to shape the buchimgae.

Step 5
Once the bottom side is golden brown and cooked, carefully flip the buchimgae and cook the other side until it’s also golden and crispy. Be mindful of the heat to prevent burning.

Step 6
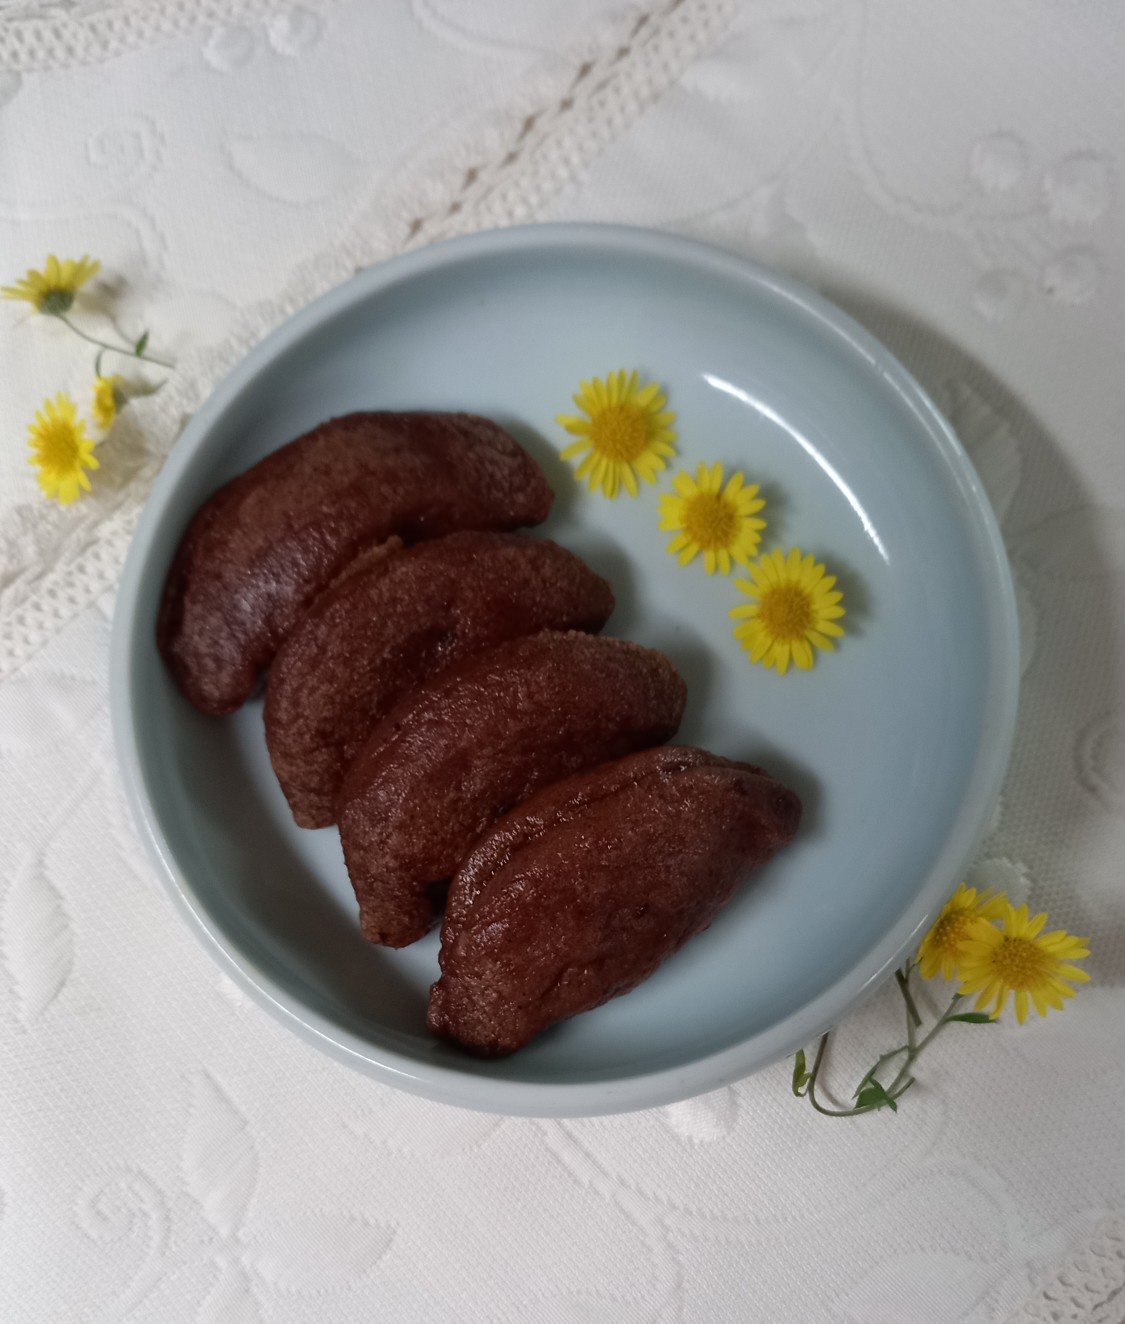
Place a portion of the red bean paste filling onto one half of the cooked sorghum pancake. Fold the other half over to cover the filling, creating a half-moon shape. Gently press the edges to seal the filling inside. For easier handling and shaping without burning your fingers, wear a food-safe glove when pressing the edges. Lightly pan-fry both sides again until golden brown.

Step 7
Arrange the perfectly cooked glutinous sorghum buchimgae on a serving plate. Enjoy them warm for the best chewy texture and rich, nutty flavor. Relive those cherished childhood memories with this delightful treat!
