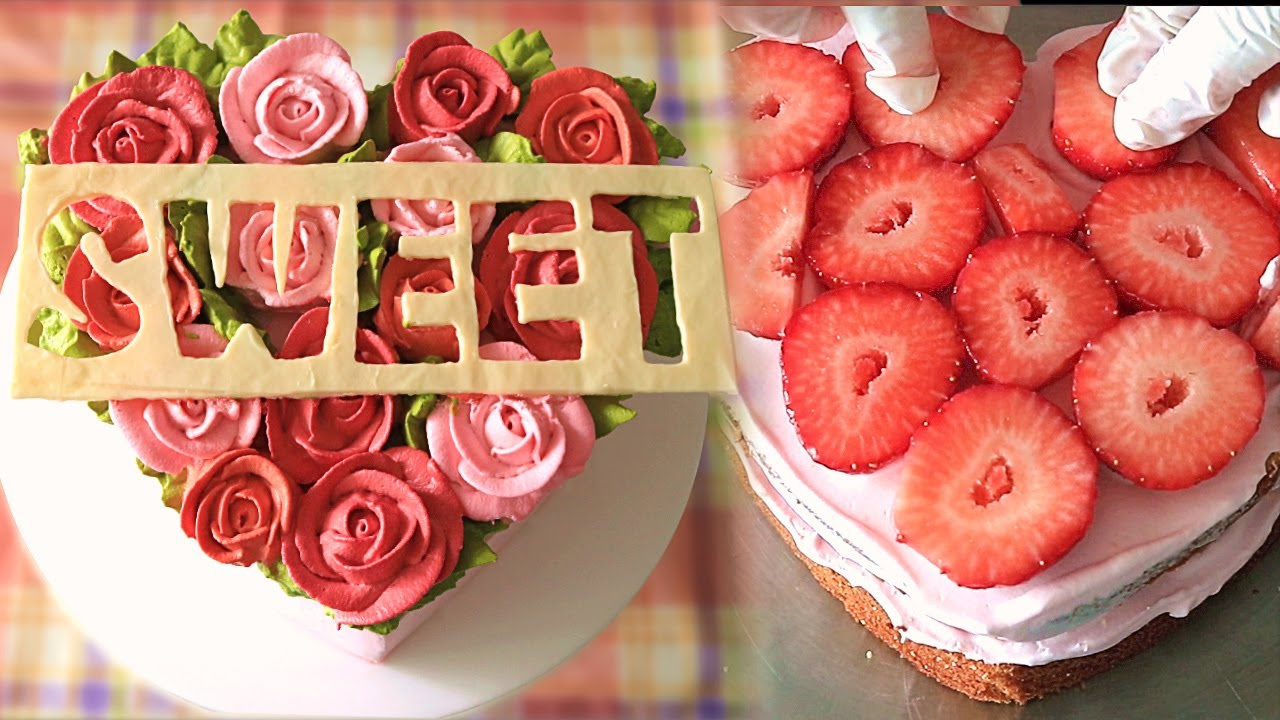
Lovely Strawberry & Flower Heart Cake
Abundant Fresh Strawberries! DIY Flower Heart Cake | Satisfying Heart Icing Video

A heart cake brimming with fresh strawberries! The colorful roses peeking through the chocolate are truly captivating. This cake is perfect for making special occasions even sweeter.
Cake Base- Whole Eggs 160g (approx. 3-4 eggs)
- Egg Yolks 43g (approx. 2 eggs)
- Granulated Sugar 111g
- Honey 7g
- Cake Flour 105g
- Unsalted Butter 27g
Icing Cream- Cold Heavy Cream (35%+ fat) 500g
- Granulated Sugar 125g
- Food Coloring (small amount, desired colors)
Decoration & Topping- Fresh Strawberries 1 pack (approx. 20-25 berries)
- White Chocolate (small amount)
- Cold Heavy Cream (35%+ fat) 500g
- Granulated Sugar 125g
- Food Coloring (small amount, desired colors)
Decoration & Topping- Fresh Strawberries 1 pack (approx. 20-25 berries)
- White Chocolate (small amount)
Cooking Instructions
Step 1
First, let’s prepare the heart-shaped cake base. In a bowl, combine the whole eggs, egg yolks, sugar, and honey. Whip on high speed with an electric mixer until the mixture becomes firm and forms voluminous peaks. Sift in the cake flour and gently fold it into the batter using a spatula, being careful not to deflate the air bubbles. Pour in the melted butter along the sides of the bowl and fold it in until just combined. Pour the batter into a heart-shaped cake pan and bake at 175°C (350°F) for about 25 minutes, or until a skewer inserted into the center comes out clean. Let the cake cool completely, then carefully slice it into three even layers.

Step 2
Wash and hull the fresh strawberries. Slice them into thick rounds, about 1cm (0.4 inch) thick, for layering inside the cake.

Step 3
Prepare the whipping cream for icing. In a chilled bowl, pour the cold heavy cream. Start whipping on high speed with an electric mixer. Once soft peaks begin to form, gradually add the granulated sugar in three additions, continuing to whip. Whip until medium-firm peaks form (about 80% stiffness), where the cream holds its shape but has a slight curl at the tip. Be careful not to over-whip, as it can curdle.

Step 4
Add small amounts of food coloring to the whipped cream to achieve your desired beautiful colors for decoration.

Step 5
Divide about 250g of the whipped cream into four separate bowls and color them to create four distinct shades (e.g., pink, red, orange, yellow). Leave the remaining cream white for the base.

Step 6
Place the first cake layer on your serving plate or cake board. Spread a thin layer of white cream over it. Generously arrange the sliced strawberries on top. Cover the strawberries with another layer of cream, then place the second cake layer on top. Repeat this process: cream, strawberries, cream. Continue with the third layer if you have one.

Step 7
Apply a thin crumb coat of cream over the entire cake to seal in any loose crumbs. Chill the cake for about 15-20 minutes until the crumb coat is firm. This step ensures a smooth and clean final frosting. (Refer to the video for the elaborate rose icing technique and cover the entire cake beautifully.)

Step 8
Gather your piping tools for creating the rose decorations. You’ll need a round tip, a rose petal tip, and a flower nail or a small spatula to transfer the piped roses.

Step 9
Fill separate piping bags with each of the colored creams. Following the techniques shown in the video, pipe various rose shapes and sizes. Create a good number of roses to adorn your cake generously.

Step 10
Place the piped roses in the freezer for about 10-15 minutes until they are firm. This will make them easier to handle and place on the cake without losing their shape.

Step 11
Carefully lift the frozen roses off the flower nail or parchment paper using tweezers or a thin offset spatula. Arrange them artfully on top of the cake, creating a stunning floral display.

Step 12
To add leaves, use a piping bag fitted with a leaf tip, or cut the tip of a piping bag into a W shape. Fill it with green cream and pipe leaf shapes between the roses for a fresh, natural look.

Step 13
Now, let’s make the chocolate decorations. Spread the tempered white chocolate thinly and evenly onto a baking sheet lined with parchment paper. Place it in the refrigerator for about 15 minutes until it’s firm and set.

Step 14
Using a warm cutter or a thin skewer heated over a flame, carefully write ‘S.W.E.E.T’ onto the hardened chocolate sheet. You can personalize this with any message or shape you like.

Step 15
Using a heated metal skewer or a thin knife, refine the edges and details of the chocolate decoration. Cut out the desired shapes. This completes your ‘Real Sweet’ chocolate embellishment!

Step 16
Finally, delicately place the ‘S.W.E.E.T’ chocolate decorations onto the cake, nestled amongst the roses. This final touch adds a professional and personal element.

Step 17
Voila! Your beautiful Flower Heart Cake, adorned with vibrant roses and fresh strawberries, is complete! Aren’t the colorful roses peeking through the message enchanting? It’s a feast for both the eyes and the palate.

Step 18
Packed with fresh strawberries, this cake is absolutely delightful to taste! Enjoy your sweet moments with this delicious creation. Thank you for reading! Subscribe to my channel for weekly new recipe updates. Happy baking!


