
Kimchi Jeon: Crispy Outside, Chewy Inside Golden Recipe
●The Golden Batter Secret for Kimchi Jeon You’ll Regret Not Knowing! This Adds an Incredible Savory Flavor! The Best Kimchi Jeon Ever!●

●Forget the common Kimchi Jeon you’ve had until now! This is a modern, fusion Kimchi Jeon for the whole family that you won’t be able to stop eating once you try it! Don’t miss Jeonggeumi’s lifetime-worthy recipe & golden batter secret!❤●
Main Ingredients- 2 bags Enoki mushrooms
- 1/3 Red bell pepper
- 2 Green onions
- 1/3 Onion
- 200g Beef (for japchae)
- 1 bag Mozzarella cheese
- 2/3 cup Pancake mix (buchim garu)
- 1 Egg
- 200-300g Ripe kimchi
Seasoning & Flavoring- Pinch of sea salt
- 1.5 Tbsp Cheongju (rice wine)
- Pinch of black pepper
- 1 Tbsp Gochugaru (red pepper flakes)
- 2 tsp Organic brown sugar
- 1 Tbsp Minced garlic
- 1 Tbsp Dried shiitake mushroom powder
- 3 Dried kelp pieces
- Pinch of sea salt
- 1.5 Tbsp Cheongju (rice wine)
- Pinch of black pepper
- 1 Tbsp Gochugaru (red pepper flakes)
- 2 tsp Organic brown sugar
- 1 Tbsp Minced garlic
- 1 Tbsp Dried shiitake mushroom powder
- 3 Dried kelp pieces
Cooking Instructions
Step 1
● Prepare the kelp broth by soaking 3 pieces of dried kelp in water for at least 10 minutes. ● Meanwhile, prepare all other ingredients and seasonings by placing them in separate bowls or small dishes.

Step 2
Finely chop the ripe kimchi using scissors or a knife, and place it in a bowl.

Step 3
● Trim the base of the enoki mushrooms and separate them into individual strands. ● Finely mince the red bell pepper and green onions after washing them. ● Peel and thinly slice the onion.

Step 4
Add 1 tablespoon of minced garlic to the chopped ripe kimchi.

Step 5
Add 2 teaspoons of organic brown sugar to balance the tartness of the kimchi.

Step 6
Add 1 tablespoon of gochugaru for a appetizing color and a touch of spiciness.

Step 7
Mix all the seasoning ingredients with the kimchi thoroughly. Ensure the kimchi is well-coated with the seasonings.

Step 8
Lightly season the japchae-style beef with sea salt. This helps to remove any gamey odors and enhances the flavor.

Step 9
Add a pinch of black pepper to further enhance the beef’s aroma.

Step 10
Add 1.5 tablespoons of Cheongju (rice wine) to eliminate any unpleasant smell from the beef and to tenderize it.

Step 11
Mix the seasoned beef well and let it marinate for about 1 to 5 minutes. This will make the meat more tender.

Step 12
In a mixing bowl, add 2/3 cup of pancake mix (buchim garu). This is the base for achieving a crispy texture.

Step 13
Add 1 tablespoon of dried shiitake mushroom powder to elevate the overall flavor of the kimchi pancake. It adds umami and a subtle mushroom essence.

Step 14
Whisk 1 egg and add it to the batter. The egg will make the kimchi pancake softer and more savory.

Step 15
Add the marinated beef to the batter.

Step 16
Add the ripe kimchi, which has already been seasoned, to the batter. You can adjust the amount of kimchi according to your preference.

Step 17
Mix everything together well using a spatula: the batter, beef, and kimchi. Ensure all ingredients are evenly distributed.

Step 18
Add all the chopped vegetables, including enoki mushrooms, bell pepper, green onions, and onion, to the batter.

Step 19
Gently mix the batter and vegetables. Be careful not to mash the vegetables, and mix them evenly.

Step 20
Add 1 bag of thawed mozzarella cheese to the batter and mix lightly. The melting cheese will add a rich, savory flavor.

Step 21
Heat a frying pan over medium-low heat, add a generous amount of oil, and pour the batter thinly in bite-sized portions. Making it thin ensures a crispy exterior.

Step 22
Cook slowly over low heat. Once one side is golden brown, carefully flip it and cook the other side until golden brown. Controlling the heat is crucial to prevent burning.

Step 23
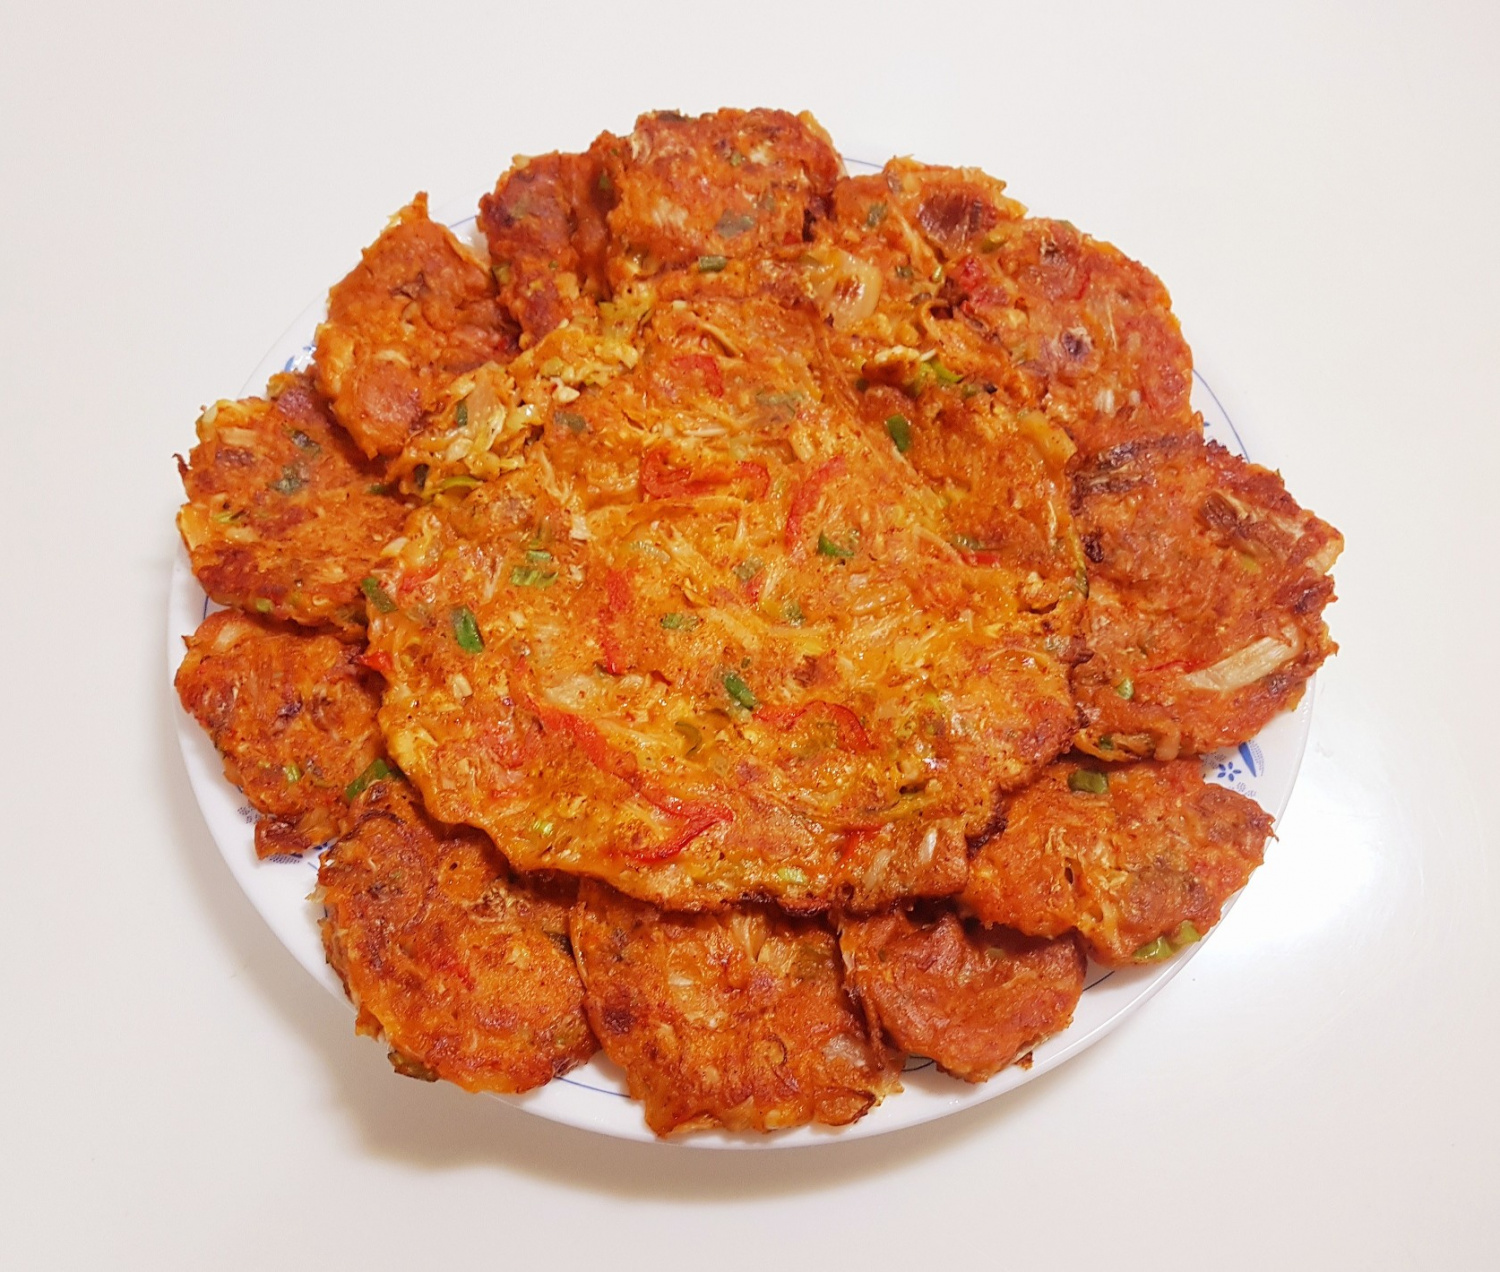
Alternatively, you can make one large pancake instead of bite-sized ones. In this case, spread the batter thinly and cook slowly over low heat until golden and crispy.

Step 24
Arrange the beautifully cooked kimchi pancakes on a plate. Serve with a dipping sauce made from soy sauce and vinegar, and enjoy with your family!❤
