
Juicy Pork Belly Kimbap
Must-Try Pork Belly Kimbap with Scallion Salad and Ssamjang! 🙂

Simple ingredients and easy to make! Let’s roll up some delicious pork belly kimbap together. A perfect dish for a special meal or a delightful treat. ♥
Ingredients- Pork Belly 600g
- 5 sheets of Kimbap seaweed (Gim)
- Lettuce leaves
- 10 perilla leaves
- Shredded scallions, appropriate amount
- Scallion salad dressing, appropriate amount
- 1 Tbsp Ssamjang (Korean soybean paste)
- A little sesame oil
- 5 bowls of cooked white rice (approx. 1.5kg)
Cooking Instructions
Step 1
Let me introduce you to all the ingredients you’ll need to make delicious pork belly kimbap! Just looking at them makes your mouth water.

Step 2
First, let’s prepare the pork belly for the oven. Preheat your oven to 200°C (392°F) with both the top and bottom heating elements on for about 10 minutes. This ensures the oven is hot enough. Line an oven pan with parchment paper – this makes cleanup so much easier! Place the pork belly on the prepared pan.

Step 3
Place the pork belly in the preheated oven and bake at 200°C (392°F) with only the top heating element on for about 20 minutes. This will give the pork belly a wonderfully golden-brown exterior while keeping the inside juicy.

Step 4
While the pork belly is baking, we’ll make the scallion salad to add a refreshing crunch to our kimbap. I’m using a convenient pre-shredded scallion product with dressing that’s often sold together in supermarkets. It’s a quick and easy way to prepare it!

Step 5
Add the scallion salad dressing to the shredded scallions. Gently toss them with your hands until well combined. Be careful not to overmix, as this can make the scallions mushy. Your flavorful scallion salad is ready!

Step 6
Take the pork belly out of the oven after 20 minutes. Now it’s time to cook the other side! Flip the pork belly over and return it to the oven. Bake again at 200°C (392°F) with only the top heating element on for another 10 minutes. This ensures both sides are evenly cooked and beautifully browned!

Step 7
Alright, now it’s time to assemble the pork belly kimbap! Lay your kimbap rolling mat flat on a clean surface. Make sure the rough side of the seaweed sheet will face up when you place it on the mat, as this helps the rice adhere better.

Step 8
Place one sheet of kimbap seaweed on the mat. Spread a bowl’s worth of warm white rice evenly over the seaweed. Avoid making the rice layer too thick, as this can cause the kimbap to break when rolling. Gently spread the rice so it’s even and not clumpy.

Step 9
Now, let’s layer the delicious fillings on top of the rice. Start with a fresh lettuce leaf, followed by fragrant perilla leaves. Use about 1-2 lettuce leaves depending on their size, and 2 perilla leaves for extra aroma. Finally, add a generous amount of the prepared scallion salad.

Step 10
Time to add the flavor enhancer: ssamjang! Carefully spoon the ssamjang and spread it in a straight line over the scallion salad. The rich, savory flavor of the ssamjang will perfectly complement the other ingredients.

Step 11
This is the exciting part! Place the whole, cooked pork belly strip on top of the ssamjang. Now, using the rolling mat, carefully and firmly roll the kimbap. Roll it tightly but be gentle to avoid bursting the seaweed. Tuck in the ends securely to prevent it from unrolling.

Step 12
Your first pork belly kimbap is complete! Doesn’t it look amazing? A tip for easier rolling: avoid overstuffing with lettuce and perilla leaves, as this can make the kimbap difficult to close. For an extra touch of flavor, lightly brush the outside of the rolled kimbap with sesame oil before slicing. It adds a wonderful nutty aroma! Now, repeat this process to make the rest of your pork belly kimbap.

Step 13
Here are the beautifully finished pork belly kimbap rolls. I might have added a bit more rice than necessary, but generous portions make food taste even better, right? ^^ If it’s delicious, that’s all that matters!

Step 14
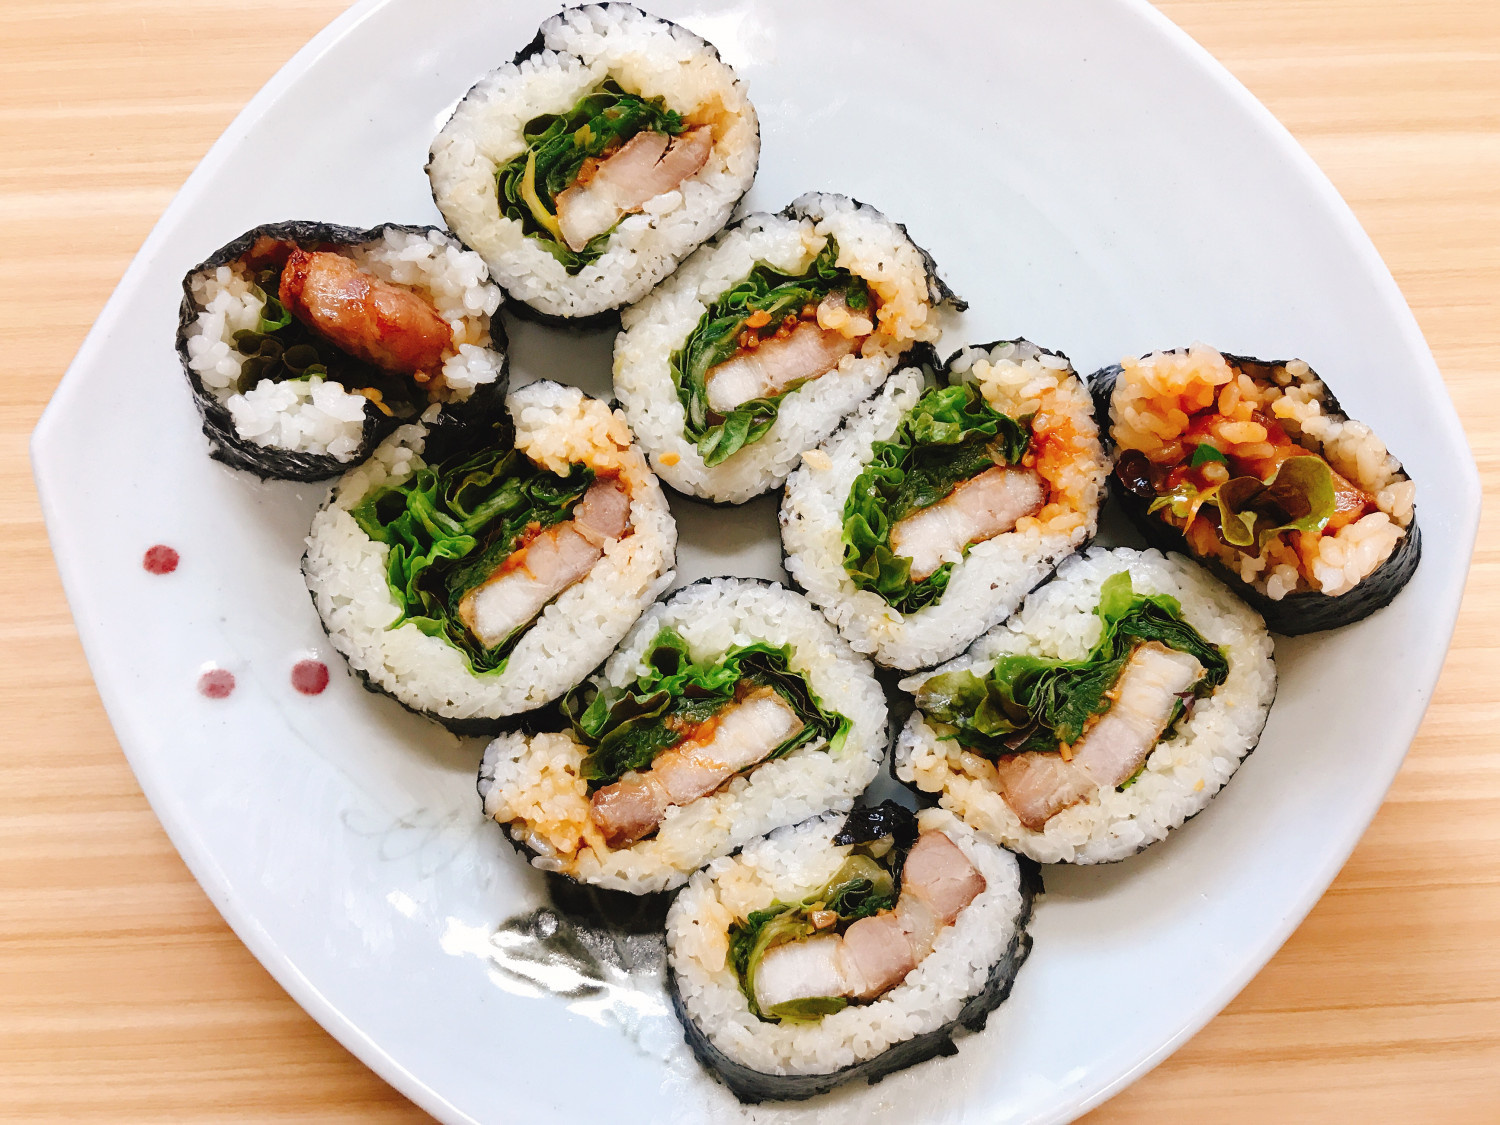
Slice the kimbap into bite-sized pieces and arrange them attractively on a serving plate, showcasing the colorful cross-section. You can create a restaurant-worthy presentation right in your own home.

Step 15
The vibrant green of the vegetables and the rich color of the pork belly look absolutely stunning together! With the generous amount of rice I added, I think four rolls will be quite filling. *^^*

Step 16
Take a bite of this incredible pork belly kimbap, and your mouth will be filled with an explosion of flavors! The savory pork, the umami ssamjang, the crisp vegetables, and the satisfying rice – it’s a perfect combination all in one bite. Give this delightful roll a try and enjoy this wonderful meal!
