
Homestyle Roasted Whole Chicken (with Quick Pickled Radish)
#WholeChicken #OvenRoast #PickledRadish #EasyChicken #HomeCooking

Introducing an easy-to-make electric oven roasted whole chicken recipe you can enjoy at home! Recreate the crispy exterior and juicy interior of a classic whole chicken. Perfectly paired with our quick and tangy pickled radish (chicken mu), this dish will elevate your dining table. It’s the perfect weekend meal to enjoy with a cold beer!
Pickled Radish Ingredients- 1/3 Korean radish (mu)
- 1 cup sugar
- 1/2 cup vinegar
- 1 tsp salt
Whole Chicken Ingredients- 1 whole chicken (approx. 1kg)
- 3 Tbsp herb powder (e.g., rosemary, thyme)
- 2 Tbsp salt
- 2 Tbsp black pepper
- 3 bay leaves
- 3 Tbsp rice wine (cheongju or mirin)
- 4 Tbsp olive oil
- 1 whole chicken (approx. 1kg)
- 3 Tbsp herb powder (e.g., rosemary, thyme)
- 2 Tbsp salt
- 2 Tbsp black pepper
- 3 bay leaves
- 3 Tbsp rice wine (cheongju or mirin)
- 4 Tbsp olive oil
Cooking Instructions
Step 1
First, let’s make the super simple pickled radish to go with the roasted chicken. Wash the radish thoroughly and peel off the skin using a peeler.

Step 2
Cut the prepared radish into bite-sized cubes. Cubes of about 1.5cm to 2cm are ideal, especially for children. You can adjust the size according to your preference.

Step 3
In a bowl, combine the cubed radish with 1 cup of sugar, 1/2 cup of vinegar, and 1 teaspoon of salt. If you prefer a sweeter taste like store-bought chicken mu, you can increase the sugar slightly, but this ratio is already deliciously sweet and tangy. Taste the brine and adjust for your preferred balance of sweet and sour.

Step 4
After mixing the ingredients well, let it sit at room temperature for about 2 hours to allow the flavors to meld. Afterwards, store it in the refrigerator. It’s a refreshing side dish perfect for chicken or any fried food, and can be enjoyed for a while.

Step 5
Now, let’s prepare the main dish: the roasted whole chicken. Rinse the chicken under cold running water. To remove any gamey odors and tenderize the meat, soak the chicken in milk for about 1 hour.

Step 6
Remove the chicken from the milk and discard the milk. Pat the chicken dry thoroughly with paper towels. Now, generously rub the inside and outside of the chicken with 2 tablespoons of salt, 2 tablespoons of black pepper, and 3 tablespoons of herb powder. Make sure to massage it in well. Finally, sprinkle 3 tablespoons of rice wine (or mirin) evenly over the chicken to further eliminate any remaining odors. Cover the seasoned chicken with plastic wrap and refrigerate for about 30 minutes to let the flavors penetrate.

Step 7
Before roasting, coat the chicken inside and out with 4 tablespoons of olive oil. This step is crucial for achieving a crispy skin. Preheat your oven to 200°C (390°F) for 10 minutes. Once preheated, place the chicken on a baking sheet and arrange the 3 bay leaves on top of the chicken. Roast at 200°C for a total of 40 minutes. It’s important to take it out periodically to flip it and ensure even cooking.

Step 8
Carefully remove the chicken from the oven. Check if one side is golden brown and crispy. Flip the chicken and roast the other side until it’s also nicely browned. If your oven has a top broiler or convection setting, using it can help crisp up the skin even further. Ensure both sides are evenly exposed to heat.

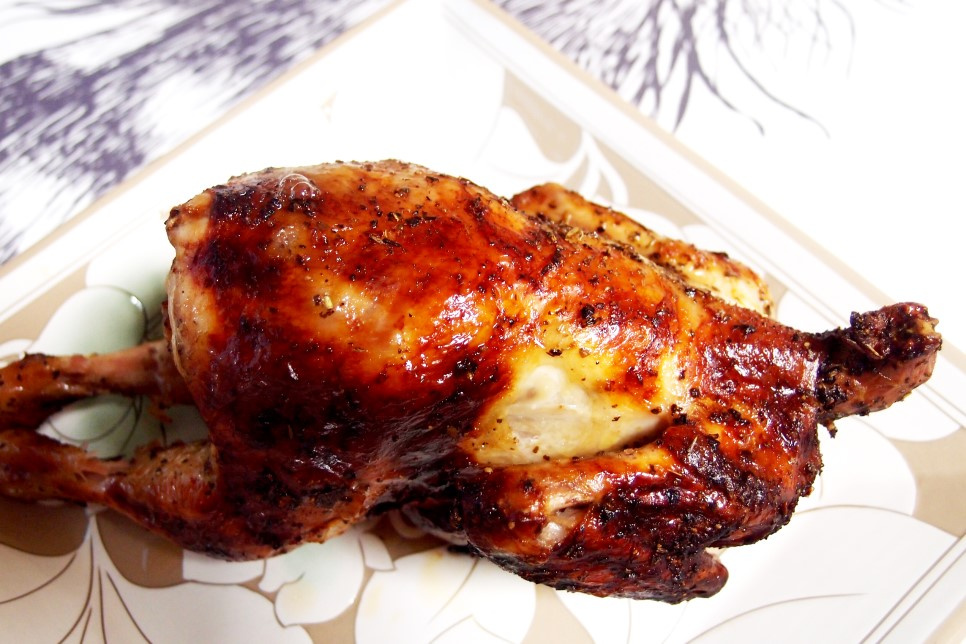
Step 9
Here is the roasted whole chicken, cooked for a total of 40 minutes, flipping it occasionally. It looks just like the nostalgic whole chicken you might have bought wrapped in a paper bag from the market years ago!

Step 10
The skin is perfectly crispy and golden, while the meat inside is tender and juicy. Your homemade oven-roasted whole chicken is ready! Enjoy it generously with the pre-made sweet and tangy pickled radish.
