
Homemade Thick & Creamy Greek Yogurt (Rice Cooker Method)
Easy Rice Cooker Greek Yogurt Recipe: Healthy & Delicious!

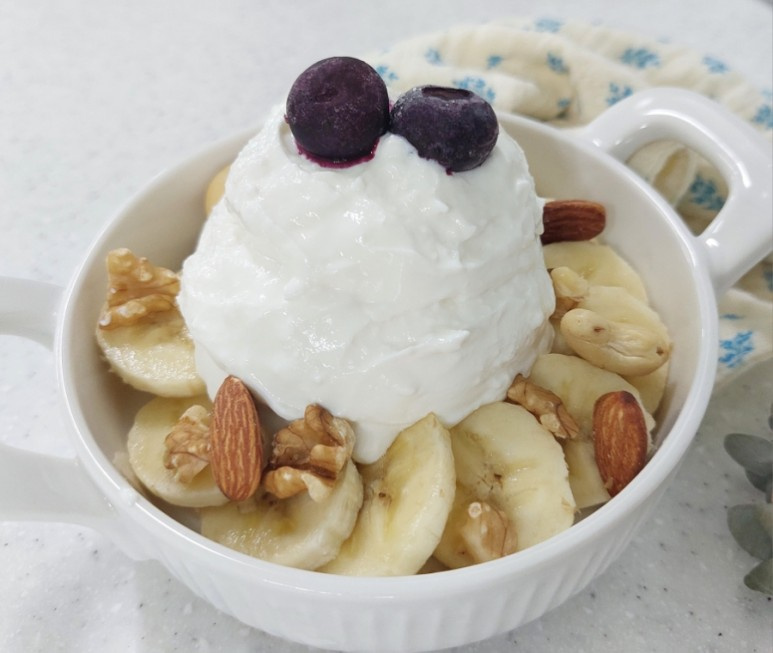
Make gut-friendly Greek yogurt at home with this incredibly simple recipe! Using a rice cooker makes temperature control effortless, ensuring a successful batch of healthy homemade Greek yogurt every time. Enjoy it deliciously with your favorite fruits or nuts. 🙂
Ingredients- 1L Whole Milk (Using low-fat or skim milk may affect texture)
- 200ml Plain Yogurt (Preferably a ‘thick fermented milk’ type, brought to room temperature for 30-60 minutes before use)
Cooking Instructions
Step 1
First, for the 1L of milk, it’s best to use regular whole milk (not low-fat or skim) for the ideal texture. For the 200ml of plain yogurt starter, choose a product labeled ‘thick fermented milk’ and let it sit at room temperature for about 30 to 60 minutes before you begin. This removes the chill and helps ensure even fermentation when mixed with the milk.

Step 2
Once the yogurt starter has reached room temperature, add it to the 1L of milk in the inner pot of your rice cooker. Stir gently until well combined, being careful not to create too much foam. Close the lid and press the ‘Keep Warm’ (or similar) function on your rice cooker for about 1 hour and 30 minutes. This gentle warmth activates the yogurt cultures, initiating the transformation of milk into yogurt.

Step 3
After the 1 hour and 30 minutes of warming, turn off the rice cooker completely. Leave the lid closed and allow the mixture to ferment undisturbed for approximately 8 hours. During this extended fermentation period, the yogurt will develop its characteristic tangy flavor and begin to thicken. An overnight fermentation often results in a deeper taste.

Step 4
Once the 8-hour fermentation is complete, prepare to strain the yogurt. Place a fine-mesh sieve or cheesecloth-lined colander over a bowl. Carefully pour the thickened yogurt mixture from the rice cooker into the prepared sieve or cheesecloth.

Step 5
Gather the edges of the cheesecloth (if using) and secure them tightly with a clip or rubber band, forming a bundle. If using a colander, ensure the cheesecloth is well-draped. Place this bundle or the colander setup in the refrigerator and let it drain for about 2 to 3 hours. This allows the whey (the watery liquid) to separate and drip away.

Step 6
After 2 to 3 hours of draining, remove the cheesecloth or colander. The liquid whey will have been removed, leaving behind a concentrated, thick, and creamy Greek yogurt! Your delicious homemade Greek yogurt is now ready to be enjoyed. Store it in the refrigerator and consume within a few days. Serve plain or with your favorite toppings like honey, fresh fruit, or granola.
