
Homemade Sweet Sticky Rice Flour (Chalsusu Garu): A Detailed Guide for Delicious Dishes
How to Make Chalsusu Flour at Home

Learn how to make fresh, delicious Chalsusu flour (sticky sorghum flour) from scratch using premium sticky sorghum rice. This homemade flour is incredibly versatile, perfect for making chewy ‘Susu Bukkumi’ (pan-fried sorghum pancakes), soft ‘Saesim’ (dumplings) for ‘Patjuk’ (red bean porridge), chewy ‘Susu Chaetteok’ (sticky rice cakes), and traditional ‘Susu Tteok’ (sorghum cakes) often made for children. We’ll also share tips on making smaller batches at home!
Ingredients- 8kg well-ripened sticky sorghum rice
Cooking Instructions
Step 1
Before we begin making the sorghum flour, prepare a generous amount of sticky sorghum rice. (As we farm, we make a large batch, but I’ll soon share tips for those who want to make it in smaller quantities at home!) Using fresh, well-ripened sticky sorghum rice is the first step to achieving delicious flour.

Step 2
Pour clean water over the prepared sticky sorghum rice. Make sure to add enough water to fully submerge the rice.

Step 3
This is the first step of adding water.

Step 4
Now, gently rinse the rice by swirling it in the water. You’ll notice a lot of reddish water draining out. Continue rinsing the rice repeatedly until the reddish color is no longer significant. This is a crucial step to remove any impurities from the rice.

Step 5
After rinsing, soak the clean sticky sorghum rice in fresh water. It needs to soak overnight, or for the entire day. Soaking the rice thoroughly will soften it, resulting in a better texture when it’s ground into flour.

Step 6
Once the rice has been sufficiently soaked, drain it using a sieve.

Step 7
The drained rice is now ready to be taken to the mill. It’s important to drain the water well. We covered the rice in a basin, which allowed it to drain thoroughly from the bottom while preventing it from drying out. The rice will be left to drain for about 4 hours.

Step 8
Take the sticky sorghum rice to a local mill. Request them to grind it to your desired fineness (usually finely ground), with a small amount of salt added. The salt helps to subtly enhance the flavor of the flour.

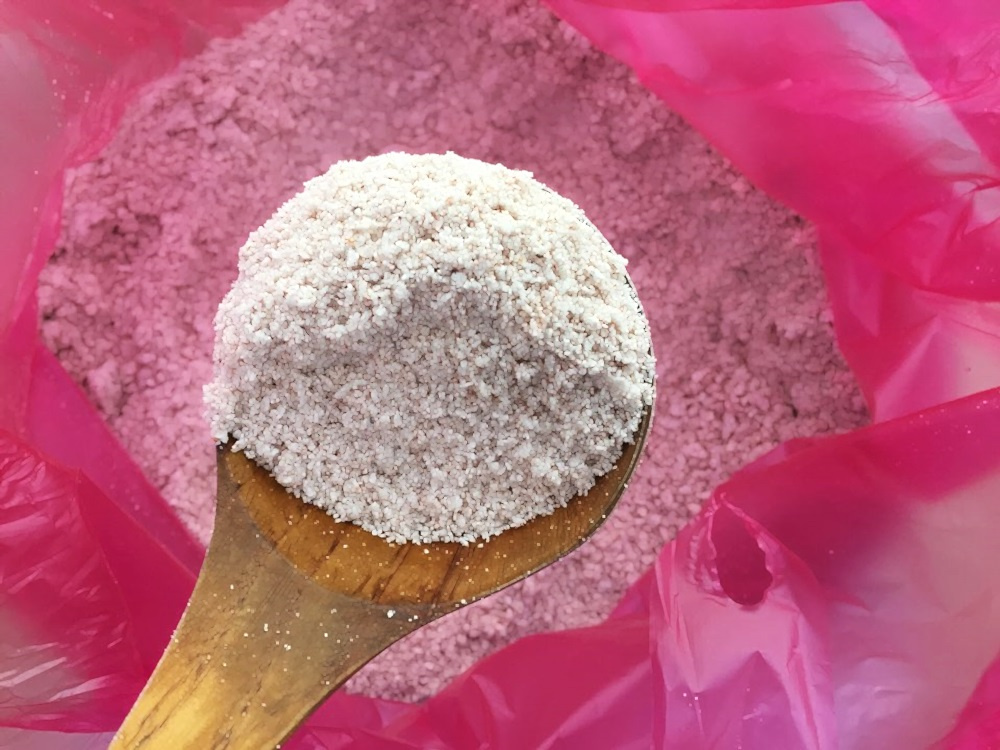
Step 9
This process will yield a very smooth and fine sorghum flour. You can adjust the coarseness based on your preference.

Step 10
For an even finer and smoother texture, it’s recommended to ask the mill to grind it twice. Double grinding will result in a much more delicate consistency.

Step 11
Once you bring the finely ground sorghum flour home from the mill,

Step 12
portion the flour into 1kg bags for convenient storage and use.

Step 13
You can also portion it into 500g bags for smaller servings. It’s essential to store the packaged flour in the freezer. To use it, transfer the frozen flour to the refrigerator the night before. By morning, it will be perfectly thawed and ready to use, retaining its freshness.
