
Homemade Strawberry Jam (Using Non-Crystalline Fructose)
Making Delicious Strawberry Jam with Non-Crystalline Fructose: Reduce Sugar Worries!

Nourish your family’s health with delicious homemade strawberry jam! Made with non-crystalline fructose instead of white sugar, it’s a healthier option you can enjoy with peace of mind. While I used to hesitate making jam at home due to the high sugar content, using non-crystalline fructose has made it possible to create a jam that’s both healthier and tastier than store-bought versions. If you plan to consume the jam quickly, you can reduce the sugar amount further. However, for storage longer than a month, increasing the sugar proportion is recommended to prevent mold and ensure longevity. Experience the sweet, authentic flavor and aroma of fresh strawberries in this delightful jam. Make yours today!
Essential Ingredients- 800g Fresh Strawberries
- 400g Non-Crystalline Fructose (2:1 strawberry to sugar ratio; 1:1 for longer storage)
- 1 Tbsp Lemon Juice (or 1 tsp Lemon Juice Concentrate)
Cooking Instructions
Step 1
To make delicious strawberry jam, I’ve gathered a generous amount of fresh strawberries. These are smaller in size, making them less commercially appealing, but they are wonderfully flavorful and were purchased at a great price. ^^

Step 2
The first step to great jam! Thoroughly wash the strawberries under running water. Carefully remove any bruised or spoiled parts, and then hull them. Make sure to drain them well; excess water can affect the jam’s consistency.

Step 3
The secret to a healthier jam: using non-crystalline fructose! The standard ratio is 2 parts strawberries to 1 part sugar. However, if you plan to store the jam for an extended period, consider using a 1:1 ratio for better preservation and to prevent mold.

Step 4
Mash the strawberries, which have been mixed with sugar, using your hands. While a blender is quick, hand-mashing preserves some fruit pulp, resulting in a jam with a more satisfying texture. You’ll enjoy those delightful berry chunks! ^^

Step 5
Don’t worry if some small chunks of strawberry remain after mashing. These pieces will provide a wonderful textural contrast when you enjoy the finished jam, offering bursts of fresh strawberry flavor with every bite. It’s quite delightful!

Step 6
Now it’s time to cook the jam. Start with a medium-high heat to dissolve the sugar and begin cooking the strawberries. Once it comes to a boil, reduce the heat to medium-low. Simmer gently, stirring occasionally, to prevent burning and develop a deep flavor.

Step 7
As the jam simmers and thickens, the initial sweetness of the sugar mellows, and the natural tartness of the strawberries beautifully harmonizes with it. You’ll notice a wonderful evolution of flavor from simple sweetness to a more complex, rich profile. It’s truly captivating.

Step 8
Skim off any foam that rises to the surface during cooking; this helps create a clearer, smoother jam. Continue simmering for about an hour, or until the jam reaches your desired consistency. Your patience will be rewarded with a delicious jam!

Step 9
The color of freshly made strawberry jam is absolutely stunning! Its vibrant red hue is incredibly appetizing. Capturing this beautiful color in a photograph is quite challenging, but it’s truly a sight to behold in person. ^^

Step 10
Add lemon juice to enhance the tartness and improve the jam’s shelf life. If using fresh lemon, squeeze the juice. If using concentrated lemon juice, add about 1 to 2 teaspoons. Be careful not to add too much.

Step 11
Once the jam is ready, place the pot in a bowl of cold water to cool it down quickly. This rapid cooling is said to help preserve the jam’s vibrant, beautiful color. So, work quickly to maintain that lovely hue! ^^

Step 12
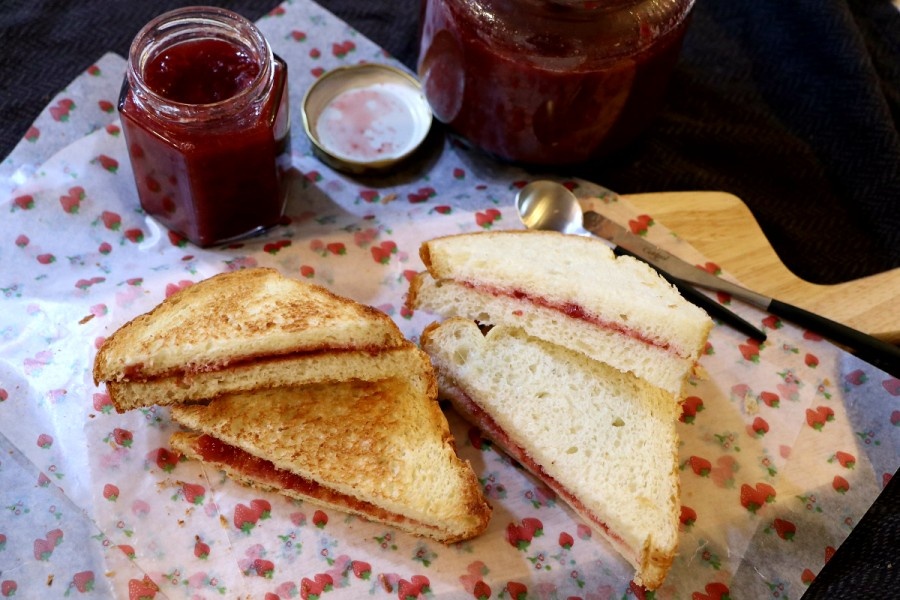
Sterilize your glass jars thoroughly before filling. Carefully spoon the finished strawberry jam into the prepared jars and store them in the refrigerator. Imagine spreading this homemade jam generously on freshly toasted bread… the thought alone is delightful! I highly recommend making it yourself. ^^
