
Homemade Shrimp Paste (Saeu-jeot) – A Taste of Authentic Flavor
Making Delicious Homemade Shrimp Paste

While buying skate, I spotted some fresh shrimp and decided to try making my own shrimp paste! It’s surprisingly simple and creating your own allows for a depth of flavor that store-bought versions can’t match. Elevate your Korean dishes with this homemade delicacy. Let’s get started!
Main Ingredients- 1kg fresh shrimp
- Approximately 1.3kg coarse sea salt
Cooking Instructions
Step 1
First, prepare 1kg of fresh shrimp. The quality and freshness of the shrimp are crucial for the best flavor, so choose plump and vibrant ones.

Step 2
Gently remove the shrimp from their packaging and place them in a clean bowl. Take a moment to pick out any unwanted bits or debris. While you could mix them directly, this extra step ensures a cleaner, purer shrimp paste.

Step 3
Add 1kg of coarse sea salt to the 1kg of prepared fresh shrimp. We’re not adding all the salt at once; just enough to start coating the shrimp for the initial mixing.

Step 4
Carefully mix the shrimp and salt together. Be gentle to avoid crushing the shrimp, but ensure each piece is evenly coated. This even coating is key to proper fermentation.

Step 5
Transfer the salted shrimp into a clean, dry fermentation container. It’s vital that the container is completely dry to prevent mold or spoilage. Glass jars or traditional earthenware pots work well.

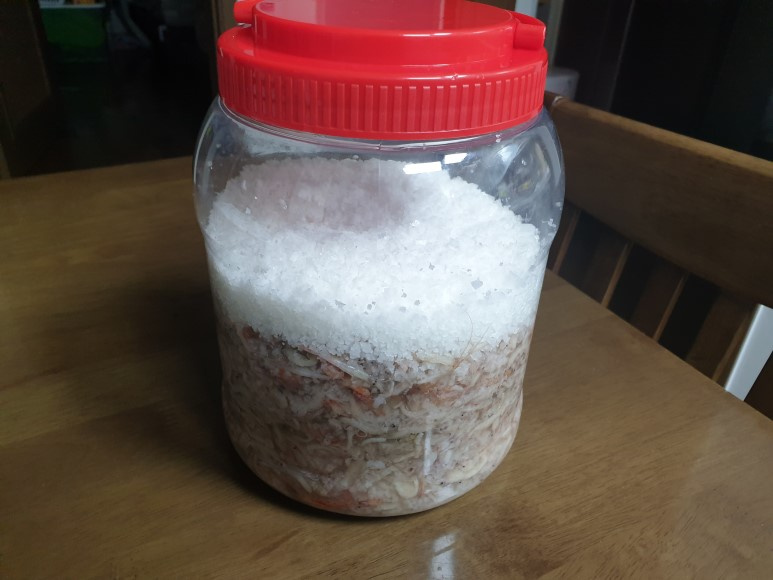
Step 6
Once the shrimp are in the container, pour the remaining approximately 300g of coarse sea salt over the top, creating a salt cap. This layer helps to protect the shrimp from direct contact with air, promoting better fermentation.

Step 7
Leave the sealed container at room temperature until the coarse salt on top has dissolved. This process allows the flavors to develop. After about 3 months of fermentation in a cool place, it’s ready to be stored in the refrigerator and enjoyed. The longer it ferments, the richer and more complex the flavor will become!
