
Homemade Red Bean Buns (Danpatppang)
Moist and Generously Filled Homemade Red Bean Buns

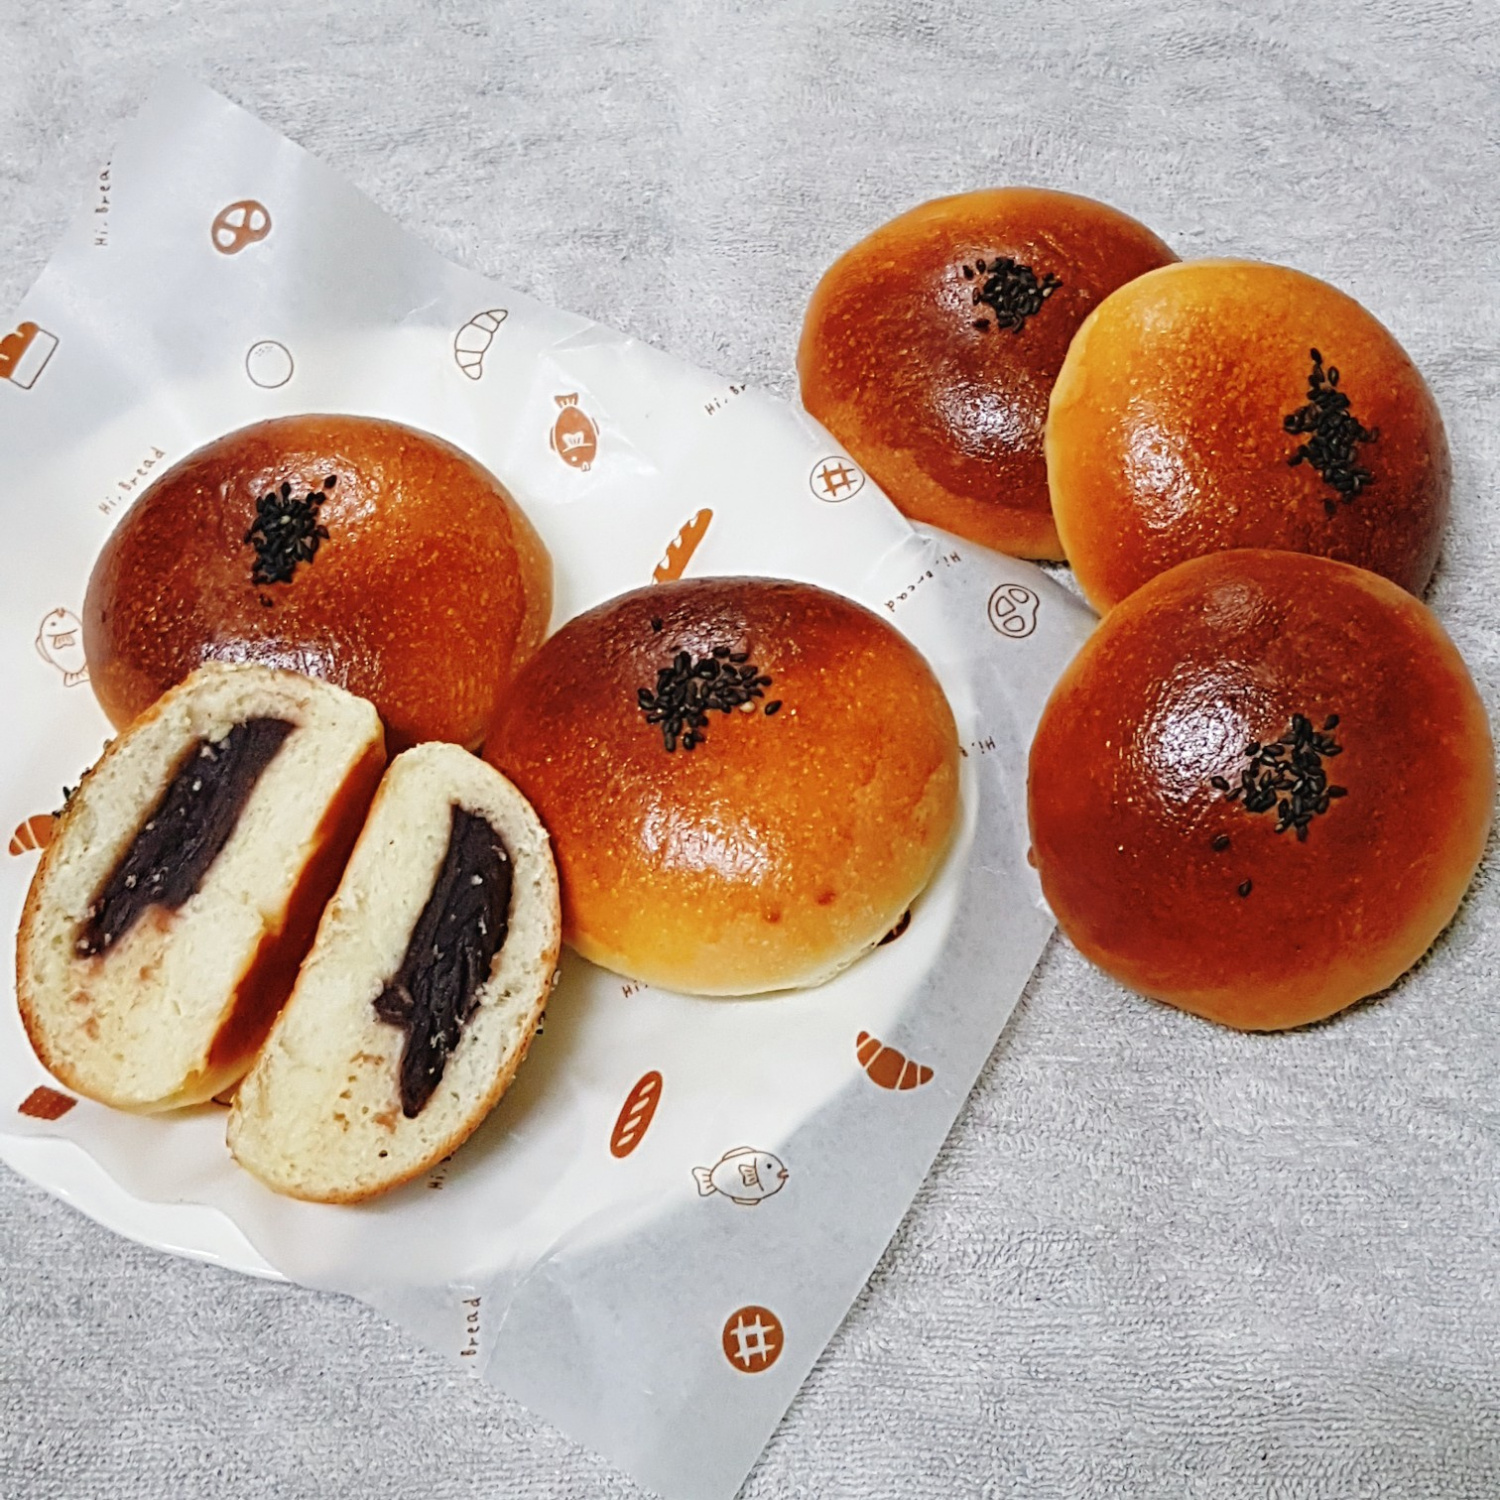
I made some homemade red bean buns filled with plenty of sweet red bean paste! Eating them fresh from the oven was absolutely delicious ♡ Even children who don’t usually eat red beans eat these buns really well with milk ♡♡ Fluffy bread packed with sweet red beans ♡♡♡ Give it a try together!
Dough Ingredients- 240g Bread flour
- 50g Sugar
- 4g Salt
- 40g Butter, unsalted
- 100ml Water or milk, lukewarm
- 1 Egg (for dough, room temperature)
- 4g Dry yeast
Cooking Instructions
Step 1
First, prepare all the ingredients needed for making the red bean buns. It’s especially helpful if the butter and egg are at room temperature, as this will make the dough easier to handle.

Step 2
In a large bowl, add the 240g of bread flour. Make three small wells in the surface of the flour. Place the sugar in one well, the dry yeast in another, and the salt in the third. Adding them separately like this prevents the yeast from being directly affected by the sugar and salt, which is important for proper fermentation!

Step 3
Using a spatula, mix the ingredients in the bowl until they are roughly combined. It’s okay if there are still some dry flour bits showing.

Step 4
Crack in the room-temperature egg and pour in the 100ml of lukewarm water or milk. Begin kneading the dough with your hands. Continue to knead until no dry flour is visible and the mixture forms a cohesive mass.

Step 5
Once the flour is fully incorporated and the dough has come together, add the 40g of unsalted butter at room temperature. Knead the dough vigorously with your hands for about 10 minutes until the butter is completely absorbed and the dough becomes smooth and elastic. The dough is ready when it can be stretched thinly without tearing, forming a ‘windowpane’.

Step 6
Shape the smooth dough into a ball. Place it in a clean bowl, cover with plastic wrap or a damp cloth, and let it rise in a warm place (around 30-40°C or 86-104°F) for at least 40 minutes, or until it has doubled in size. The rising time may vary depending on the temperature.

Step 7
Check if the dough has doubled in size; this is a key indicator of successful first proofing! To test, lightly flour a finger and poke the center of the dough. If the indentation remains without the dough collapsing, the first proof is complete!

Step 8
Gently punch down the proofed dough to release the gas. Transfer it to a work surface and divide it into 8 equal portions, each weighing about 50g to 55g. Shape each portion into a ball and let them rest for a short period (bench rest).

Step 9
Divide the 280g of red bean paste into 8 equal portions, about 35g each. Roll each portion into a smooth ball. Having these ready will make filling the dough easier.

Step 10
Take one rested dough ball and flatten it using a rolling pin. Roll it out into a circle large enough to enclose the red bean paste filling. It’s helpful to make the edges slightly thinner than the center.

Step 11
Place one ball of the prepared red bean paste in the center of the flattened dough.

Step 12
Carefully bring the edges of the dough up and around the red bean paste, pinching them together to seal the filling completely. Ensure there are no gaps where the filling might leak out. Reshape the bun into a neat, round ball.

Step 13
Place the filled buns on a baking sheet lined with parchment paper. Gently press the top of each bun with your palm to flatten it slightly. Cover them with a damp cloth or plastic wrap and let them undergo a second proofing in a warm place for 30 minutes, or until they become puffy.

Step 14
Once the second proofing is complete, whisk the remaining egg and brush it evenly over the surface of each bun. This will give the buns a beautiful golden color and a glossy finish when baked.

Step 15
Sprinkle the black sesame seeds onto the center of each bun for decoration. Bake in a preheated oven at 180°C (350°F) for 12 to 15 minutes, or until the tops are golden brown and the buns are cooked through. Your delicious, freshly baked homemade red bean buns are now ready! Enjoy!
