
Homemade Plum Wine (Maesil-ju): The Ultimate Guide to Preparation and Fermentation
Crafting Authentic Plum Wine: Perfect Plum Preparation and Cleaning Techniques

Plums are in season this June! Let’s make some delicious plum wine. This guide will walk you through the best methods for preparing and cleaning fresh plums to create your own delightful homemade plum wine.
Plum Wine Ingredients- 4kg Fresh Plums (preferably slightly unripe)
- 2 Tbsp Baking Soda (for cleaning)
- 7.2L Shochu (Distilled Spirits) for Soaking (25-30% ABV)
- 1 handful Dried Licorice Root (approx. 10-15g)
Cooking Instructions
Step 1
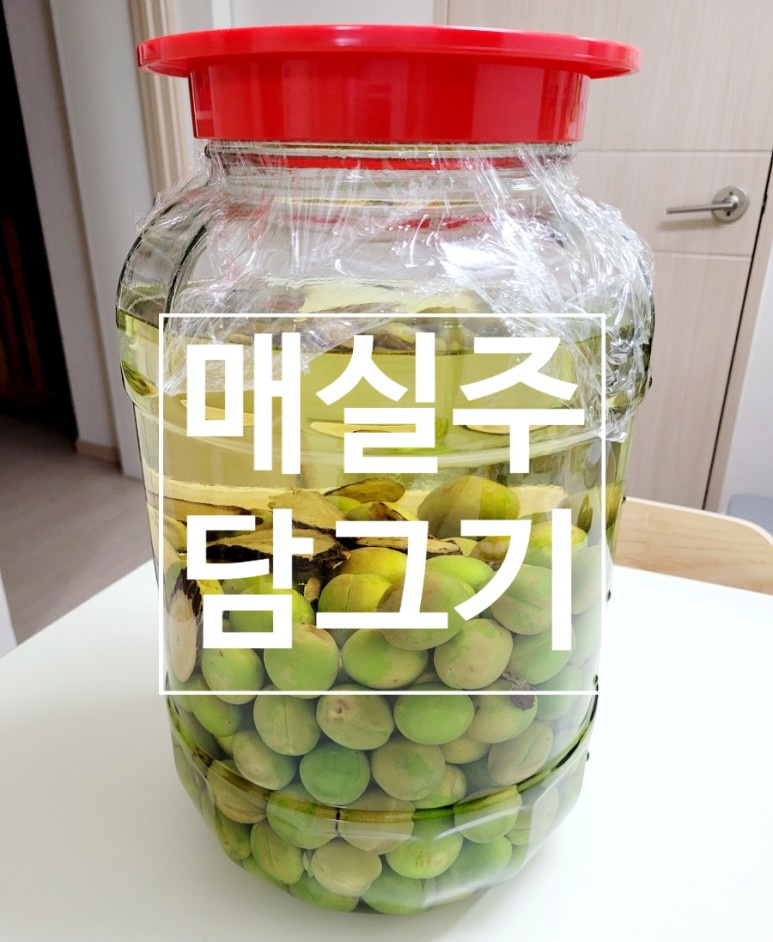
We’re using a 13-liter glass jar for our plum wine. This size is perfect for holding 4kg of plums and 7.2L of soju, ensuring the ideal ratio for fermentation. Make sure your jar is clean and sturdy.

Step 2
Sterilizing the jar is a crucial step to prevent spoilage. If boiling the large jar (hot water sterilization) is inconvenient, we recommend using food-grade ethanol spray. Thoroughly spray the inside of the jar and ensure all surfaces are sanitized.

Step 3
Now, let’s prepare the fresh plums. Thorough preparation is key to ensuring a clean, pure flavor in your plum wine, free from any unwanted tastes.

Step 4
Examine each plum closely. You’ll notice a small stem or stem nub at one end.

Step 5
A simple toothpick is the perfect tool for removing these stems. Gently insert the toothpick into the stem and twist or flick it sideways; it should come off cleanly with a ‘pop’.

Step 6
Continue removing the stem from all plums, leaving them neat and tidy. This step not only improves the appearance but also ensures better infusion.

Step 7
While removing the stems, take this opportunity to pick out any plums that are bruised, overripe, or damaged. Using only the best quality plums will result in a superior tasting wine.

Step 8
Clean your sink thoroughly or use a large bowl. Place the prepared plums into the sink or bowl and fill it with enough cold water to cover the plums completely.

Step 9
Add 2 tablespoons of baking soda to the water. Let the plums soak for about 15 minutes. Afterward, rinse them under running water 3 to 4 times, changing the water frequently, to wash away any remaining baking soda and surface impurities.

Step 10
It’s essential that the plums are completely dry before proceeding. After rinsing, drain the plums well in a colander. Then, spread them out on a clean surface in a cool, well-ventilated area and let them air dry for at least a day. Any remaining moisture can affect the clarity and taste of the wine.

Step 11
If you’re short on time and can’t wait a full day for drying, here’s a quicker method. Prepare a large plastic bag by cutting a small opening at the bottom to allow for air circulation.

Step 12
Place the drained plums into the bag. Seal the opening of the bag securely with tape. Then, use a hairdryer on the ‘cool’ setting and blow air into the bag for about an hour, ensuring the plums dry thoroughly. This method significantly speeds up the drying process.

Step 13
Now, it’s time to assemble our plum wine! Carefully place the 4kg of dried plums into the sterilized 13-liter glass jar. Add the handful of dried licorice root – this adds a wonderful depth and complexity to the flavor.

Step 14
Pour the 7.2 liters of soju over the plums and licorice. To ensure a good seal and prevent oxidation, cover the mouth of the jar with plastic wrap before screwing on the lid tightly. This double seal will protect your wine.

Step 15
Your plum wine needs time to mature. It’s best to let it ferment for at least 3 months. After this initial period, you can strain out the plum solids. For an even richer and smoother flavor, allow the strained wine to age for another year. Patience is key to unlocking the full potential of your homemade plum wine!
