
Homemade Dried Red Chilies: A Sun-Kissed Flavor!
How to Make Dried Red Chilies Using a Food Dehydrator: Explore the Benefits of Dried Chilies!

Hello everyone! Today, we’ll be making healthy and delicious dried red chilies right at home using a food dehydrator. Dried chilies offer a multitude of benefits. Their spicy flavor stimulates appetite and promotes the secretion of stomach acid. The capsaicin compound also enhances blood circulation, aiding in the relief of nerve pain. Furthermore, capsaicin is known to help with weight loss by breaking down and burning body fat. Rich in Vitamin A and beta-carotene, they also boost immunity and are great for eye health. Let’s get started on making these flavorful and healthy dried chilies!
Ingredients for Dried Chilies- 2 bags of fresh red chilies
Cooking Instructions
Step 1
First, select fresh, plump red chilies.

Step 2
Fill a large bowl with cold water and add about 3 tablespoons of vinegar. Submerge the chilies for about 10 minutes, then rinse them thoroughly under running water several times to ensure they are clean. This process effectively removes any surface impurities.

Step 3
After washing, drain the chilies well using a colander. Excess moisture can prolong the drying time, so make sure to drain them thoroughly.

Step 4
Spread the drained chilies on a wide sieve and let them air dry for 2-3 hours in a well-ventilated area or under sunlight. This initial drying step helps to reduce the moisture content, making the subsequent dehydration process more efficient.

Step 5
Arrange the chilies on the trays of your food dehydrator. To ensure they dry thoroughly and efficiently, it’s best to cut the chilies in half lengthwise, rather than drying them whole. Leave some space between each chili piece to allow for proper air circulation, which is crucial for even drying.

Step 6
Close the lid of the food dehydrator.

Step 7
To preserve the vibrant red color of the chilies, low-temperature drying is key. Set the dehydrator temperature to 50°C (122°F) and run it for approximately 30 hours. It’s beneficial to rotate the trays every few hours to ensure all chilies dry evenly.

Step 8
Continue drying until the chilies have shriveled and feel firm and crisp to the touch. The exact drying time may vary depending on the size and initial moisture content of the chilies.

Step 9
The total drying time can vary based on the size of the chilies and your specific dehydrator model. Check the chilies periodically and adjust the time as needed.

Step 10
Be cautious not to set the temperature too high, as this can cook the chilies and cause them to turn pale. The secret to achieving a beautiful red color is slow, low-temperature drying. Your dried chilies are ready when they are firm and brittle.

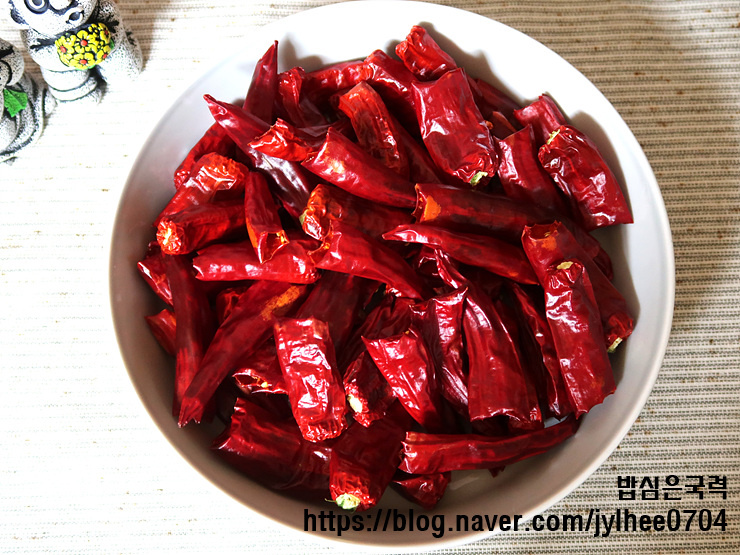
Step 11
Voila! Your homemade dried red chilies made with a food dehydrator are complete. They have retained their beautiful red hue and look absolutely delicious.

Step 12
A sign of perfectly dried chilies is the crisp ‘snap’ sound they make when gently tossed with a spoon. This indicates they are thoroughly dried and will grind well into chili powder. Undried chilies can become clumpy and won’t powder properly. These dried chilies can be chopped and added to spicy dishes for an extra kick, or rehydrated and blended to make chili paste for kimchi. Of course, they can also be ground into fine chili powder. While making dried chilies with a food dehydrator does take time, the reward is having your own healthy and flavorful dried chilies at home.
