
Homemade Dried Radish Strips (Mumarangyi) – Easy Dehydrator Method
How to Dry Radish with a Food Dehydrator: Preparing Ingredients for Delicious Mumarangyi Kimchi

The first step to making delicious spicy and sweet Mumarangyi kimchi! This guide provides detailed instructions on how to transform fresh radishes into chewy and flavorful dried radish strips using a food dehydrator. Perfect for beginners!
Main Ingredients- Radish (choose large, firm ones)
Cooking Instructions
Step 1
First, thoroughly washing the radish is crucial. Use a vegetable-specific scrubber or a soft brush to meticulously remove any dirt or debris from the skin. Keeping the skin on when drying results in a wonderfully chewy and satisfying texture for the final dried radish strips, so we recommend leaving the skin on.

Step 2
After washing, cut the radish into pieces approximately 5-6 cm long. This size is ideal for placing in the dehydrator and drying.

Step 3
We’ll be cutting the radish into stick shapes. The thickness can be adjusted according to your preference. You can slice them very thinly, or cut them into a fan shape – feel free to get creative with the shapes!

Step 4
A good thickness to aim for is about the width of your index finger; this will yield a great texture after drying.

Step 5
Arrange the cut radish pieces on the dehydrator trays. Since they will shrink as they dry, you can overlap them slightly initially. Just be sure not to pack the trays too densely.

Step 6
I used 3 radishes, and this amount filled all 6 of my dehydrator trays. The number of trays needed will vary depending on how much radish you’re preparing.

Step 7
Now, it’s time to operate the food dehydrator. Set it to the highest temperature, 70°C (158°F), and dehydrate for about 10 hours. During these 10 hours, it’s important to periodically swap the positions of the trays (top to bottom and vice versa) to ensure even drying. Even within the same tray, the center pieces may dry faster than those on the edges, so moving them around is key. Also, continuous high heat can cause the radish to burn. Once some moisture has evaporated and the pieces start to become chewy, it’s a good idea to lower the temperature to 55°C (131°F).

Step 8
As time passes, you’ll visibly see the moisture evaporating and the volume decreasing. Check the dryness, remove any pieces that are fully dried, and rotate the remaining ones to continue drying evenly.

Step 9
After 10 hours at 70°C (158°F), when the radish pieces become somewhat chewy (‘kkudeuk-kkudeuk’), lower the temperature to 55°C (131°F) and dehydrate for an additional 5 hours. However, these times and temperatures can vary depending on the amount of radish, the dehydrator’s specifications, and your desired final texture. So, monitor the process and adjust the temperature and time flexibly.

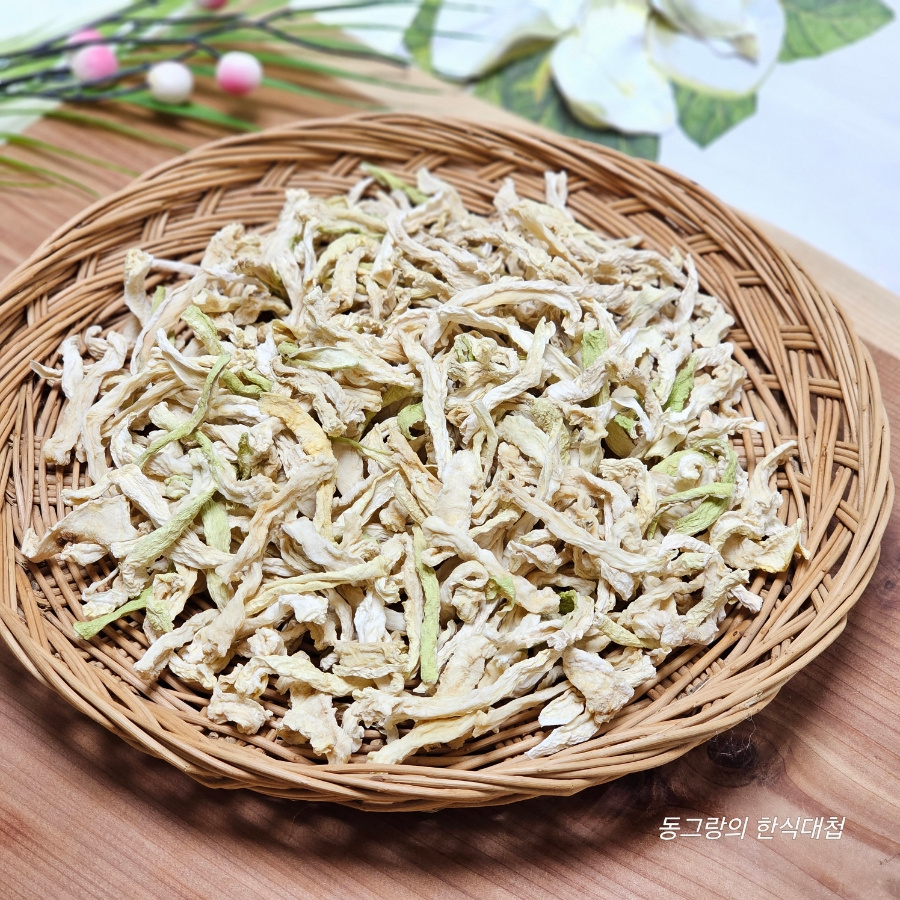
Step 10
After a total of 15 hours of careful dehydration, all the radish is perfectly dried!

Step 11
Voila! Your beautifully dried radish strips are ready. They look clean and appetizing, with a lovely color.

Step 12
Once dried, store the Mumarangyi in an airtight zipper bag at room temperature. If you prefer a chewier texture or want to store them for a longer period, you can freeze them.

Step 13
And that’s how you make delicious dried radish strips! Now you’re ready to make some fantastic kimchi with them.
