
Homemade Cheonggyul (Unripe Green Mandarin) Syrup
Make Cheonggyul Syrup: A Year of Refreshment Guaranteed! ::31::

I made cheonggyul (unripe green mandarin) syrup using the seasonal fruit. I make it like this every year to enjoy as a refreshing drink in the summer and a warming health tea in the winter. It’s so versatile and always a household favorite!
Ingredients- 2kg Cheonggyul (unripe green mandarins)
- 2kg Sugar (equal weight to cheonggyul, white or unrefined)
- 4 Glass jars with airtight lids (total capacity of at least 4L)
Cooking Instructions
Step 1
First, thorough cleaning of the cheonggyul is essential. For the initial wash, use baking soda. Gently rub each cheonggyul with baking soda using a soft brush or your hands to clean them thoroughly. Then, dissolve some baking soda in water and soak the cheonggyul for 20-30 minutes. Flip them occasionally to ensure even cleaning. After soaking, rinse them 2-3 times with clean water to remove any baking soda residue.

Step 2
For the second wash, we’ll use vinegar. Fill a basin with water, add about a tablespoon of vinegar, and soak the cheonggyul for about 20 minutes. This step helps remove any remaining pesticides. After soaking, rinse them again 2-3 times with clean water.

Step 3
It’s crucial to completely remove all moisture from the washed cheonggyul. Pat them dry thoroughly with paper towels or a clean kitchen cloth. Any residual water can cause the syrup to spoil faster.

Step 4
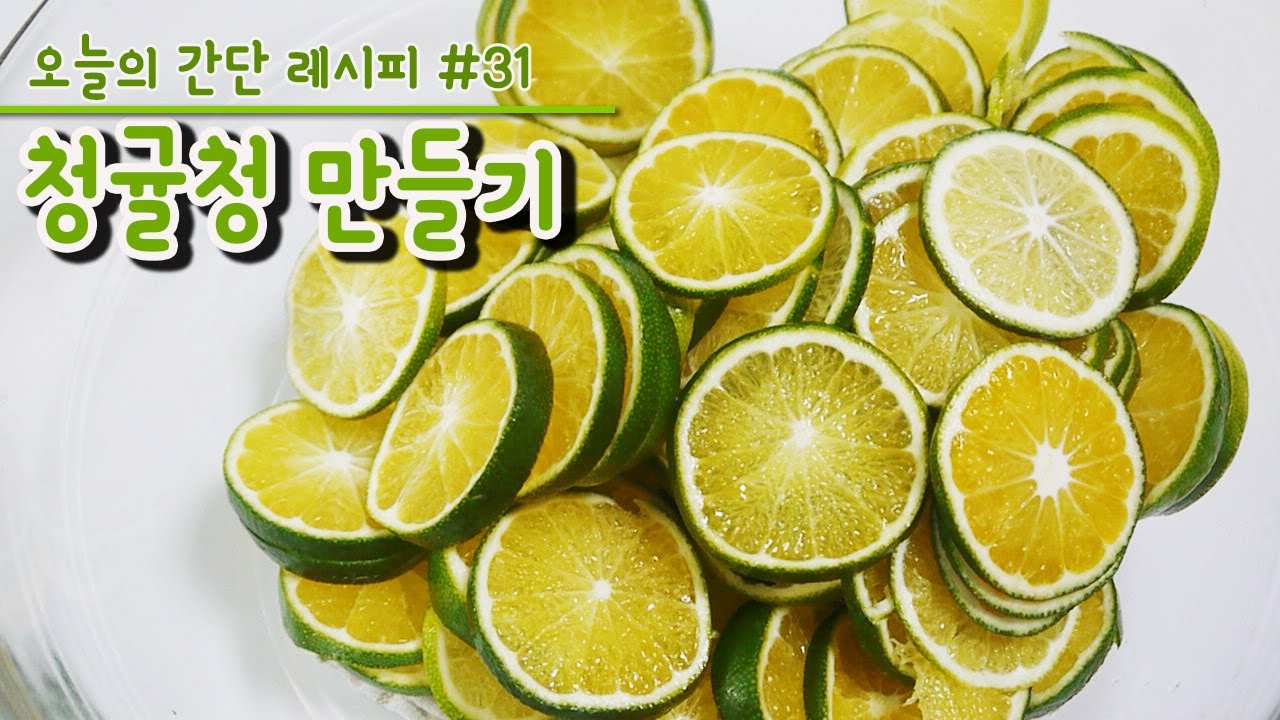
Once dried, remove any seeds from the cheonggyul and slice them thinly. Thin slices allow the sugar to dissolve more easily and help the flavor and aroma infuse properly. Seeds can impart a bitter taste, so be sure to cut them out or remove them carefully. You can leave the peel on.

Step 5
Now, it’s time to mix the cheonggyul and sugar in a 1:1 ratio. In a large bowl, combine the thinly sliced cheonggyul and sugar. Mix well to ensure the sugar evenly coats all the fruit pieces.

Step 6
Cover the bowl with plastic wrap and let it sit at room temperature to ferment and dissolve the sugar. The sugar will slowly melt, creating the characteristic syrup of cheonggyul. During this process, stir occasionally. If you see undissolved sugar at the bottom, use a spatula to scrape it up and mix it with the rest, ensuring all sugar dissolves completely. This prevents clumping.

Step 7
Prepare the glass jars for storing the cheonggyul syrup by sterilizing them in boiling water. Invert the jars in boiling water for at least 5 minutes, then let them air dry completely. Using clean, dry jars is essential for preserving the syrup for a long time.

Step 8
Once the sugar has mostly dissolved and the cheonggyul has released plenty of juice, carefully transfer the syrup into the sterilized and dried glass jars. Avoid filling the jars to the brim; leave a little space at the top.

Step 9
Allow the filled jars to sit at room temperature for another day to ensure all sugar is fully dissolved. After this, seal the jars tightly and store them in the refrigerator. Properly stored, your cheonggyul syrup can last for over a year. When serving, use a clean spoon and stir well before drinking!
