
Hearty Whole Wheat Bread Recipe
How to Make Delicious Whole Wheat Bread at Home

Baking brings so much joy and excitement, especially when you can create all sorts of bread according to the season! As the weather warms up, I’ve been experimenting with fermented breads using various grains like rye, oats, and whole wheat. While 100% whole wheat bread can be a bit rustic, its nutty and wholesome flavor is truly satisfying. If you prefer a chewier texture, consider mixing in some bread flour. For a softer crumb, a little all-purpose flour can be added. Enjoy the delightful process of baking healthy bread right in your kitchen!
Whole Wheat Bread Ingredients- Whole wheat flour 500g
- Instant dry yeast 7g
- Salt 7g
- Lukewarm water (approx. 35-40°C / 95-104°F) 420ml
Cooking Instructions
Step 1
I’m using ‘Uri-mil’ (Korean domestic) whole wheat flour for this recipe, but feel free to use your favorite brand of whole wheat flour.

Step 2
1. **Mixing the Dough:** In a large bowl, combine the whole wheat flour, yeast, and salt. Make a well in the center and pour in the lukewarm water. Mix with a spatula or your hands until a shaggy dough forms. (Tip: If hand-kneading is challenging, a bread machine can also be used).
2. **First Proofing:** Shape the dough into a ball, place it in a lightly oiled bowl, cover with plastic wrap or a damp cloth, and let it rise in a warm place for 1 hour, or until doubled in size.
3. **Degassing and Pre-shaping:** Gently punch down the risen dough to release the gas. Turn it out onto a lightly floured surface and shape it into a round. Let it rest for 10 minutes.
4. **Bench Rest (Intermediate Proofing):** Divide the dough into two equal portions. Shape each portion into a round ball. Cover them with plastic wrap or a damp cloth and let them rest at room temperature for 20 minutes.
5. **Second Proofing and Shaping:** After the bench rest, shape the dough portions into your desired bread shape. You can place them in loaf pans or shape them freeform. Cover with plastic wrap or a damp cloth and let them proof at room temperature for another 1 hour, or until they have nearly doubled in size.
6. **Baking:** Preheat your oven to 200°C (400°F). Just before baking, lightly dust the top of the proofed loaves with a bit of flour. Using a sharp knife or a lame, score the top of the dough with decorative cuts (coupes). Place the loaves in the preheated oven and bake for 25 minutes, or until golden brown and the internal temperature reaches around 93°C (200°F). (Tip: A quick spritz of water inside the oven before baking can help create a crispier crust.)

Step 3
Here’s a handy tip for successful dough proofing: Place the dough in a bowl, cover it, and then put that bowl inside a larger bowl filled with lukewarm water (around baby bath temperature). Place this setup in your oven (turned off, of course) or another warm spot. This creates a perfect, humid environment for the dough to rise beautifully.

Step 4
After letting it proof for 1 hour, the dough has risen spectacularly! It’s truly amazing to see how much it has grown.

Step 5
This is what the dough looks like after the first proofing. The puffed-up appearance is a great sign that the yeast is actively working.

Step 6
Once the first proofing is complete, divide the dough into two pieces. Shape them into rounds, cover with plastic wrap or a damp cloth, and let them undergo an intermediate proof for 20 minutes at room temperature. This step helps relax the gluten and makes shaping easier.

Step 7
After the intermediate proofing, I’ve shaped the dough into my preferred bread forms. Now, I’ll cover these with plastic wrap or a damp cloth and let them have their second proof for 1 hour at room temperature.

Step 8
Here’s how the dough looks after its second proofing. You can clearly see it has almost doubled in volume compared to its size before this stage.

Step 9
Tiny bubbles are forming on the surface of the dough. This is a wonderful indicator that the fermentation process has gone very well.

Step 10
Now comes the fun part: scoring the dough! Using a sharp knife or a baker’s lame, I’ll make some decorative cuts (coupes) across the surface. Scoring bread is one of the most enjoyable aspects of baking fermented doughs. Imagine the design you want as you score!

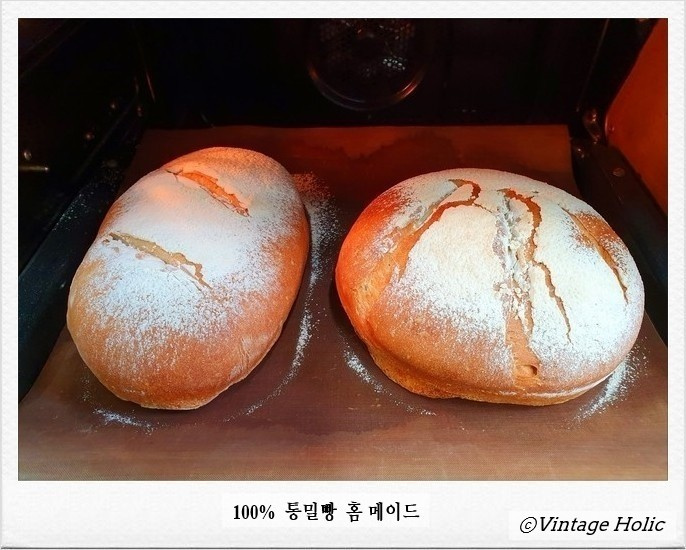
Step 11
Finally, I’ll lightly dust the bread with flour, place it in the 200°C (400°F) preheated oven, and bake for 25 minutes until beautifully golden brown. Your delicious whole wheat bread is ready!
