
Hearty Homemade Gimbap (10 Rolls)
A Feast from Your Kitchen! Making 10 Rolls of Gimbap is Easier Than You Think!

Embark on a culinary adventure with these 10 rolls of homemade gimbap, packed with flavor and love! Forget those childhood memories of messy, bursting rolls; this recipe is a testament to how far your kitchen skills have come. Once intimidated by the thought of making gimbap, now you can effortlessly craft 10 delicious rolls. Enjoy a satisfying and delicious meal made with your own hands.
Gimbap Ingredients- 4 servings of freshly cooked rice (rice cooker measurement)
- 10 sheets of gimbap seaweed (nori)
- 1/2 bunch of seasoned spinach
- 10 strips of egg omelet (made from 4 eggs)
- 10 strips of gimbap ham
- 10 strips of grilled fish cake
- 10 strips of seasoned burdock root
- 10 strips of pickled radish (danmuji)
- 10 strips of imitation crab meat (matssal)
- 1/2 carrot, julienned and stir-fried in oil
Cooking Instructions
Step 1
The foundation of great gimbap lies in fresh, flavorful ingredients! You can conveniently use pre-packaged gimbap kits often found in supermarkets. These typically include seaweed, ham, pickled radish, and burdock root (sometimes burdock is omitted). Feel free to enhance your gimbap by adding spinach, carrots, fish cake, and egg omelet, according to your preference.

Step 2
Personally, besides the standard egg, ham, pickled radish, imitation crab, fish cake, and carrots, I often add burdock root, spinach, or even tuna with perilla leaves, or cheese, for variety.

Step 3
Choose gimbap seaweed that’s neither too thin nor too thick. A standard pack usually contains 10 sheets, which is perfect for making 10 rolls.

Step 4
Let your freshly cooked rice cool slightly. Using hot rice can make the seaweed soggy. Season the rice with a pinch of salt, a drizzle of sesame oil, and some toasted sesame seeds. This base seasoning is crucial for preventing the gimbap from tasting bland. Don’t skip this step!

Step 5
Place a bamboo rolling mat on your cutting board and lay one sheet of gimbap seaweed on top. Spread about two-thirds of a ladleful of the cooled rice evenly over the seaweed, leaving a small margin at the top. (I used a 7:3 ratio of white rice to brown rice, which gives a great texture.)

Step 6
Now, arrange your prepared fillings neatly over the rice. To make your gimbap visually appealing, try to distribute the colorful ingredients evenly for a balanced look.

Step 7
Be mindful not to overfill the rolls, as this can cause them to burst or be difficult to roll. Taking a photo of all your fillings before assembly can help you ensure you haven’t forgotten any ingredient!

Step 8
Once all the fillings are in place, carefully lift the edge of the seaweed closest to you and begin to roll, tucking the ingredients in tightly to prevent them from shifting.

Step 9
With the roll enclosed in the bamboo mat, gently but firmly press along the length of the roll. This helps to shape the gimbap into a compact cylinder and ensures it holds its form.

Step 10
Don’t worry if the roll looks a bit uneven right after rolling. As the rice settles and combines with the moisture from the fillings, the roll will naturally firm up and become smoother.

Step 11
Continue this process for all your ingredients, and soon you’ll have 10 delicious rolls of gimbap! Notice the difference in the seaweed’s texture between the first and last rolls you made. As time passes, the seaweed will moisten and the creases will smooth out, making them look even more appetizing.

Step 12
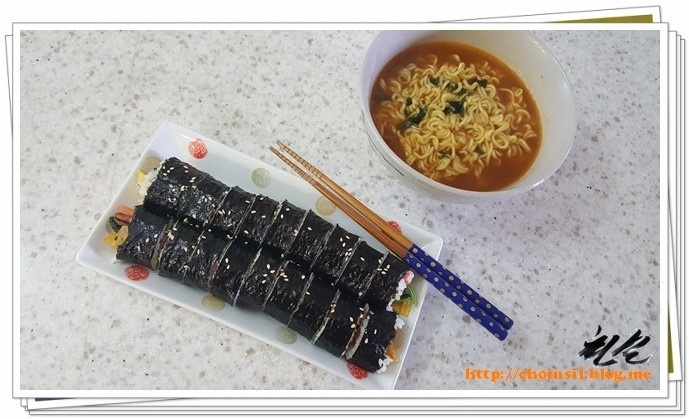
Once the gimbap has rested, use a sharp knife to slice each roll into bite-sized pieces (about 1.5 to 2 cm thick). The cross-section, revealing the vibrant and abundant fillings, looks incredibly appetizing!

Step 13
Arrange the sliced gimbap neatly on a serving plate. To add a beautiful sheen, use a pastry brush to lightly coat the exposed surfaces of the gimbap with sesame oil.

Step 14
Finally, sprinkle some toasted sesame seeds over the gimbap. This adds an extra layer of aroma and nutty flavor, making your gimbap even more irresistible.

Step 15
While delicious on its own, gimbap is perfection when paired with a bowl of hot ramen! For younger eaters, consider serving it with a clear fish cake soup instead of ramen. Enjoy your delicious homemade gimbap!
