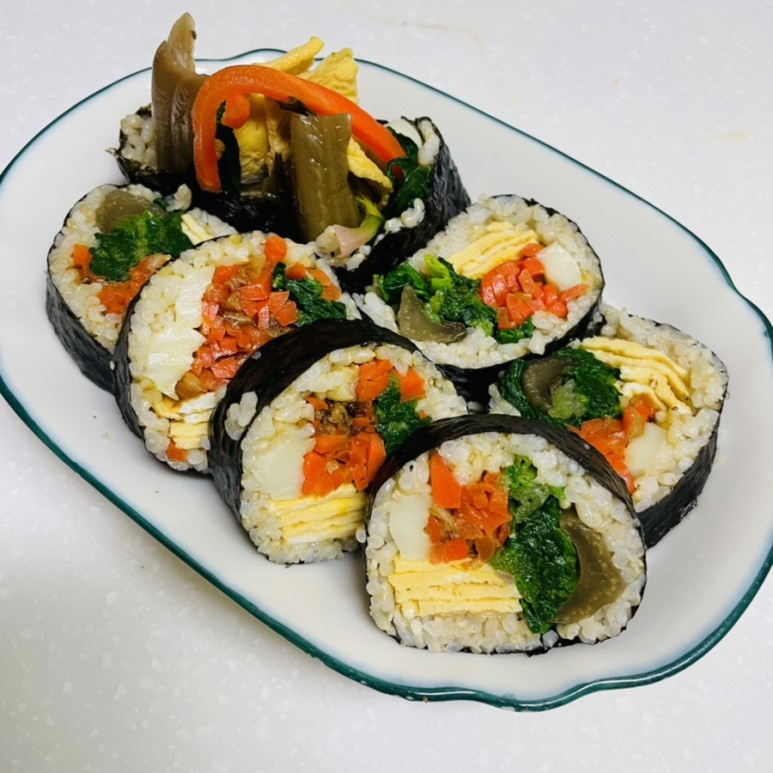
Healthy Spring Vegetable and Mustard Kimchi Gimbap
Making a Diet-Friendly Gimbap Packed with Seasonal Spring Greens and Tangy Mustard Kimchi

Introducing a diet-friendly gimbap recipe that harmonizes the freshness of spring with the refreshing zest of mustard kimchi, stimulating your appetite. It’s packed with nutritious seasonal vegetables like spinach and carrots.
Gimbap Ingredients- 1/2 carrot (approx. 50g)
- 2 handfuls fresh spinach (approx. 100g)
- 2 eggs
- 2 strips store-bought mustard kimchi (pickled mustard greens)
- 2 sheets dried seaweed for gimbap
- 1.5 bowls of brown rice (approx. 300g)
Rice Seasoning- 1 Tbsp sesame oil or perilla oil
- 1 Tbsp sesame oil or perilla oil
Cooking Instructions
Step 1
First, prepare all the ingredients for the gimbap. Wash the carrot and julienne it. Trim and wash the spinach. Whisk the eggs, season the rice, and prepare the minced garlic for stir-frying. Having all ingredients ready beforehand makes cooking much smoother.

Step 2
After thoroughly washing the carrot, slice it thinly on an angle to a thickness of about 0.5 cm, suitable for gimbap filling.

Step 3
Julienne the sliced carrots into thin, long strips approximately 0.3 cm thick. Using a mandoline slicer can help achieve uniform cuts.

Step 4
Mince the garlic finely. Minced garlic adds a wonderful aroma and flavor when stir-frying vegetables.

Step 5
Heat about 1 tablespoon of cooking oil in a pan over medium-low heat.

Step 6
Add the minced garlic to the heated pan. Stir-fry gently, being careful not to burn the garlic, until a subtle garlic aroma infuses the oil.

Step 7
Once the garlic fragrance begins to develop (after about 30 seconds),

Step 8
Add all the julienned carrots to the pan.

Step 9
Stir-fry the carrots over medium heat for about 2-3 minutes until they become slightly translucent and tender. Avoid overcooking, as they can become too soft; retaining a slight crispness is ideal.

Step 10
Bring a pot of water to a boil, add a tiny pinch of salt to season the blanching water. Lightly salting the spinach makes it taste better.

Step 11
Add the cleaned and trimmed spinach to the boiling water.

Step 12
Blanch the spinach very briefly, just until it wilts, for about 30 seconds to 1 minute. Over-blanching can destroy nutrients and make it mushy, so be mindful of the time.

Step 13
Immediately transfer the blanched spinach to cold water to cool it down. This helps maintain its vibrant green color and a crisp texture.

Step 14
Gently squeeze out as much water as possible from the spinach after rinsing it in cold water. Excess water can make the gimbap soggy.

Step 15
In a clean bowl, crack 2 eggs and add a tiny pinch of salt to season and remove any eggy smell.

Step 16
Whisk the eggs with a chopstick or whisk until well combined and smooth, ensuring there are no stringy bits (egg whites).

Step 17
Heat a non-stick pan over low heat and lightly coat it with cooking oil. Cooking slowly over low heat prevents burning and ensures even cooking.

Step 18
Once the pan is adequately heated, pour in the beaten egg mixture thinly. Reduce the heat to very low. Cook slowly to ensure the egg cooks through and becomes soft without burning.

Step 19
Once the egg omelet is cooked, let it cool slightly, then slice it into long, bite-sized strips about 1 cm thick for the gimbap filling.

Step 20
Add 1 tablespoon of sesame oil or perilla oil to 1.5 bowls of brown rice. Gently mix the rice, being careful not to mash the grains. Seasoning the rice enhances the overall flavor of the gimbap.

Step 21
Place a sheet of gimbap seaweed, rough side up, on a bamboo rolling mat or a clean cutting board. Using a mat will make rolling easier.

Step 22
Spread the prepared brown rice thinly and evenly over the seaweed. Be careful not to spread the rice too thickly, as this can cause the gimbap to burst when rolled.

Step 23
Arrange the sliced egg omelet strips neatly over the rice. Think of filling the center of the gimbap.

Step 24
Generously add the stir-fried carrot strips on top of the egg omelet. This adds color and texture.

Step 25
Add a good portion of the squeezed spinach as well. Distribute the ingredients evenly to balance the gimbap.

Step 26
Finally, place the 2 strips of prepared mustard kimchi over the other ingredients. The sweet and sour flavor of the mustard kimchi cuts through any richness, making it a delightful addition.

Step 27
Starting from the bottom edge of the seaweed, hold the ingredients firmly and roll the gimbap tightly, using the mat or your hands to shape it. Lightly moistening the edge of the seaweed with water will help seal it.

Step 28
Once rolled, slice the gimbap into bite-sized pieces, about 1.5 cm to 2 cm thick. Brushing a little sesame oil on the outside of the gimbap adds a nice sheen and enhances the flavor.

Step 29
Arrange the sliced gimbap attractively on a plate. Your healthy and delicious gimbap, made with seasonal spring greens and mustard kimchi, is now complete! Enjoy your meal.


