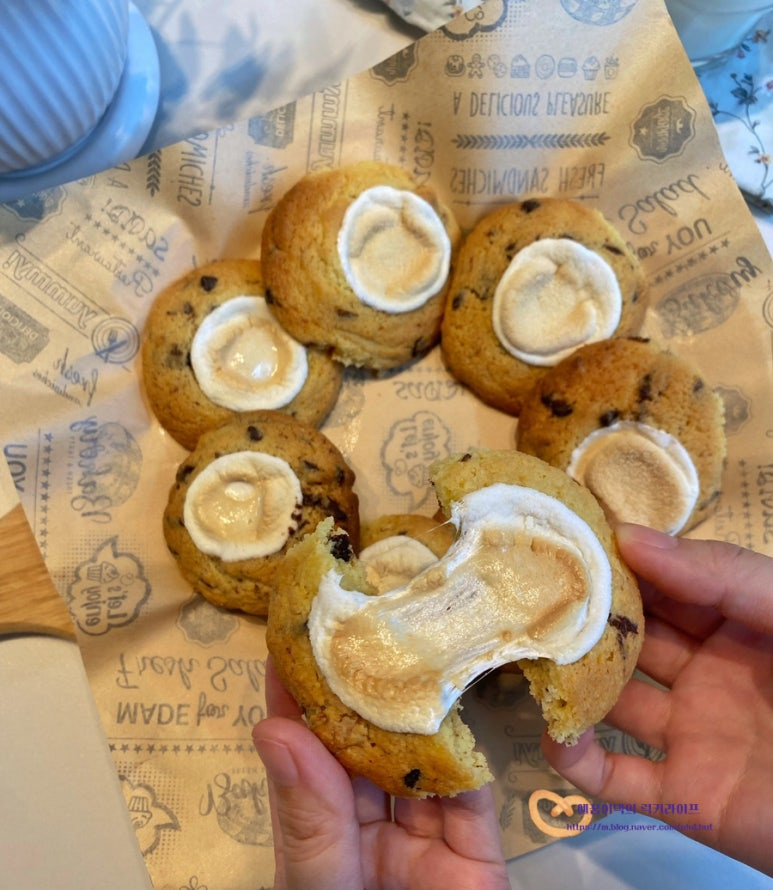
Gooey & Sweet S’mores Cookies: Homemade Recipe
The Best Kid’s Snack! Crispy Outside, Chewy Inside S’mores Cookies: A Perfect Harmony of Marshmallow, Chocolate, and Nuts

Today, I’m sharing a recipe for ‘S’mores Cookies’ that are perfect as a snack for kids during their school break! Homemade cookies are incomparably delicious compared to store-bought ones. ‘S’more’ originates from ‘Some more,’ implying a desire for more because they’re so tasty! It’s a truly delightful dessert where warm, melted marshmallow meets the sweetness of the cookie. Adding chocolate chips for a burst of flavor and nuts for a satisfying crunch makes these cookies even better. If you’ve been hesitant to bake, don’t worry! S’mores cookies are easy to make – you just mix the dough and bake. They’re a great baking project for beginners. For a crispy exterior and a chewy interior, we’re using almond flour and cake flour, enhanced with the rich flavors of dark chocolate and walnuts. A key tip is to add the marshmallows towards the end of baking, as they can burn easily. Feel free to customize your s’mores cookies by adding different types of chocolate, nuts, or even biscuits to suit your taste!
Cookie Dough Ingredients (Makes approx. 13 cookies)- 100g unsalted butter, softened to room temperature
- 100g granulated sugar
- 1 pinch of salt
- 1 large egg, room temperature
- A few drops of vanilla extract (optional, to enhance flavor and reduce egg smell)
- 100g cake flour
- 80g almond flour
- 3g baking powder
- 1g baking soda
Topping Ingredients- 80g dark chocolate, chopped into small pieces or chocolate chips
- 1 handful of walnuts or your preferred nuts, finely chopped
- Marshmallows, as needed (adjust size according to cookie size)
- 80g dark chocolate, chopped into small pieces or chocolate chips
- 1 handful of walnuts or your preferred nuts, finely chopped
- Marshmallows, as needed (adjust size according to cookie size)
Cooking Instructions
Step 1
First, prepare 100g of unsalted butter. You can leave it at room temperature to soften naturally, or speed things up slightly using a microwave. Place the butter in a microwave-safe bowl and heat in short bursts of 15-30 seconds, just until it’s softened but not fully melted or hot. Be careful not to overheat it.

Step 2
Using a whisk or spatula, beat the softened butter until it becomes smooth and creamy.

Step 3
Add 100g of granulated sugar and a pinch of salt to the creamed butter. Mix well until the sugar is mostly incorporated. You don’t need to dissolve all the sugar; a lightly creamed mixture of butter and sugar is perfect.

Step 4
Here’s the butter and sugar mixture after creaming lightly. A smooth, creamy consistency is what you’re aiming for.

Step 5
Add 1 large egg (ensure it’s at room temperature) and mix thoroughly. Eggs can sometimes separate from butter, so it’s best to add it in 2-3 additions, mixing well after each. Whisk briskly to emulsify the egg and butter mixture.

Step 6
Add about 3-4 drops of vanilla extract for a lovely aroma and to help eliminate any eggy smell. Mix gently.

Step 7
Now, it’s time to add the dry ingredients. Sift together 100g of cake flour, 80g of almond flour, 3g of baking powder, and 1g of baking soda into the butter mixture. Sifting ensures there are no lumps and creates a smoother dough.

Step 8
Once the dry ingredients are partially incorporated, add the chopped dark chocolate and finely chopped walnuts. Gently mix until the additions are evenly distributed throughout the dough. Be careful not to overmix, as this can lead to tough cookies.

Step 9
Dark chocolate is recommended for its rich flavor, but feel free to mix it with chocolate chips. For nuts, you can use walnuts, pecans, cashews, or any other nuts you prefer to add variety.

Step 10
Wrap the cookie dough tightly in plastic wrap and refrigerate for 30 minutes. This chilling period helps the dough firm up, making it easier to shape and improving the cookie’s final texture.

Step 11
After 30 minutes, the chilled cookie dough will be firm and easy to handle.

Step 12
Take portions of the dough (about 30-40g each) and roll them into balls. Remember that cookies spread while baking, so shape them slightly smaller than your desired final size. Leave enough space between cookies on the baking sheet.

Step 13
Bake in a preheated oven at 180°C (350°F) for 12 minutes. Since marshmallows can burn easily, we’ll add them towards the end. After 12 minutes, remove the cookies from the oven, place marshmallows on top, and bake for an additional 3 minutes to finish.

Step 14
Marshmallows can be quite large, so cutting them in half before placing them on the cookies makes them easier to manage and distribute.

Step 15
After 12 minutes of baking, take the cookies out and place the prepared marshmallow halves in the center of each cookie.

Step 16
Return the cookies with marshmallows to the oven and bake for another 3 minutes at 180°C (350°F). Bake just until the marshmallows are slightly melted and lightly golden. Keep a close eye on them to prevent burning.

Step 17
Voila! Your delicious S’mores Cookies are ready, with a crispy exterior, chewy interior, and perfectly gooey marshmallows. Enjoy them warm for the best experience!


