
Fragrant Apple Pie
Homemade Apple Pie Recipe Using a Mini Oven (Complete Guide from Dough to Filling)

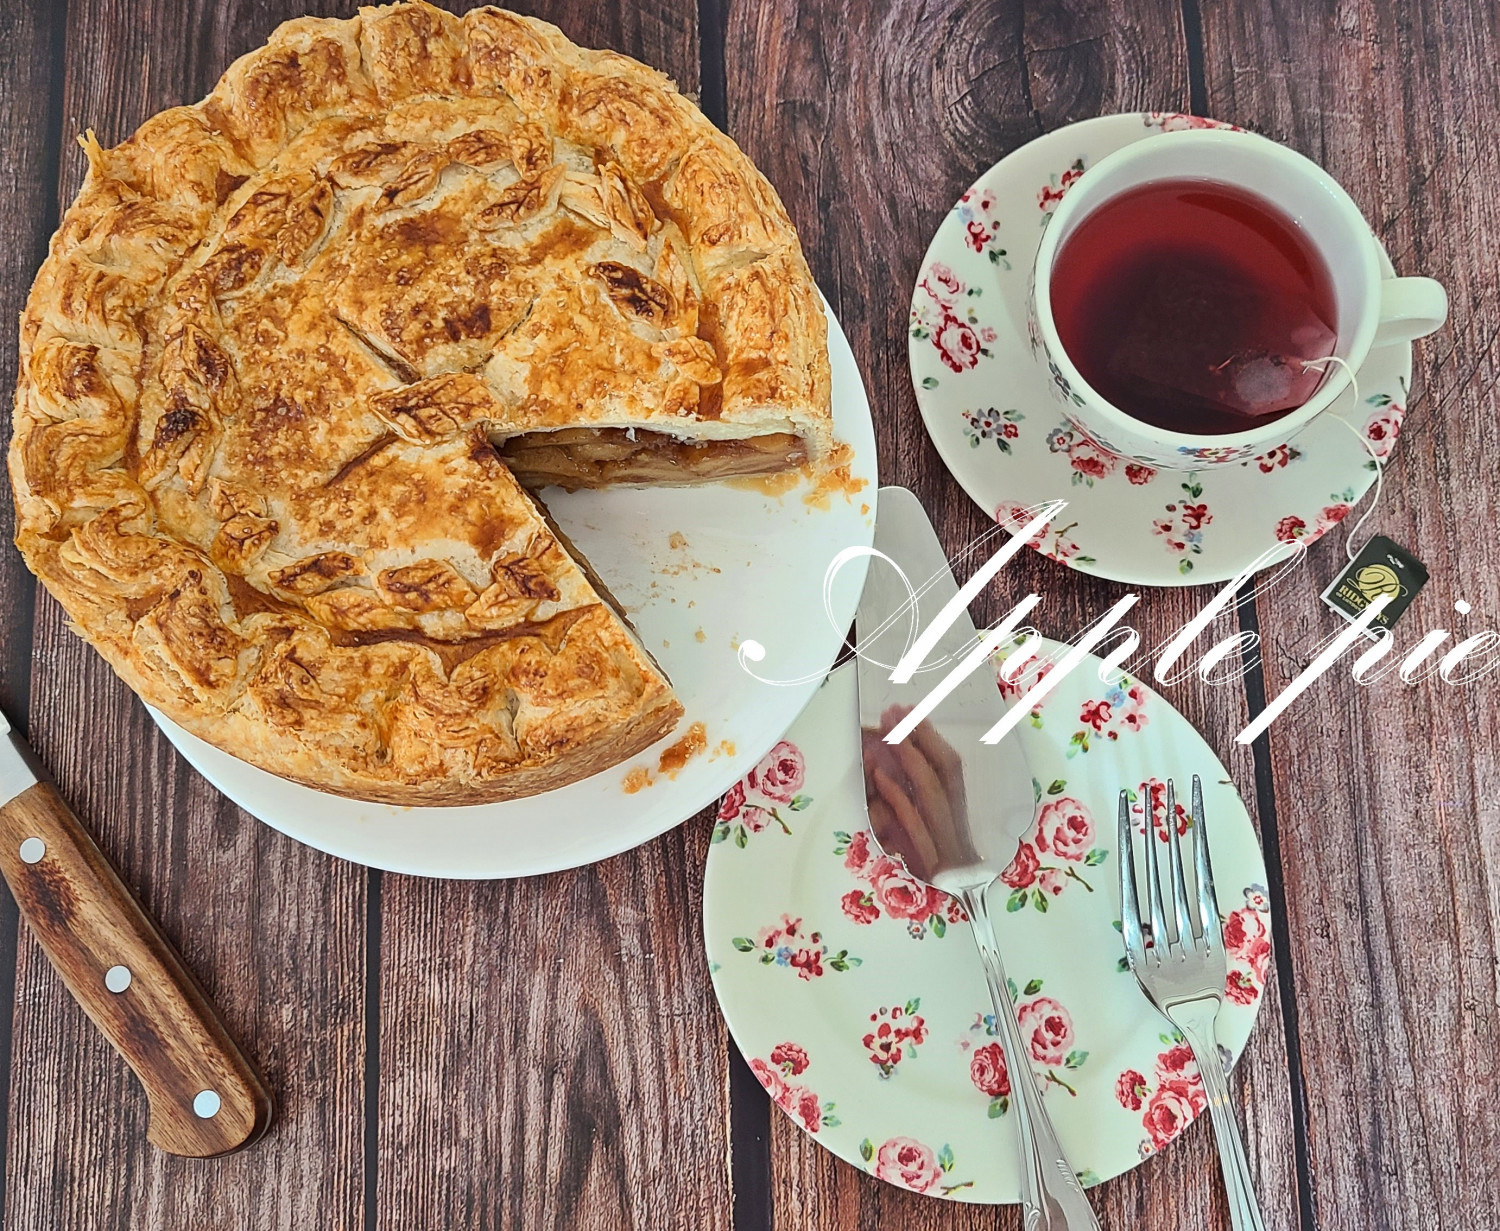
Hello everyone! Today, we’re baking a universally loved classic dessert: Apple Pie! This pie, with its crispy crust and moist, flavorful apple filling, is perfect with coffee or tea. We’ll guide you through making it easily at home using a 20cm pie pan. Enjoy a delightful baking session filled with the sweet aroma of apples that will fill your home!
Crispy Pie Crust Ingredients- 230g cold unsalted butter, cubed
- 30g granulated sugar
- 1 tsp salt
- 320g all-purpose flour
- 120g ice-cold water
Sweet Apple Filling- 720g apples (about 2-3 medium apples)
- 1 tsp lemon juice
- 80g granulated sugar
- 53g brown sugar
- 1 tsp ground cinnamon (approx. 2g)
- 1/4 tsp salt (approx. 1g)
- 15g cornstarch
- 150g unsalted butter, cubed
- 720g apples (about 2-3 medium apples)
- 1 tsp lemon juice
- 80g granulated sugar
- 53g brown sugar
- 1 tsp ground cinnamon (approx. 2g)
- 1/4 tsp salt (approx. 1g)
- 15g cornstarch
- 150g unsalted butter, cubed
Cooking Instructions
Step 1
First, let’s make the pie crust. In a large bowl, combine 320g of all-purpose flour, 1 tsp of salt, and 30g of granulated sugar. Whisk them lightly with a whisk or fork.

Step 2
Add the cold, cubed 230g of unsalted butter to the flour mixture. It’s important to keep the butter cold to ensure a flaky crust.

Step 3
Using your fingertips or a pastry blender, cut the butter into the dry ingredients until the mixture resembles coarse crumbs, similar to breadcrumbs. Aim for pea-sized pieces of butter remaining.

Step 4
Gradually add 120g of ice-cold water, mixing until the dough just comes together. Be careful not to overmix; you want it to form a cohesive ball. The amount of water may vary slightly depending on the flour’s moisture content, so add it incrementally until the dough is just combined.

Step 5
Divide the dough into two discs, flatten them slightly, wrap them in plastic wrap or place them in a sealed bag, and refrigerate for at least 30 minutes to 1 hour. This resting period allows the gluten to relax, making the dough easier to roll and resulting in a crispier crust after baking.

Step 6
Now, let’s prepare the apple filling. Peel approximately 720g of apples (about 2-3 medium apples).

Step 7
Core the peeled apples and slice them into bite-sized pieces or pieces suitable for filling the pie. Avoid slicing them too thinly, as they can turn mushy when cooked.

Step 8
In a bowl, combine the sliced apples with 1 tsp of lemon juice, 80g of granulated sugar, 53g of brown sugar, 1 tsp of ground cinnamon, and 1/4 tsp of salt. Add 15g of cornstarch to help thicken the filling.

Step 9
Cook the apple mixture over medium-low heat for about 15 minutes, stirring occasionally, until the apples soften and the liquid has thickened slightly, releasing a wonderful cinnamon aroma. Stir in the cubed 150g of unsalted butter until melted. The butter will add richness and a smooth texture to the filling.

Step 10
Set the cooked apple filling aside to cool slightly. It’s important to let it cool down before adding it to the pie crust, as a hot filling can melt the butter in the dough.

Step 11
Take one of the rested dough discs from the refrigerator. Lightly flour your work surface and roll out the dough to about 2mm thickness, ensuring it’s slightly larger than your pie pan to allow for trimming the edges.

Step 12
Carefully transfer the rolled dough into the pie pan. Gently press it to fit the bottom and sides of the pan. Trim any excess dough that extends beyond the rim of the pan for a neat finish.

Step 13
Spoon the cooled apple filling evenly into the pie crust. Be careful not to overfill, as the filling can bubble up and spill over during baking.

Step 14
Take the second dough disc and roll it out to approximately 2mm thickness, similar to the bottom crust. This will be your pie’s top crust.

Step 15
Place the rolled top crust over the apple filling. Crimp the edges of the top and bottom crusts together securely using your fingers or a fork to seal them. Trim any excess dough to create a clean edge.

Step 16
This step is optional, but adding decorative edges to your pie crust will make it look even more appealing. You can press with your fingertips, pinch the edges, or use decorative cutters to create your desired design.

Step 17
To prevent the crust from puffing up too much or bursting, cut a few slits in the center of the top crust. This allows steam to escape during baking, ensuring an even bake and a beautiful presentation.

Step 18
If you have leftover dough, you can cut out decorative shapes like leaves or flowers. These can be placed on top of the pie for an extra touch of artistry. This is a fun step, especially if baking with children!

Step 19
Arrange the decorative dough shapes attractively on top of the apple pie to complete the decoration. Use this step if you desire a more elaborate pie.

Step 20
To give the pie crust a beautiful golden sheen and appealing color, whisk one egg in a small bowl to create an egg wash.

Step 21
Using a soft pastry brush, gently brush the egg wash evenly over the entire surface of the pie crust. Be sure to cover the edges as well for uniform browning.

Step 22
Sprinkle granulated sugar lightly over the egg-washed crust. This will create a delightful, slightly crunchy, and sweet glaze when baked.

Step 23
It’s time to bake! Preheat your oven to 190°C (375°F), then reduce the temperature to 170°C (340°F) and bake for approximately 55-60 minutes. Bake until the crust is a beautiful golden brown and the filling is bubbling. If the crust starts browning too quickly, you can loosely tent the pie with aluminum foil. Enjoy your delicious homemade apple pie!
