
Fluffy and Moist Tamagoyaki (Rolled Omelet)
The Ultimate Foolproof Tamagoyaki Recipe for Everyone

I’m a dad in my mid-forties! ^^♡ My youngest, an 8-year-old, found his Sunday breakfast a little plain, so I decided to make this. He said, ‘Dad, you should open a side dish shop!’ Haha! ^^♡♡♡ Here’s my foolproof recipe for a wonderfully soft and moist tamagoyaki that kids and adults alike will adore.
Main Ingredients- 8 large eggs
- 1/3 carrot
- 1/3 onion
- 1/3 green onion
Seasoning- 12 pinches of salt (approx. 1/2 tsp)
- 12 pinches of salt (approx. 1/2 tsp)
Cooking Instructions
Step 1
First, crack 8 large eggs into a bowl and whisk them well. Finely chop the carrot, onion, and green onion into very small pieces. Add the chopped vegetables to the whisked eggs and season with 12 pinches of salt (or about 1/2 teaspoon). Finely chopping the vegetables makes the tamagoyaki softer and prettier. Once you’ve done this, you’re almost halfway there!

Step 2
Now, heat a non-stick frying pan over low heat. Add just a tiny splash of cooking oil, barely enough to coat the pan. If you use too much oil, the tamagoyaki will become greasy and heavy.

Step 3
Using a paper towel, lightly coat the entire surface of the pan with oil. You want just enough to create a non-stick surface, not so much that you can see pooled oil. This step ensures the egg won’t stick and will cook gently.

Step 4
Pour about one ladleful to two and a half ladlefuls of the egg mixture into the pan, adjusting the amount based on your pan size. Cook over very low heat for about 10 seconds. When the edges of the egg mixture start to look slightly cooked and ‘a bit firm’, it’s time for the next step.

Step 5
As the egg mixture begins to firm up, quickly use a spatula or chopsticks to roll one edge of the egg over. Roll it up to about 2-3 cm thickness; you can adjust this to your preference. Shaping it nicely is key.

Step 6
Gently slide the rolled egg to one side of the pan. Pour more egg mixture into the empty space. This step helps the new egg mixture adhere to the already rolled portion.

Step 7
When the edges of the newly poured egg start to firm up, roll the omelet every 5 seconds, turning it to create a round, even shape. Just before the final roll, you can lightly brush the surface with the oil from the paper towel you used earlier. This gives it a beautiful sheen and extra moisture. (While not strictly necessary, it does make it even better!)

Step 8
Pour another one to two ladlefuls of egg mixture. Similar to the previous step, once the edges start to firm up (in about 10 seconds), roll it every 5 seconds to shape it. Repeat this process, gradually building up the layers until your tamagoyaki reaches your desired thickness.

Step 9
Voilà! Your delicious-looking tamagoyaki is ready. Before removing it from the pan, you can stand it upright to shape the sides neatly, creating a perfectly rectangular shape if you prefer. Transfer the finished tamagoyaki to a cutting board and let it cool for 2-3 minutes. This allows it to set, making it easier to slice without falling apart.

Step 10
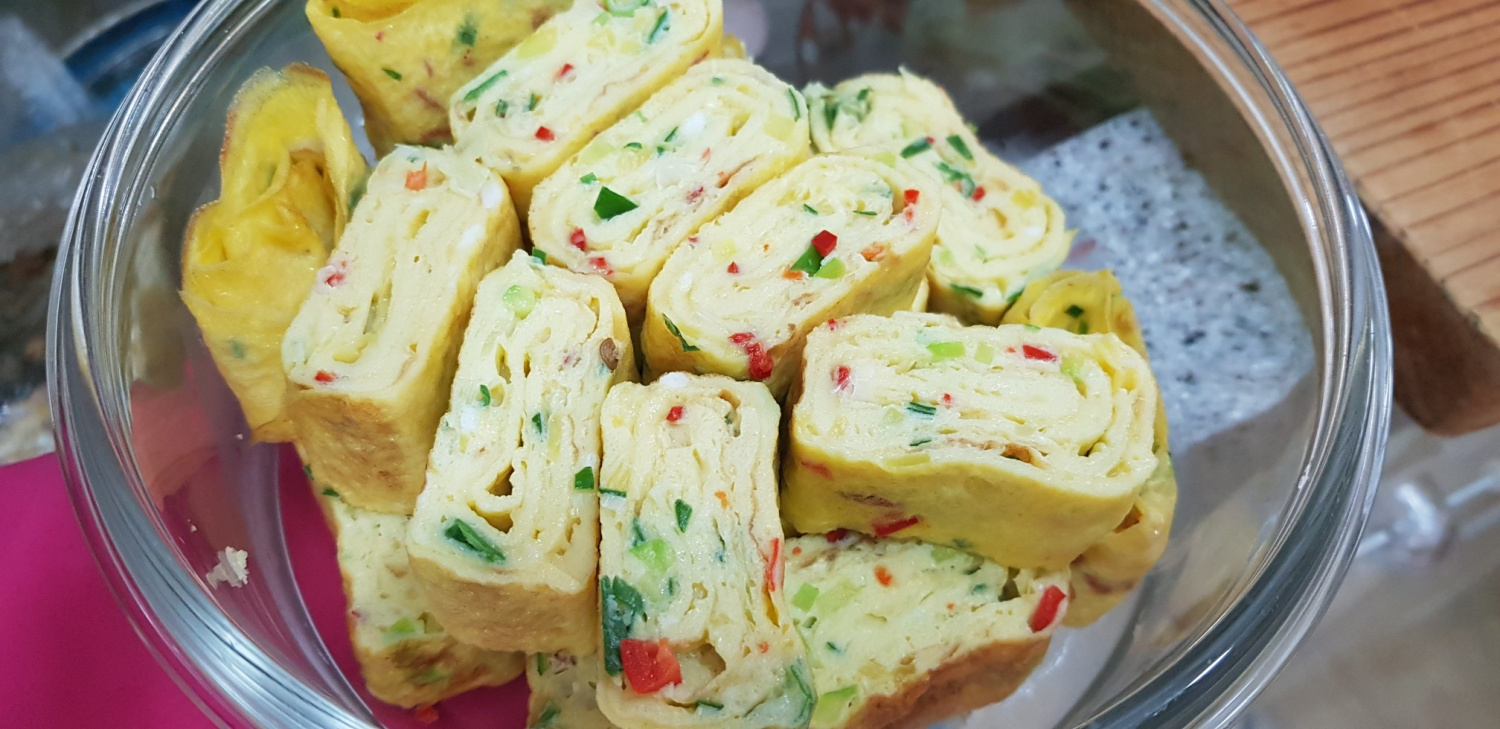
Once slightly cooled, slice the tamagoyaki diagonally into attractive pieces. The kids will absolutely love it! For an extra touch of flavor, serve it with ketchup, mustard, or mayonnaise.

Step 11
Arranging the slices on a long plate makes for a beautiful presentation.

Step 12
Doesn’t the cross-section look wonderfully appetizing when it’s warm? Don’t miss out on the slightly browned, crispy tail end – it has a fantastic savory flavor!

Step 13
You can also cut it into cubes for bite-sized pieces, which is equally delicious. Chilled tamagoyaki from the refrigerator is also a delightful treat. Enjoy it in different ways! ^^♡
