Effortless Kimchi Making with Pre-Brined Cabbage: A Foolproof Guide
Mastering Kimchi with Pre-Brined Cabbage for Delicious Results

Typically, we make kimchi in December, but this year, I decided to get a head start! While I don’t make a huge batch as our family is small, using pre-brined cabbage makes the process so quick and easy, even for one person. Let’s make some delicious and abundant kimchi together!
Kimchi Ingredients- 40kg pre-brined napa cabbage
- 2 Korean radishes (Mu)
- 1 bunch of green garlic chives (Jjokpa)
Flavorful Kimchi Paste- 10 cups glutinous rice paste (Japssalpul)
- 5 cups salted fermented shrimp (Saewujeot)
- 2 cups fish sauce (Canary brand)
- 2 cups fish sauce (Anchovy brand)
- 1kg gochugaru (Korean chili flakes)
- 4 cups minced garlic
- 4 Tbsp minced ginger
- 1 cup pureed onion
- 4 persimmons, pureed (Our secret for natural sweetness instead of sugar!)
- Pinch of salt (to adjust seasoning)
- 10 cups glutinous rice paste (Japssalpul)
- 5 cups salted fermented shrimp (Saewujeot)
- 2 cups fish sauce (Canary brand)
- 2 cups fish sauce (Anchovy brand)
- 1kg gochugaru (Korean chili flakes)
- 4 cups minced garlic
- 4 Tbsp minced ginger
- 1 cup pureed onion
- 4 persimmons, pureed (Our secret for natural sweetness instead of sugar!)
- Pinch of salt (to adjust seasoning)
Cooking Instructions
Step 1
Ordering pre-brined cabbage is convenient, but sometimes it lacks the outer leaves, which can be a bit disappointing. This time, however, the supplier included the outer leaves, which was a wonderful bonus! These outer leaves are great for wrapping the kimchi later.

Step 2
I ordered 40kg of pre-brined cabbage, which came in two boxes of 20kg each. Maybe it’s a lot, but it’s perfect for delicious kimchi! First, place the brined cabbage in a colander to drain excess water thoroughly. Proper draining is key to preventing watery kimchi and ensuring the flavors meld beautifully.

Step 3
Let’s prepare the rich kimchi paste! Start by making 10 cups of glutinous rice paste and letting it cool. Then, combine it with 5 cups of salted fermented shrimp, 2 cups of Canary fish sauce, 2 cups of anchovy fish sauce, 1kg of gochugaru, 4 cups of minced garlic, 4 tablespoons of minced ginger, 1 cup of pureed onion, and our secret ingredient for natural sweetness – 4 pureed persimmons. Add a pinch of salt if needed to adjust the seasoning. Mix everything well and let it sit so the gochugaru can fully hydrate and the flavors can meld. Using persimmons adds a natural sweetness and depth of flavor, a wonderful alternative to sugar.

Step 4
Now, let’s prepare the ingredients for the kimchi filling. While I prefer not to add too many ingredients to my kimchi filling, this time I prepared a bit extra to also make some white kimchi. Thinly julienne 2 Korean radishes, lightly salt them, then rinse and squeeze out excess water. Cut 1 bunch of green garlic chives into 5cm lengths and lightly marinate them with fish sauce. In a large bowl, combine the julienned radish and chives. Gently mix in the pre-made kimchi paste until everything is well coated. Be careful not to overmix to preserve the crisp texture of the vegetables. This forms our flavorful kimchi filling.

Step 5
It’s time to stuff the cabbage! Carefully spread the kimchi filling between the cabbage leaves, making sure to add a bit more paste to the thicker stem parts for better flavor distribution. Gently fold the outer leaves over the filling to enclose it. Finally, wrap the entire head with the reserved outer cabbage leaves. This helps the kimchi stay fresh and retain its shape as it ferments.

Step 6
Arrange the stuffed cabbage heads snugly in your kimchi containers. Use the reserved outer leaves to cover the top layer. This prevents the kimchi from drying out or being exposed to air, ensuring it stays fresh. You don’t need to apply much paste to these top leaves; just a light wipe with the remaining paste is sufficient.

Step 7
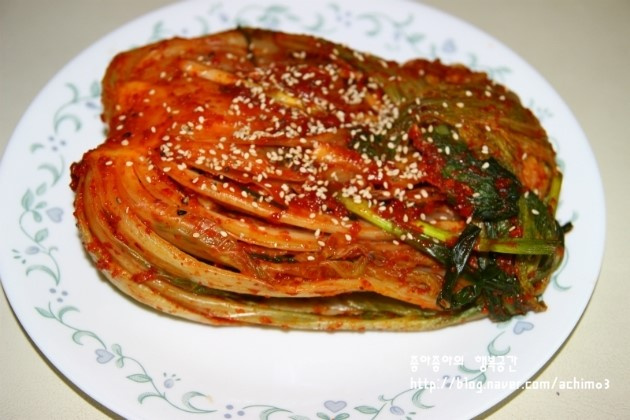
And there you have it – 40kg of delicious homemade kimchi, made effortlessly with pre-brined cabbage! Two of these batches were made into white kimchi. Completing the kimchi-making process feels like a huge accomplishment. Now, all that’s left is to let it ferment and enjoy the delicious results. Enjoy your homemade kimchi throughout the winter!


