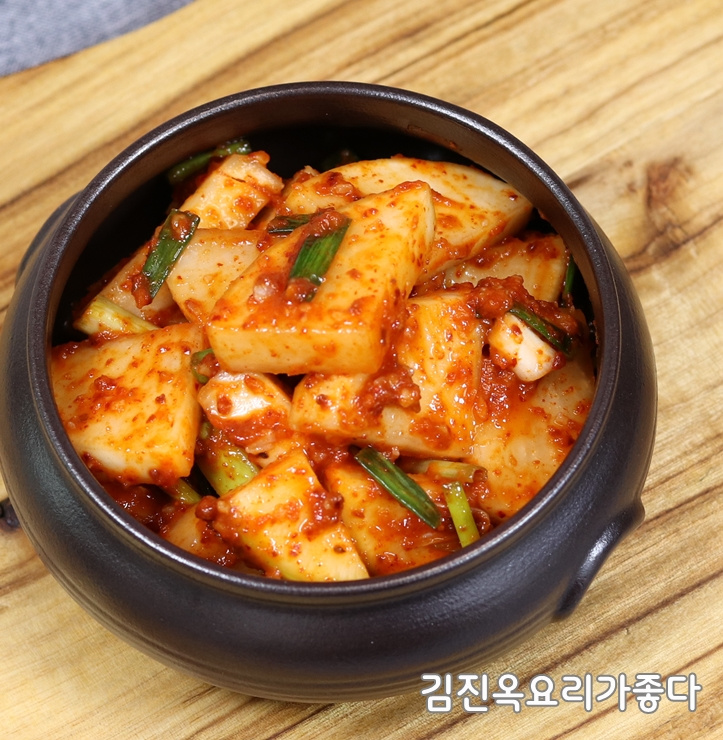
Easy Kkakdugi (Cubed Radish Kimchi) Recipe
Quick Kkakdugi Recipe Using Stale Rice – How to Make Kkakdugi

Hello everyone, this is Kim Jin-ok of ‘Cooking is Good’. Today, I’ll show you how to easily make delicious Kkakdugi with seasonal fall radishes! Using bunch radishes, which are affordable and tasty right now, makes the Kkakdugi naturally flavorful without needing a long fermentation period. You can even blanch the radish greens to make a delicious soybean paste stew. For this recipe, we’ll use 3 bunch radishes, totaling 3kg after preparation. Please weigh your radishes to ensure accuracy.
**Ingredients:**
* 3 radishes (approx. 3kg total after trimming)
* 10 stalks of green onion
* 1/2 onion
* 2 Tbsp cooked rice (adjust sugar based on radish sweetness)
* 1 Tbsp salted shrimp
* 4 Tbsp anchovy sauce
* 2/3 cup + 1 Tbsp Gochugaru (Korean chili flakes)
* 3 Tbsp minced garlic
* 1/2 Tbsp minced ginger
* 2-3 Tbsp sugar
* 1 Tbsp salt
* 2/3 cup coarse sea salt
*Measurements are based on a standard Korean tablespoon and a 180ml paper cup.*
**Tip:** If your radishes aren’t very sweet, adding a little sugar while salting can enhance their sweetness. After mixing, taste and adjust seasoning with salt, anchovy sauce, or sugar as needed. Store the finished Kkakdugi in an airtight container. Let it sit at room temperature for 1-2 days to ferment slightly, then refrigerate.
Main Ingredients- 3kg radish (prepared)
- 10 stalks green onion
- 2 Tbsp cooked rice
- 1 Tbsp salted shrimp
- 1/2 onion
- 4 Tbsp anchovy sauce
- 2/3 cup + 1 Tbsp Gochugaru (Korean chili flakes)
- 3 Tbsp minced garlic
- 1/2 Tbsp minced ginger
- 2-3 Tbsp sugar
- 1 Tbsp salt
- 2/3 cup coarse sea salt
Cooking Instructions
Step 1
1. **Prepare and Cut the Radish:** First, wash the radishes thoroughly and peel them. Cut each radish in half lengthwise, then in half again, and slice into approximately 1cm thick pieces. Aim for a consistent thickness so they cook evenly and don’t become too soft.

Step 2
2. **Salt the Radish:** Place the sliced radishes in a large bowl. Add the coarse sea salt (2/3 cup in total). Sprinkle a small amount of salt over a layer of radish, then add another layer of radish and sprinkle more salt on top. Repeat this process until all the radish is layered with salt. Finally, evenly sprinkle 1/2 cup of water over the salted radish. Let it sit for 40 minutes, flipping it halfway through to ensure even salting.
***Tip: If your radishes lack sweetness, you can add 1-2 tablespoons of sugar while salting to help them absorb sweetness and enhance the flavor!***

Step 3
3. **Prepare Green Onions and Seasoning Paste:** While the radish is salting, prepare the green onions and the seasoning paste. Wash the 10 stalks of green onion and cut them into approximately 2cm lengths. Cutting them to a manageable size ensures the seasoning coats them well and makes them easy to eat.

Step 4
4. **Make the Seasoning Paste Base:** In a blender, add the half onion (cut into pieces), 2 tablespoons of cooked rice, 1 tablespoon of salted shrimp, and 4 tablespoons of anchovy sauce. Blend until smooth. The cooked rice acts as a binder, similar to glutinous rice paste, adding body and umami to the Kkakdugi.

Step 5
5. **Complete the Seasoning Paste:** Transfer the blended mixture to a bowl. Add 1/2 tablespoon of minced ginger, 3 tablespoons of minced garlic, 2-3 tablespoons of sugar, 1 tablespoon of salt, and 2/3 cup of Gochugaru (Korean chili flakes). Mix everything thoroughly until well combined to create the seasoning paste.
***Tip: If the radishes are naturally very sweet, you might only need 2 tablespoons of sugar. Adjust to your preference.***

Step 6
6. **Mix and Ferment the Kkakdugi:** After 40 minutes, rinse the salted radish lightly under cold running water to remove excess salt. Drain it in a colander for about 10 minutes. Place the drained radish in a large bowl. Add 1 tablespoon of Gochugaru and gently rub it into the radish to coat it evenly with color. Then, add the prepared seasoning paste and the cut green onions. Mix gently, being careful not to mash the radish pieces, until everything is well combined. Your delicious Kkakdugi is now ready! Taste it and adjust the seasoning if necessary; add more salt or anchovy sauce if it’s too bland, or more sugar if it’s not sweet enough. Transfer the finished Kkakdugi to an airtight container. Let it ferment at room temperature for 1-2 days, then store it in the refrigerator to enjoy its developed flavor.


