
Dreamy No-Bake Tiramisu
Easiest No-Egg, No-Oven Tiramisu Recipe Ever!

Enjoy a smooth and delicious Tiramisu without the worry of raw eggs or the need for an oven! This simple recipe is perfect for beginners and guarantees a delightful dessert.
Ingredients (Serves 4)- 500g Mascarpone cheese, softened at room temperature
- 200g Heavy cream, chilled
- 80g Granulated sugar (adjust to taste)
- 4 shots Espresso, cooled (approx. 120ml, or strongly brewed instant coffee)
- 1/2 bag Ladyfinger cookies, enough to fit your containers
Cooking Instructions
Step 1
First, brew 4 shots of espresso. The rich coffee flavor is the heart of Tiramisu! If you don’t have an espresso machine, dissolve instant coffee powder in hot water to create a strong brew. It’s crucial to let the brewed coffee cool completely; this prevents the ladyfingers from becoming too soggy.

Step 2
In a clean mixing bowl, add the softened mascarpone cheese. Use a spatula or whisk to cream it until smooth and lump-free. Aim for a silky-smooth consistency.

Step 3
Add the granulated sugar to the creamed mascarpone cheese and mix gently. It’s okay if the sugar isn’t completely dissolved; a slight graininess can add a pleasant texture. If you prefer a perfectly smooth texture, continue mixing until the sugar is mostly dissolved.

Step 4
Pour in the chilled heavy cream and gently combine it with the mascarpone mixture. Be careful not to overmix, as this can cause the cream to curdle. Mix just until the ingredients are incorporated.

Step 5
Now, let’s achieve the perfect cream consistency! When you hold a whisk vertically, the cream should form soft peaks that slightly bend over. This indicates a good consistency – not too stiff, not too runny. This balance ensures a creamy mouthfeel.

Step 6
Transfer the prepared Tiramisu cream into a piping bag. If you don’t have one, a thick zip-top bag with a corner snipped off will work perfectly. Using a piping bag will help create a neater final presentation.

Step 7
Trim the ladyfinger cookies to fit the size of your dessert containers or glasses. Ensure they line the bottom snugly with minimal gaps.

Step 8
Arrange the cut ladyfinger cookies in an even layer at the bottom of your containers. Gently drizzle or brush the cooled espresso over the cookies until they are nicely moistened. Avoid making them overly soggy; they should absorb the coffee flavor well.

Step 9
Pipe a layer of the Tiramisu cream over the coffee-soaked ladyfingers. Repeat this process, layering cookies, coffee, and cream, until your containers are full. I made 3 layers, but you can adjust based on the height of your containers. Balancing the cookie-to-cream ratio is key for the best flavor.

Step 10
For the final top layer, you can elegantly pipe the cream for a decorative finish, or

Step 11
after piping a generous amount of cream, use a scraper or the back of a knife to smooth the surface for a neat, professional look. Achieving that perfectly flat top makes a big difference!

Step 12
Cover the Tiramisu containers tightly with lids or plastic wrap and refrigerate for at least 4 hours, or preferably overnight. This resting period allows the flavors to meld beautifully and the dessert to set properly.

Step 13
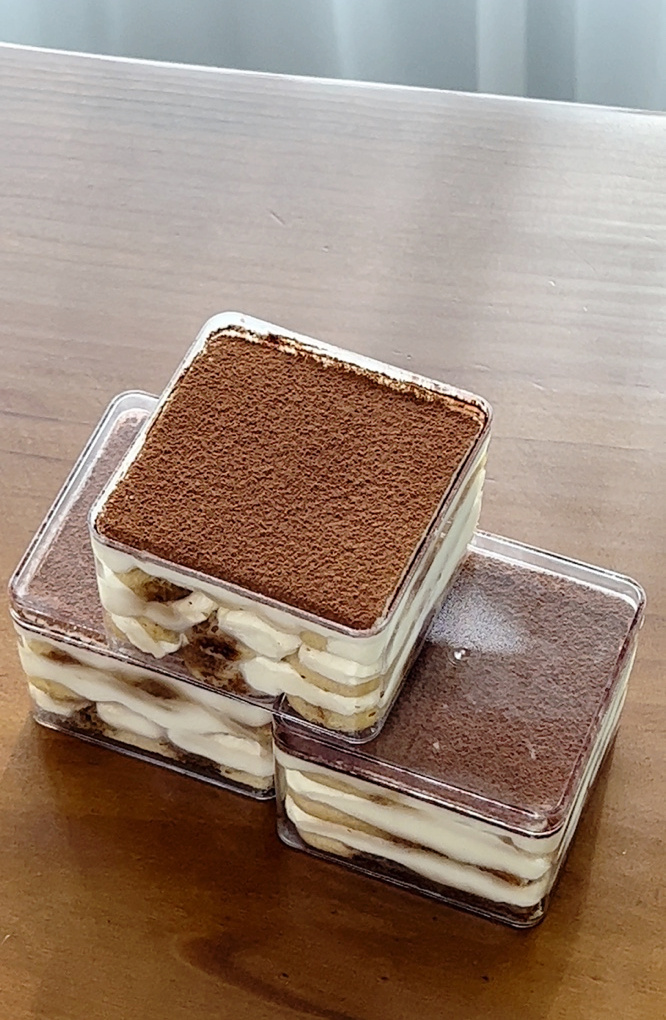
Once chilled, remove the Tiramisu from the refrigerator. Dust the top generously with cocoa powder using a fine-mesh sieve. The slight bitterness of the cocoa complements the sweet cream perfectly.

Step 14
Finally, gently wipe any excess cocoa powder from the sides of the containers with a paper towel. This simple step creates a beautifully clean presentation. Your delicious Tiramisu is now ready to be enjoyed!
