
Crispy & Sweet Summer Delight: How to Make Pickled Korean Melon (Chamoe Jangajji)
Easy Homemade Chamoe Jangajji Recipe: Refresh Your Summer Appetite

Experience the unique taste of summer with this special pickled Korean melon (chamoe) recipe! This dish offers a delightful sweet and crunchy texture that is perfect for stimulating your appetite during the hot season. You don’t need special varieties of melon; ripe yellow Korean melons work wonderfully too. Revitalize your taste buds this summer with this easy-to-follow recipe!
Ingredients- 6 Korean melons (Chamoe)
- 1/2 cup coarse sea salt (Cheonsilyeom)
- 1/2 cup sugar
Pickling Brine- 2 cups soy sauce (Ganjang)
- 1 cup sugar
- 1 cup plum extract (Maesil-aek)
- 1/2 cup soju
- 1 cup vinegar
- 2 cups water
- 2 cups soy sauce (Ganjang)
- 1 cup sugar
- 1 cup plum extract (Maesil-aek)
- 1/2 cup soju
- 1 cup vinegar
- 2 cups water
Cooking Instructions
Step 1
First, thoroughly wash the Korean melons under running water. To ensure all pesticide residues are removed, soak them in water with a little vinegar for about 10 minutes, or wash them with baking soda for an extra clean.

Step 2
Since you’ll be eating the melon peel, it’s crucial to wash it meticulously. After washing, place the melons on a colander and let them drain completely for about 30 minutes. Excess moisture can negatively affect the crispiness of the pickled melon.

Step 3
Trim off the ends of the Korean melons. Then, cut them in half lengthwise, and further cut each half into 2-3 pieces to create bite-sized portions. Cutting them too small might reduce the satisfying crunch.

Step 4
Using a spoon, carefully scrape out and remove the seeds and inner pulp from the halved melons. Removing the seeds prevents the melon from becoming mushy and ensures a clean texture for the pickles.

Step 5
Gently scrape the inside of the melon with a spoon to cleanly remove the seeds and pulp. It’s okay if a little bit remains, but try to remove as much as possible for the best texture.

Step 6
The prepared Korean melons, with their seeds removed, are now ready for pickling. They look nicely prepped.

Step 7
Prepare the pickling mixture by combining 1/2 cup of sugar and 1/2 cup of coarse sea salt. Mix them well. This mixture will help draw out moisture from the melon and firm it up.

Step 8
Fill the hollowed-out cavities of the prepared melon pieces evenly with the sugar and salt mixture. Ensure the mixture is packed thoroughly for consistent seasoning throughout the melon.

Step 9
Arrange the melon pieces in a container, pressing the cut surfaces together or layering them neatly. It’s important that the melon pieces are packed tightly together.

Step 10
To properly pickle the melons, weigh them down. Cover the container with a plastic bag (like a kimchi bag) to prevent air exposure, and then place a heavy plate or a water-filled bag on top to press them down firmly. Let them pickle for about a day. This step is crucial for maintaining the melon’s crispiness.

Step 11
After about a day, check the pickled melons. They should be softened enough to bend slightly when handled, indicating they are well-pickled but not overly mushy.

Step 12
Transfer the pickled melons to a colander and let them air dry in the sun for about a day until they become slightly chewy and firm (‘kkudak-kkudak’). If the weather isn’t cooperative, you can also dry them in a dehydrator on a low setting for approximately 2 hours.

Step 13
The dried chamoe jangajji will have a wonderfully chewy texture. This firm texture allows it to absorb the pickling brine beautifully.

Step 14
Now, let’s prepare the flavorful pickling brine. Measure and combine 2 cups of soy sauce, 1 cup of sugar, 1 cup of plum extract, 2 cups of water, 1 cup of vinegar, and 1/2 cup of soju in a large pot. Mix them well.

Step 15
Bring the prepared pickling brine to a rolling boil over high heat. Boiling helps to dissolve the sugar and soy sauce completely and melds the flavors together.

Step 16
While the brine is boiling, carefully arrange the dried chamoe jangajji pieces into your chosen storing container. You can add 2-3 dried chili peppers at this stage for an extra layer of flavor, if desired.

Step 17
As the brine boils vigorously, skim off any foam that rises to the surface. Removing the foam will result in a clearer and more refined tasting pickle brine.

Step 18
Turn off the heat and let the boiled pickling brine cool down slightly. Pouring the hot brine directly can make the melon too soft, so it’s best to pour it when it’s still warm but not boiling.

Step 19
Pour the slightly cooled pickling brine over the arranged chamoe jangajji in the container. Ensure the melons are fully submerged in the brine.

Step 20
To prevent the jangajji from being exposed to air, seal the container tightly with a lid or use a weights to keep everything submerged. Leave it at room temperature for about a day to allow flavors to infuse, then refrigerate for further aging. Refrigeration helps preserve it for a longer period.

Step 21
After about a week, open the container. You’ll find that the skins are nicely shriveled and the moisture has reduced, resulting in perfectly chewy chamoe jangajji. The flavor will deepen and become even more delicious with time.

Step 22
When ready to serve, chop the chamoe jangajji into small, bite-sized pieces. While you can leave them in longer strips, smaller pieces allow the seasonings to penetrate better, enhancing the flavor.

Step 23
If the jangajji tastes too salty, you can briefly soak it in cold water for 1-2 minutes to reduce the saltiness. Avoid soaking for too long, as this can make it bland.

Step 24
After rinsing, gently squeeze out any excess water from the chamoe jangajji. Thoroughly squeezing out the water is key to achieving a non-watery and flavorful seasoned dish.

Step 25
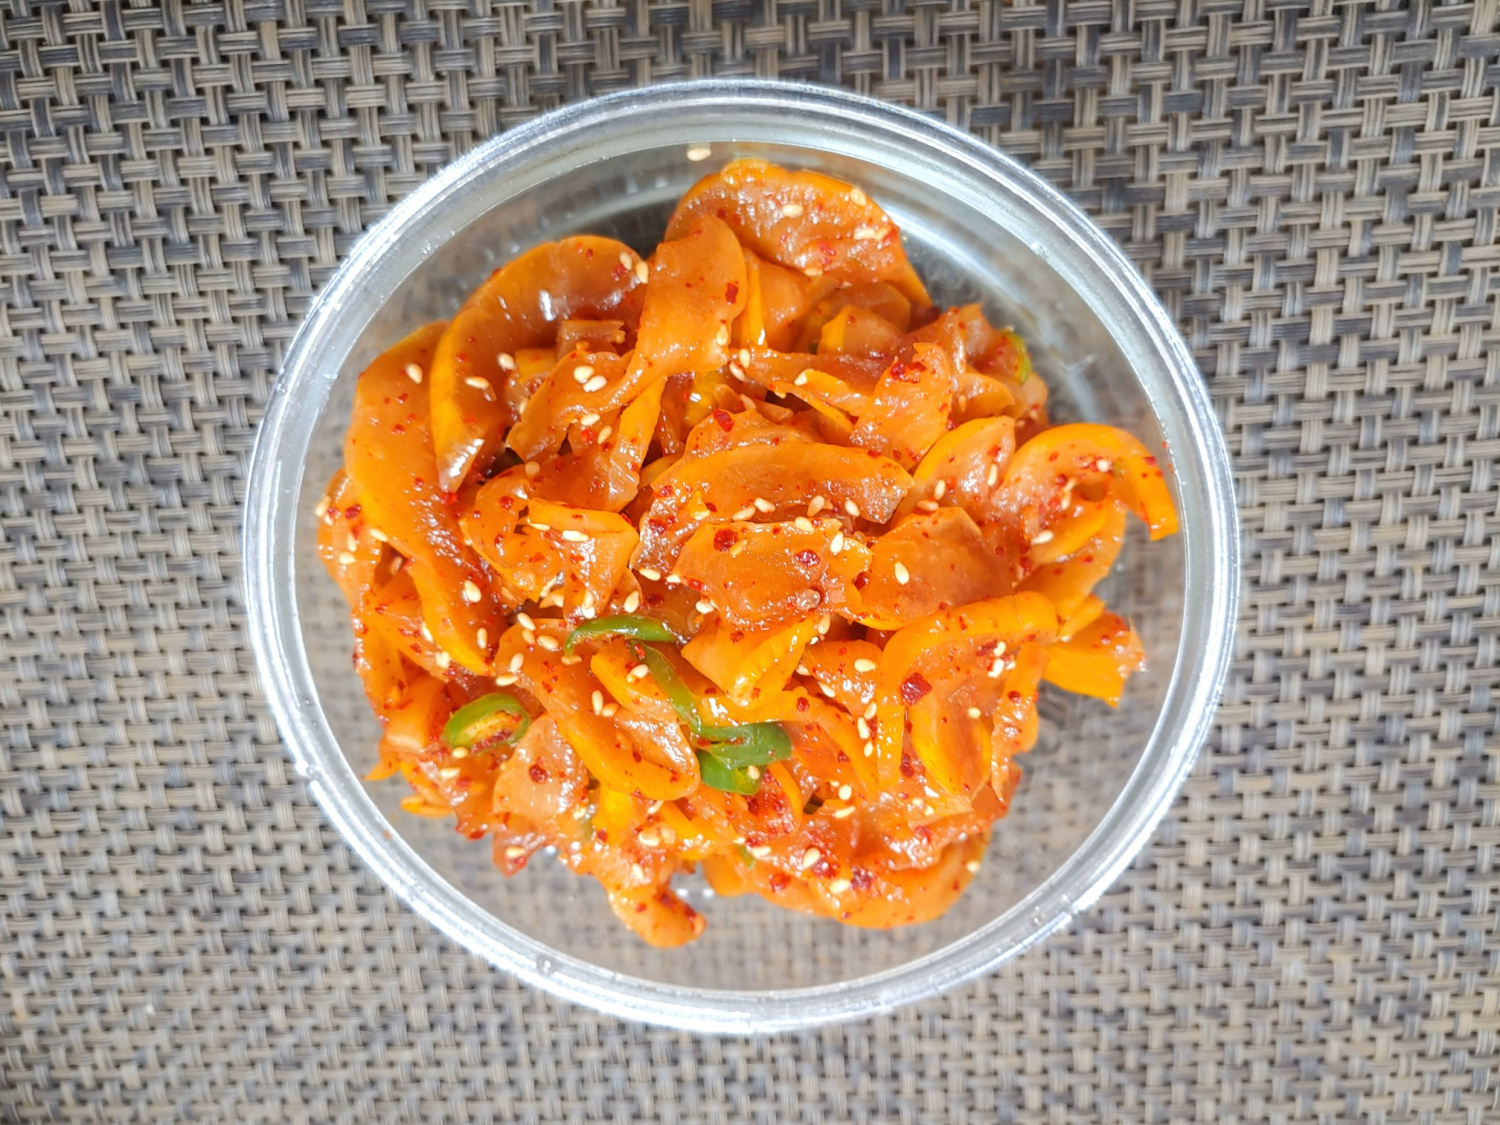
In a bowl, combine the squeezed chamoe jangajji with a drizzle of sesame oil, a pinch of red pepper flakes, and toasted sesame seeds. Gently mix and toss everything together. You can also add minced garlic for extra flavor. If needed, add a tiny bit of soy sauce or salt to adjust the seasoning.

Step 26
Your seasoned chamoe jangajji is now ready! It boasts a delightful crunch and a sweet-sour taste that creates a unique and savory flavor profile. It’s a fantastic side dish for rice or even as a snack.

Step 27
Enjoy this unique summer delicacy, chamoe jangajji! Its delightful crunch and sweet-savory taste will fill your mouth and help you forget the summer heat.
