
Crispy Pickled Cucumber Salad (Oiji Muchim)
Summer Delicacy: Easy Oiji Muchim Recipe for Appetizing Meal

Beat the summer heat and stimulate your appetite with this refreshing Oiji Muchim (Korean Pickled Cucumber Salad) recipe. While Oiji cold soup is delicious, the satisfyingly crisp and chewy texture of Oiji Muchim is truly addictive and perfect for a side dish! This simple yet flavorful recipe will bring back your appetite when it’s feeling low. It’s a go-to summer banchan (side dish) that’s so good, you’ll want to serve it often.
Main Ingredients- 3 Korean pickled cucumbers (Oiji)
Cooking Instructions
Step 1
Rinse the Oiji gently under running water to remove any dust. Slice them thinly into bite-sized pieces, about 0.5 cm thick. Slicing them not too thick will help the seasoning penetrate well and improve the texture.

Step 2
To prevent the salad from being too salty, soak the sliced Oiji in cold water for about 10 minutes. Alternatively, rinse them under water and then squeeze out the excess moisture. Avoid soaking for too long, as this can soften the crisp texture. If you’re unsure about the saltiness, you can taste a slice halfway through soaking to adjust the time.

Step 3
After soaking and rinsing to remove the saltiness, squeeze out as much water as possible from the Oiji using both hands. Excess water can dilute the seasoning and make the salad bland.

Step 4
Place the squeezed Oiji in a large bowl. Add 1.5 Tbsp minced garlic, 3 Tbsp chopped green onion, and 3 Tbsp gochugaru.

Step 5
Next, add 1.5 Tbsp sugar for a touch of sweetness and 1 Tbsp sesame oil for a nutty aroma.

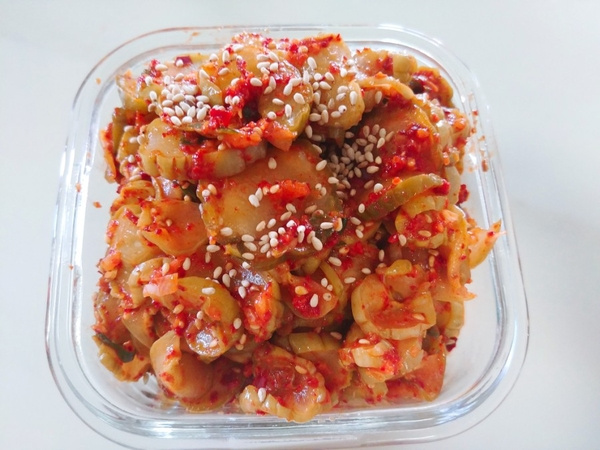
Step 6
Finally, sprinkle with sesame seeds. Gently mix everything together with your hands, ensuring the seasoning is evenly distributed. Your delicious Oiji Muchim is now ready! You can enjoy it immediately, or chill it in the refrigerator for a while for an even more refreshing taste.
