
Crispy Outside, Tender Inside! Japanese-Style Chicken Karaage at Home
Clear Out Your Fridge! A Golden Recipe for Crispy and Juicy Japanese-Style Chicken Karaage Using Chicken Thighs and Tenderloins

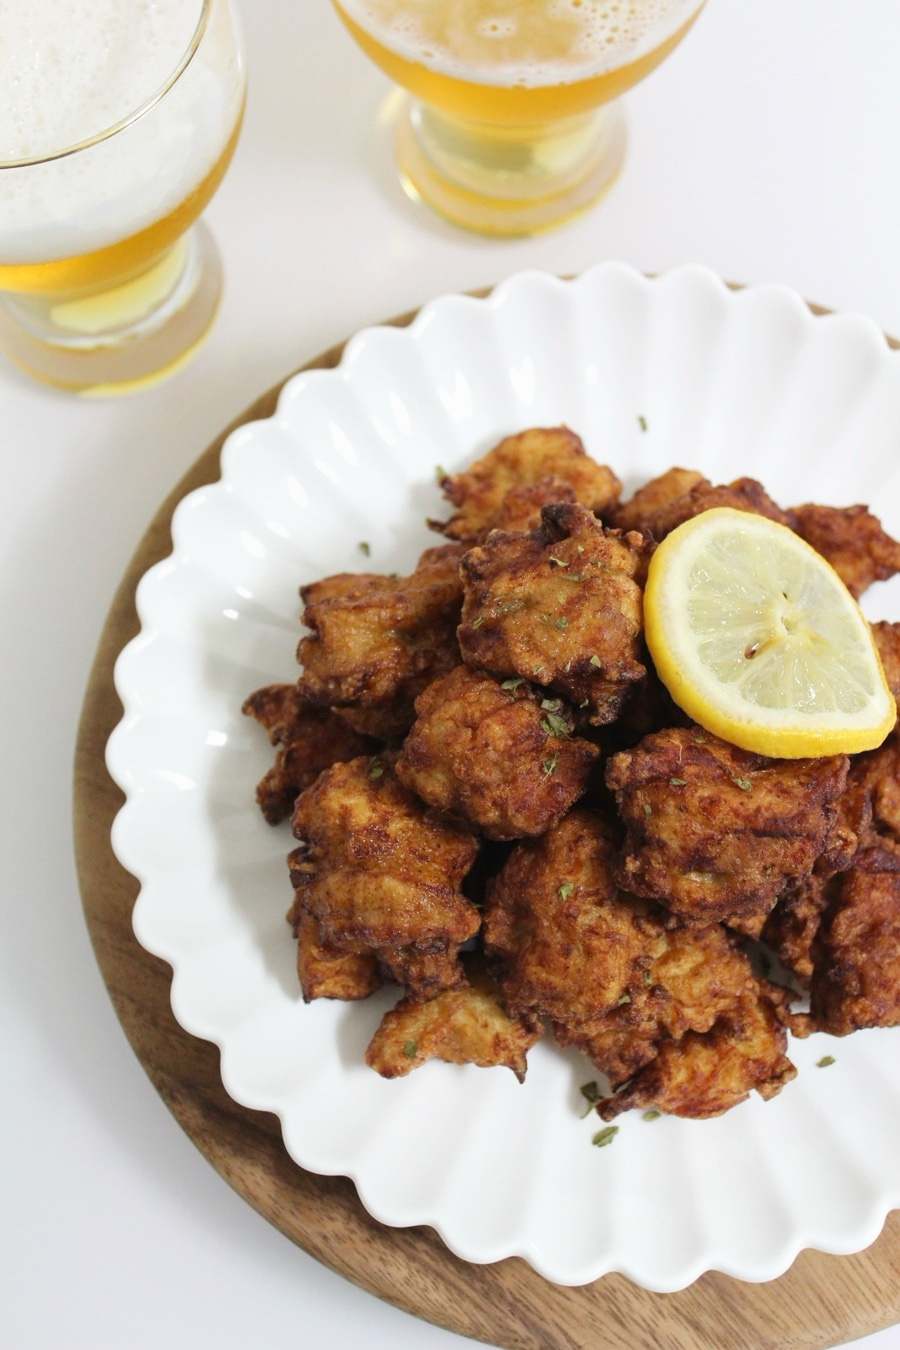
Don’t let those leftover chicken thighs and tenderloins go to waste! Transform them into delicious Chicken Karaage with this easy recipe. Marinated in a savory soy sauce blend and lightly coated for a perfect crunch, this Japanese-style fried chicken is incredibly crispy on the outside and wonderfully tender on the inside. It’s an ideal dish for entertaining, a fantastic accompaniment to beer, or a satisfying side dish. I’ll share my secrets for achieving that perfect crispiness. Enjoy restaurant-quality Chicken Karaage right in your own kitchen, without the fuss of complicated batters!
Main Ingredients- 600g chicken thigh and tenderloin, mixed
- 3 Tbsp soy sauce
- 2 Tbsp mirin (sweet rice wine)
- 1 Tbsp minced garlic
- 1 tsp grated ginger
- Pinch of black pepper
- 4 Tbsp cake flour (or all-purpose flour)
- 4 Tbsp potato starch
- 1 large egg
Cooking Instructions
Step 1
First, prepare a total of about 600g of chicken thigh and tenderloin. You can use up any chicken you have left in the fridge. Feel free to use your preferred cuts.

Step 2
Lightly rinse the prepared chicken pieces under water, then cut them into bite-sized pieces. Pat them thoroughly dry with paper towels. This step is crucial to prevent oil splatter while frying and to ensure maximum crispiness.

Step 3
In a bowl, combine the chicken with 3 Tbsp soy sauce, 2 Tbsp mirin, 1 Tbsp minced garlic, 1 tsp grated ginger, and a pinch of black pepper. Gently massage the marinade into the chicken with your hands, ensuring it’s evenly coated. Let it marinate for about 10-15 minutes to allow the flavors to penetrate.

Step 4
Add 1 large egg to the marinated chicken. Then, sprinkle in 4 Tbsp cake flour and 4 Tbsp potato starch. Mix everything well until the chicken pieces are lightly coated with the flour mixture. Make sure there are no clumps.

Step 5
In a heavy-bottomed pot (a Dutch oven is recommended), pour enough oil to generously submerge the chicken pieces. Heat the oil to 160℃ (320℉). Using a thermometer will help you maintain the correct temperature.

Step 6
Once the oil reaches 160℃, carefully add the coated chicken pieces one by one. Avoid overcrowding the pot, as this will lower the oil temperature and result in soggy chicken. Make sure to space out the pieces so they don’t stick together.

Step 7
As the chicken starts to cook and the bottom turns a light golden brown, gently flip the pieces to cook the other side. Fry for about 3-4 minutes until lightly browned.

Step 8
Remove the first batch of fried chicken from the oil and place it on a wire rack to drain excess oil. Let it cool slightly. This resting period is key to achieving extra crispiness in the second fry.

Step 9
Repeat the first frying process with the remaining coated chicken pieces.

Step 10
Now, it’s time for the second fry (re-frying). Increase the oil temperature to 180℃ (350℉). Adjust the heat as needed to maintain this temperature.

Step 11
When the oil reaches 180℃, carefully add the chicken pieces that have already been fried and cooled. Fry them for a short time, about 30 seconds to 1 minute, until they achieve a deep golden-brown color. Frying at a higher temperature for a shorter duration will create an extra-crispy exterior.

Step 12
Remove the double-fried Chicken Karaage from the oil, drain any excess oil on a wire rack, let it cool for a moment, and then serve immediately. Enjoy your perfectly crispy and juicy homemade Karaage!
