
Crispy Outside, Juicy Inside! Special Chicken Kiev Recipe
Recreate the Memorable Taste of Chicken Kiev from Your UK Study Abroad Days at Home

My husband fondly remembers Chicken Kiev as an unforgettable taste from his study abroad days in the UK! Inspired by this, I decided to recreate that special dish at home. This recipe will help you achieve a golden, crispy exterior and a succulent interior where butter and juices meld perfectly. Perfect for special occasions or to elevate an ordinary day, let’s dive into the delightful world of homemade Chicken Kiev!
✨ Ingredients for Homemade Chicken Kiev- 300g fresh chicken breast
- 100g unsalted butter
- 2 large eggs
- 4 Tbsp minced garlic
- 50g all-purpose flour
- 100g breadcrumbs
- 2 Tbsp cooking wine (or mirin)
- Pinch of salt
- Pinch of black pepper
- Vegetable oil for frying
Cooking Instructions
Step 1
First, rinse the chicken breast under cold water and pat it completely dry with paper towels. This ensures the chicken doesn’t stick together and absorbs marinades well.

Step 2
In a bowl, combine the chicken breast with 2 Tbsp of cooking wine, a pinch of salt, and a pinch of black pepper. Gently massage the seasonings into the chicken. Let it marinate in the refrigerator for about 30 minutes to tenderize and deepen the flavor.

Step 3
Prepare three shallow dishes. In the first, place 50g of flour. In the second, whisk 2 eggs. In the third, place 100g of breadcrumbs. You’ll use these for breading the chicken, so ensure there’s enough to coat each piece generously.

Step 4
Cut the chilled butter into thick pieces, about 3cm wide. You’ll want one piece per chicken breast. Cutting it thicker helps prevent it from melting out too quickly during cooking and ensures a creamy center.

Step 5
Take the marinated chicken breast and lay it flat on a cutting board. Use a rolling pin or the flat side of your palm to gently pound or flatten the chicken to about 0.5cm thickness. Evenly flattened chicken makes for easier rolling and prevents the filling from escaping.

Step 6
You can further tenderize the flattened chicken by gently pounding it with a meat mallet or by lightly scoring it with the back of a knife, being careful not to cut all the way through. This process helps make the chicken more tender and allows the flavors to penetrate better.

Step 7
On one end of the flattened chicken breast, place a piece of butter. Top the butter with about 1 Tbsp of minced garlic, a sprinkle of chopped parsley (optional), and a pinch of black pepper. The aromatic combination of butter and garlic will enhance the overall flavor profile.

Step 8
Carefully roll up the chicken breast, starting from the end with the filling, just like rolling sushi. Roll it tightly to ensure the filling stays inside. Repeat this process with the remaining chicken breasts.

Step 9
Now, it’s time to bread the rolled chicken. First, dredge each roll evenly in flour, shaking off any excess. Next, dip it into the beaten egg, ensuring it’s fully coated. Finally, press the chicken into the breadcrumbs, making sure every surface is covered. A thick layer of breadcrumbs will result in a wonderfully crisp crust.

Step 10
Pour a generous amount of vegetable oil into a frying pan (about 1-2 cm deep) and heat it over medium-high heat. To test if the oil is hot enough, drop a small piece of breadcrumb; it should sizzle and float to the surface immediately.

Step 11
Carefully place the breaded chicken rolls into the hot oil. Fry them over medium heat for about 3-5 minutes per side, turning occasionally, until they are golden brown and crispy. Once the exterior is cooked, reduce the heat slightly to ensure the inside cooks through evenly without burning the outside.

Step 12
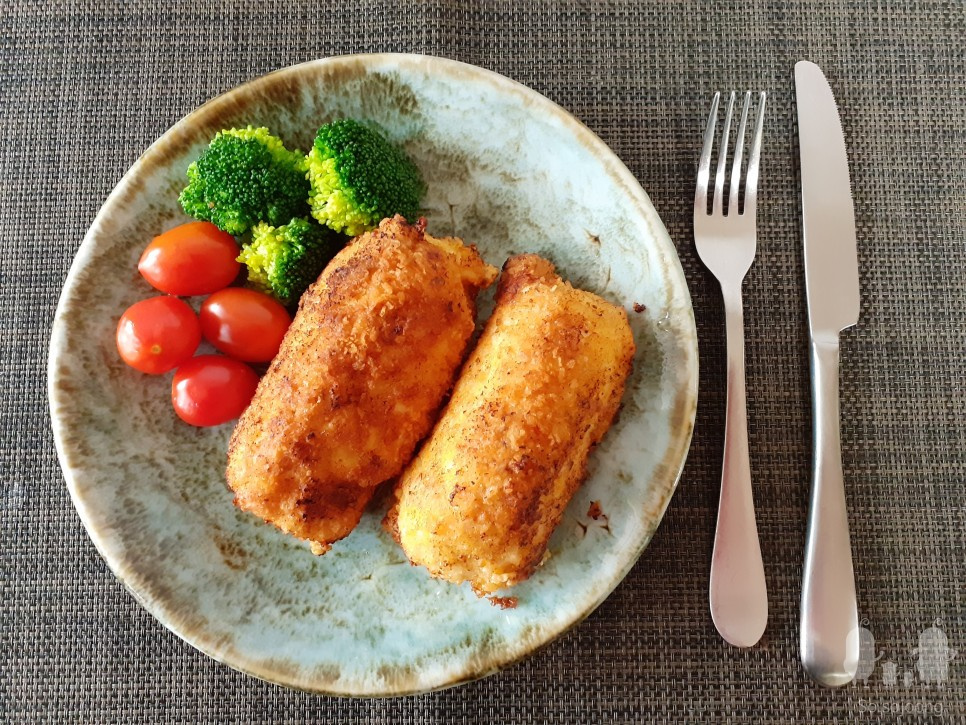
Once golden and crispy, remove the Chicken Kiev from the pan and let it drain on a wire rack. When you cut into it while hot, the melted butter and juices will ooze out, creating an incredibly rich and flavorful experience! Enjoy your perfectly crispy, juicy Chicken Kiev – a guaranteed success!
