
Crispy & Nutty Quinoa Nut Bar
The Perfect Dessert to Pair with Americano: Healthy Quinoa Nut Bars

As my interest in health grew, I started making healthier versions of snacks at home rather than buying pre-made products. This recipe is for a delicious and nutritious quinoa nut bar.
Ingredients- 1/2 cup Quinoa
- 2 cups Roasted Job’s Tears (use a store-bought product)
- 1 handful Almonds
- 1 handful Cashews
- 1/4 cup Oligosaccharide (Korean syrup)
Cooking Instructions
Step 1
Here are the ingredients you’ll need to prepare these delicious and nutty quinoa nut bars, perfect for a dessert. We’ll be using a store-bought roasted Job’s tears for convenience.

Step 2
Rinse the quinoa thoroughly under cold running water. Drain it well in a sieve. Properly draining the quinoa prevents it from clumping when sautéed, ensuring a fluffy texture.

Step 3
Place the drained quinoa in a pan and toast it over medium-low heat. Sauté it until you hear a ‘crackling’ sound, similar to toasting sesame seeds, and the quinoa grains turn slightly translucent. This process significantly enhances its nutty aroma and flavor.

Step 4
Finely chop the almonds and cashews with a knife. Aim for bite-sized pieces that will be easy to chew in the finished bar. You can adjust the size according to your preference.

Step 5
Add the roasted Job’s tears to the pan with the sautéed quinoa. Gently stir to combine them.

Step 6
For an even richer flavor and crispier texture, add the chopped almonds and cashews to the pan. Stir everything together and lightly toast for another minute, ensuring the nuts don’t burn. This step adds extra depth to the bars.

Step 7
Turn off the heat or reduce it to very low, then pour in the oligosaccharide. Stir quickly with a spatula or spoon to coat all the ingredients evenly. The syrup will create a glossy finish and bind everything together.

Step 8
Line a square container or mold with parchment paper or plastic wrap. This prevents the bars from sticking, making them easy to remove later and ensuring a neat shape.

Step 9
Once the mixture is in the container, cover it with plastic wrap or another sheet of parchment paper. Press down firmly with your hands or a rolling pin to create a flat and compact surface. This ensures the bars hold their shape when cut.

Step 10
Let the bars cool and set at room temperature for about 20 minutes. They need to harden sufficiently to be cut cleanly. Avoid refrigerating them, as they may become too hard. Just let them firm up.

Step 11
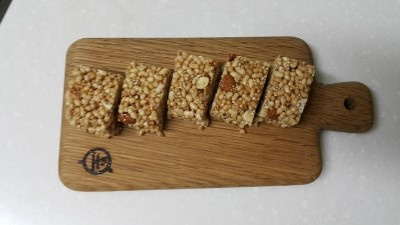
Transfer the hardened nut bars to a cutting board. Use a sharp knife to cut them into small, neat squares. For cleaner cuts, you can lightly oil the knife or dip it in warm water.

Step 12
And there you have it! Your homemade quinoa nut bars are ready. They are not too sweet and incredibly nutty from the quinoa and nuts, making them a wonderful snack on their own. They also pair beautifully with a hot Americano, serving as a healthy and satisfying dessert. Enjoy these delightful treats with your coffee!
