
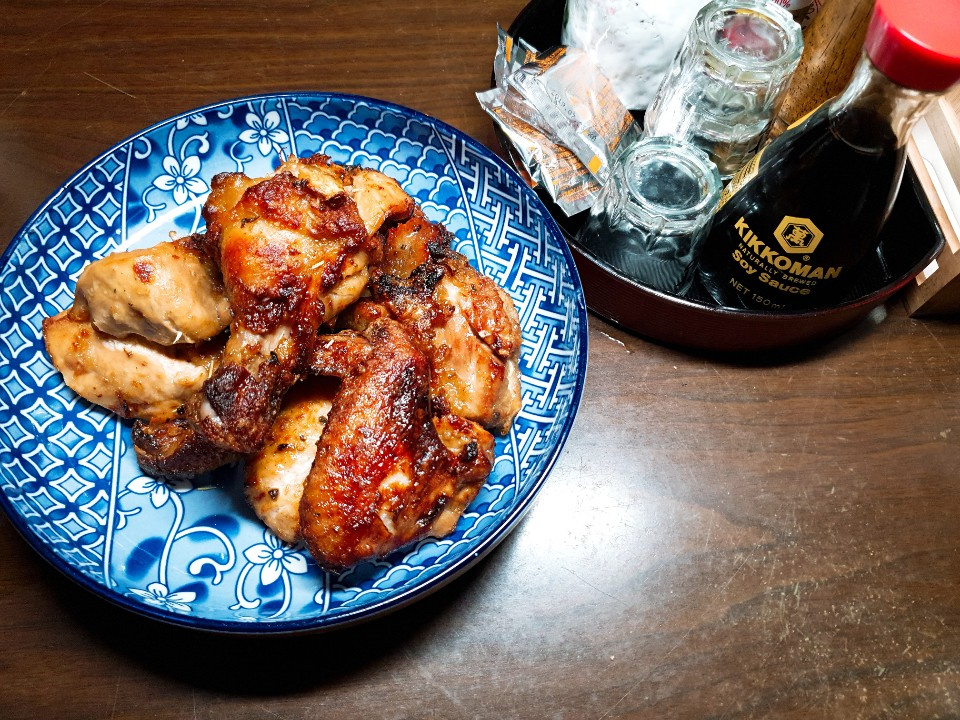
Crispy & Chewy Garlic Soy Chicken (Air Fryer)
Homemade Professional-Style Garlic Soy Chicken with an Air Fryer

Chicken prices are soaring, and with delivery fees added, eating out for chicken has become quite a splurge. Don’t worry anymore! Using your air fryer, you can easily make delicious garlic soy chicken that rivals any restaurant. I’ll share a detailed recipe for this crispy on the outside, chewy on the inside, universally loved chicken!
Essential Ingredients- 1/2 chicken (size 9-10)
- 1.5 Tbsp all-purpose flour
- 1.5 Tbsp potato starch (or tempura powder)
- 1 egg white (optional, for color and crispiness)
Garlic Soy Sauce Ingredients- 1 Tbsp Mirin (Korean rice wine for cooking)
- 1 Tbsp Rice Wine (Cheongju)
- 0.5 Tbsp Water
- 0.5 Tbsp Sugar
- 0.5-1 Tbsp Soy Sauce (adjust to taste)
- 1 Tbsp minced garlic
- 2 cloves garlic, thinly sliced and minced
- 1 small piece of dried kelp (for umami)
- 1 Tbsp Mirin (Korean rice wine for cooking)
- 1 Tbsp Rice Wine (Cheongju)
- 0.5 Tbsp Water
- 0.5 Tbsp Sugar
- 0.5-1 Tbsp Soy Sauce (adjust to taste)
- 1 Tbsp minced garlic
- 2 cloves garlic, thinly sliced and minced
- 1 small piece of dried kelp (for umami)
Cooking Instructions
Step 1
If you bought chicken prepared for ‘dak dori tang’ (braised chicken), it’s crucial to rinse off any internal residual blood or debris with cold running water. This step significantly impacts the final flavor by removing any gamey taste. While methods like soaking chicken in milk or marinating with rice wine exist to eliminate odors, honestly, if the chicken is fresh, I believe these extra steps might be overkill and potentially detract from the flavor. Thorough rinsing is often sufficient!
Step 2
Let’s make the delicious garlic soy sauce! In a small saucepan, combine 1 Tbsp of Mirin and 1 Tbsp of Rice Wine (Cheongju) – a 1:1 ratio, about 50ml each. Heat over medium heat to let the alcohol evaporate. Next, prepare the soy sauce. The amount of soy sauce can vary based on your preference, but I like to use a bit less than the Mirin and Rice Wine, around 40ml. Add the piece of dried kelp, water, and sugar. Bring it to a boil briefly, then let it cool completely. Dip a finger into the sauce to taste and adjust the sweetness and saltiness by adding more brown sugar or soy sauce as needed! For a thicker, glossier sauce, consider adding a bit of corn syrup or oligosaccharide.
Step 3
To ensure the sauce penetrates well and the chicken cooks evenly in the air fryer, score the chicken pieces deeply with a knife. The deeper the scores, the better the flavor absorption. Now, place the garlic soy sauce you made into a zip-top bag or an airtight container. Add the thoroughly rinsed and scored chicken. Squeeze out as much air as possible before sealing the bag tightly. Marinate the chicken in the refrigerator for at least 30 minutes. The longer you marinate, the deeper the flavor will be!
Step 4
Now it’s time to coat the chicken! In a clean zip-top bag, add 1.5 Tbsp of potato starch and 1.5 Tbsp of all-purpose flour. Drop the marinated chicken into the bag. Seal the bag securely and shake it well. This shaking action mimics the ‘tumbling’ process used in professional kitchens, ensuring a thin and even coating of the dry ingredients. (Tip: If you coat the chicken with 1 egg white beforehand, the batter will become extra crispy, prevent burning, and give the chicken a beautiful golden-brown color!)
Step 5
Line your air fryer basket with two sheets of parchment paper. Arrange the coated chicken pieces in a single layer, making sure they don’t overlap. Generously brush the pre-marinated garlic soy sauce all over the chicken. A light drizzle of cooking oil will make the skin extra crispy! Since air fryers can burn the outside before the inside is cooked at higher temperatures, it’s best to ‘par-cook’ first. Air fry at 160°C (320°F) for 15 minutes, flipping halfway through. Then, increase the temperature to 170°C (340°F) and air fry for another 10 minutes, flipping again, to achieve a beautiful color and a perfectly crisp skin. Enjoy your delicious homemade chicken!