
Crispy and Savory Fried Lotus Root Balls with Korean Chive
A Fantastic Combination of Spring Vegetable Chives and Crunchy Lotus Root! Delicious Fried Lotus Root Balls Recipe (with Tartar Sauce)

Today, I’m introducing a truly delicious lotus root dish: Fried Lotus Root Balls! This recipe has already become a best-seller in our home and is sure to be loved by everyone, young and old. Enjoy the crispy exterior and moist interior of these lotus root balls, along with an easy-to-make tartar sauce recipe. Once you taste them, you won’t be able to stop!
Fried Lotus Root Ball Ingredients- Lotus root 600g
- Chicken breast 120g
- Korean chive (Chamnamul) 20g
- Cornstarch 3 Tbsp
Simple Tartar Sauce- 1/2 onion (finely minced)
- 1 hard-boiled egg
- 2 Tbsp chopped pickles
- 3 Tbsp mayonnaise
- 1/2 Tbsp lemon juice
- Pinch of salt
- Pinch of pepper
- 1/2 onion (finely minced)
- 1 hard-boiled egg
- 2 Tbsp chopped pickles
- 3 Tbsp mayonnaise
- 1/2 Tbsp lemon juice
- Pinch of salt
- Pinch of pepper
Cooking Instructions
Step 1
First, let’s make a delicious tartar sauce that’s always a hit. It’s wonderful as a sandwich spread or mixed with any ingredient. It’s not difficult, so follow along step-by-step. The main ingredients are onion, hard-boiled egg, and chopped pickles. Finely mince all ingredients for preparation. Lightly mash the hard-boiled egg yolk at the end for a creamier texture and enhanced flavor.

Step 2
Combine all the prepared ingredients in a bowl and mix well. If you like, you can add a bit of whole grain mustard or yellow mustard for a deeper, different flavor. The tangy mustard will make the sauce even more rich.

Step 3
Today, I’ve made a simple tartar sauce using just mayonnaise, which brings out the natural flavors of the ingredients and adds a smooth richness. Try this easy yet delicious tartar sauce with your fried lotus root balls.

Step 4
Now it’s time to make the star of today’s dish: Fried Lotus Root Balls! These are truly special. They have a taste and texture that everyone, young and old, will love. Prepare one large lotus root and about 120g of chicken breast. If you have a lot of chicken breast, feel free to use what you have stocked in your fridge! ^^

Step 5
The key ingredient for the fried lotus root balls, the lotus root, will be processed. I previously shared a recipe for Sweet and Sour Lotus Root Stir-fry, which is also a very popular dish in our home. It’s been a while since I posted that recipe, so I’m thinking of sharing it again in detail soon.

Step 6
Process the lotus root using a food processor or blender until it’s slightly coarse. It’s important not to blend it too finely; you want to retain some of the crunchy texture of the lotus root. This texture adds to the charm of the fried lotus root balls.

Step 7
Grind the chicken breast that will be used along with the lotus root. Using ground chicken breast ensures a smooth texture when combined with the lotus root, creating delicious lotus root balls.

Step 8
Next, I’ve prepared some fragrant Korean chives (Chamnamul), which I really love. This is a golden opportunity to get children who are picky eaters to consume vegetables, by adding them to the fried lotus root balls! It can help with picky eating habits. I imagine many mothers can relate. Hahaha

Step 9
Korean chives add a fragrant aroma to the fried lotus root balls. While you don’t have to use Chamnamul specifically, adding it greatly enhances the flavor harmony, so I highly recommend it! (I’m not sure what I’m saying… Hahaha)

Step 10
Now, combine the ground lotus root, ground chicken breast, and minced Korean chives in a bowl and mix thoroughly. Add about 3 tablespoons of cornstarch, gradually, to achieve the right consistency for the dough. You don’t need too much; just enough for the lotus root balls to hold their shape. At this stage, you don’t need to add extra seasoning. The lotus root has a natural subtle sweetness and saltiness, and the chicken breast is slightly seasoned, making it flavorful enough on its own.

Step 11
Now it’s time to shape the lotus root mixture into balls, as the name ‘Fried Lotus Root Balls’ suggests. Form them into bite-sized pieces that fit comfortably in your hand. Once shaped, carefully drop them into hot oil and fry until golden brown. Their bite-sized nature makes them easy to eat.

Step 12
After the initial frying, you can make the lotus root balls even crispier by frying them a second time using an air fryer. This method allows you to store them after the first fry and then quickly reheat them in the air fryer whenever you want to enjoy them warm and crispy, just like they were freshly fried.

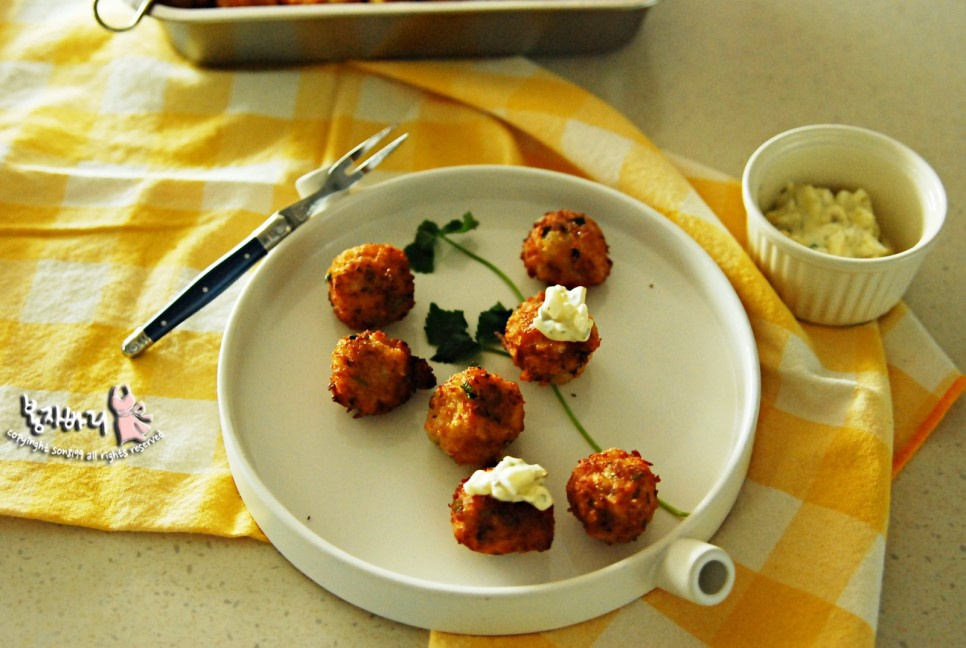
Step 13
I honestly lost count of how many lotus root balls I snacked on while they were frying. Hahaha. Don’t they look appetizing? The combination of the crispy coating with the moist lotus root and chicken breast inside is so appealing that you can’t help but reach for more. This is a truly delicious lotus root dish, so please give it a try!
