
Crispy and Delicious Pickled Garlic Scapes
The Perfect Partner for Pork Belly: Delicious Pickled Garlic Scapes Recipe

Hello everyone! Today, I’m sharing a recipe for pickled garlic scapes, made with the season’s freshest garlic scapes, offering a delightful sweet, sour, and salty flavor. This irresistible side dish is especially wonderful when paired with rich pork belly. Let me show you how to easily make these flavorful pickled garlic scapes!
Main Ingredients- Garlic scapes (fresh and firm), appropriate amount
Delicious Pickling Brine- Soy sauce 1 : Water 1 : Vinegar 0.7 : Sugar 0.7 (ratio)
- Soy sauce 1 : Water 1 : Vinegar 0.7 : Sugar 0.7 (ratio)
Cooking Instructions
Step 1
I received a generous bag of pesticide-free garlic scapes, grown with care by my neighbor! The green garlic scapes were so plump. First, trim off the flower bud end of each scape. Then, wash them thoroughly under running water and ensure they are completely dry. Plump scapes offer a satisfying chew.

Step 2
After washing and drying, cut the garlic scapes into bite-sized pieces, about 3-4 cm long. Cutting them into manageable lengths will make them easier to eat.

Step 3
Place all the cut garlic scapes into a sterilized pickling jar. Next, prepare the pickling brine by mixing soy sauce, water, vinegar, and sugar according to the specified ratio. Bring this mixture to a rolling boil and immediately pour the hot brine over the garlic scapes. Pouring the hot brine helps the garlic scapes cook crispily and absorb the flavors effectively.

Step 4
After about half a day has passed since pouring the brine, you’ll notice the green garlic scapes begin to transform into an appetizing brown color. This is the delicious brine seeping into the garlic scapes.

Step 5
Once the pickling brine has completely cooled, gently press down the garlic scapes to keep them submerged in the liquid. You can use a plate or a small weight for this. This ensures the flavors penetrate evenly and the scapes pickle beautifully. Cover the jar with a lid. The next day, carefully strain out the pickling brine, bring it to a rolling boil, let it cool, and then pour it back over the scapes. Repeat this process two or three times for a deeper flavor. Store the finished pickled garlic scapes in the refrigerator.

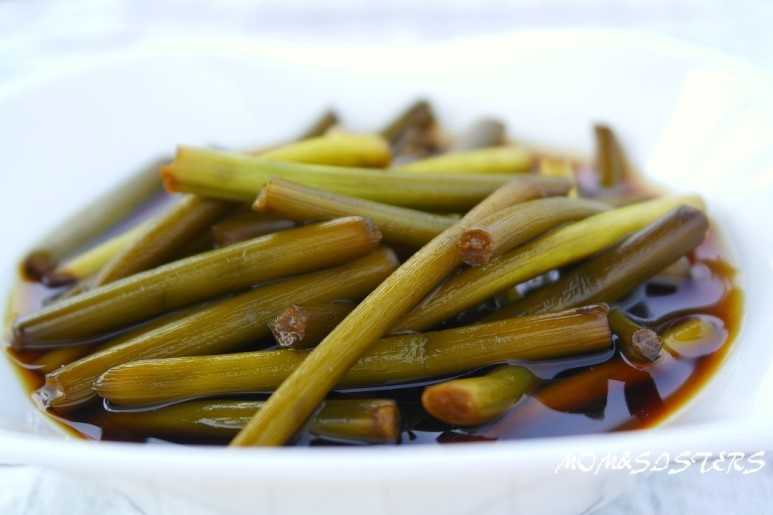
Step 6
As I’ve been pickling various vegetables lately, I feel like I’ve become a pickling pro! I plated the finished pickled garlic scapes and tasted them. They retain a wonderful crisp texture and have a well-balanced savory taste.

Step 7
The combination of sweet, sour, and salty flavors that fills your mouth is truly fantastic. Place them on top of rice, and you’ll find yourself eating bowl after bowl! They are the perfect rice accompaniment.

Step 8
The subtle pungent flavor of pickled garlic scapes truly shines when served alongside rich, grilled pork belly. This weekend, when you’re grilling pork belly for your family, be sure to include these pickled garlic scapes. It will complete your delicious meal. Enjoy your wonderful dining experience!
