
Crispy and Delicious Gim-mari (Seaweed Rolls) Fry
Homemade Bunsik-style Favorite! Gim-mari Fry Recipe

Starting with leftover frying oil from making squid tempura, here’s a simple Gim-mari fry! It’s one of the most beloved fried snacks at Bunsik (Korean snack food) restaurants! You can now make this delicious Gim-mari fry at home! Enjoy the crispy exterior and chewy interior.
Ingredients- Glass noodles, about 1 handful (when cooked)
- Gim (seaweed sheets for kimbap), 5 sheets
- Tempura flour, 0.8 rice bowl (approx. 80g)
- Wheat flour, 0.5 rice bowl (approx. 50g)
- Cooking oil (for deep frying), 2 bowls (approx. 300ml)
- Kimbap rolling mat, 1
- Water, a little (for sealing the ends)
Cooking Instructions
Step 1
First, prepare the glass noodles, which will be the filling for your Gim-mari. About one handful should be sufficient.

Step 2
Place the glass noodles in a pot and add enough water to cover them. Once the water boils, add the noodles and cook for about 5-7 minutes until they become translucent and tender.

Step 3
Drain the cooked glass noodles in a colander and rinse them under cold water to cool them down. This step helps prevent the noodles from sticking together.

Step 4
Prepare the kimbap seaweed sheets. To help the batter adhere better, cut each sheet into four strips with scissors, like making a ‘+’ shape. (Cutting them lengthwise will make rolling easier).

Step 5
Place the kimbap seaweed sheets with the shinier side facing up. (Usually, the less glossy side is placed upwards).

Step 6
Cut the kimbap seaweed sheets in half horizontally. This helps control the size of your Gim-mari and prevents the seaweed from tearing when you roll it.

Step 7
Now, get ready to assemble the Gim-mari. You’ll need the cooked and rinsed glass noodles, the halved kimbap seaweed sheets, a kimbap rolling mat, and a little water to seal the ends.

Step 8
Lay one of the halved kimbap seaweed sheets on the kimbap rolling mat. If you don’t have a mat, a wide plate or cutting board will also work.

Step 9
Arrange a portion of the cooked glass noodles onto the seaweed sheet. Leave about a 1cm border along the top edge to ensure the roll seals properly.

Step 10
Using the kimbap mat, roll the seaweed tightly around the glass noodles. Press firmly as you roll to ensure it’s compact.

Step 11
Wrap the kimbap mat around the roll one more time, pressing firmly. This step helps the Gim-mari maintain its shape and prevents it from unraveling during frying.

Step 12
Unroll the mat, and you might notice that the end of the seaweed roll is slightly loose or not perfectly sealed, which could cause it to come apart during frying.

Step 13
To fix this, lightly wet your fingertips with water and gently dab the loose end of the seaweed. The water acts like a glue, sealing the edge neatly.

Step 14
Repeat this process with the remaining kimbap seaweed and glass noodles until you have made all your Gim-mari rolls. You should get about 5 rolls.

Step 15
Now it’s time to make the batter. In a large bowl, combine the tempura flour and wheat flour. Gradually add water while mixing until you achieve a thick, yet pourable batter, similar to the consistency of yogurt. Ensure there are no lumps.

Step 16
Before dipping the Gim-mari into the batter, lightly coat each roll with wheat flour. This creates a better surface for the tempura batter to adhere to.

Step 17
Gently shake off any excess flour from the coated Gim-mari, then submerge it into the tempura batter, ensuring it’s evenly coated.

Step 18
Heat a generous amount of cooking oil in a pot over medium-high heat. To test the oil temperature, drop a small amount of batter into the oil. If it sizzles and rises to the surface immediately, the oil is ready (around 170-180°C or 340-350°F).

Step 19
Prepare a wire rack or a trivet next to the frying pot. This will be used to drain the excess oil from the fried Gim-mari after cooking.

Step 20
Carefully lower the batter-coated Gim-mari into the hot oil, making sure not to overcrowd the pot. Fry them, turning occasionally, until they are golden brown and crispy, about 3-4 minutes.

Step 21
Once golden brown, remove the Gim-mari from the oil and place them on the prepared wire rack to drain excess oil. This step ensures maximum crispiness.

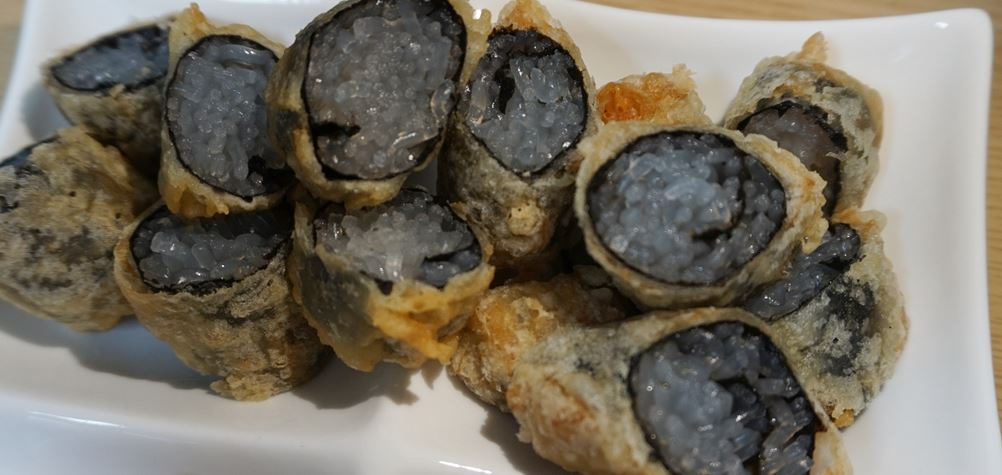
Step 22
After draining, cut the Gim-mari into bite-sized pieces. Enjoy your homemade crispy Gim-mari! They are especially delicious when dipped in tteokbokki sauce.
